
Allocate and apply a license
In the Citrix MPX and VPX ADC GUI, you can use your hardware serial number (HSN) or your license access code to allocate your licenses. Alternatively, if a license is already present on your local computer, you can upload it to the appliance.
For all other functionality, such as returning or reallocating your license, you must use the licensing portal. Optionally, you can still use the licensing portal for license allocation. For more information, seeUse Manage Licenses in My Account on citrix.com.
Citrix Licensing guide
Citrix Licensing guide also covers information about installing licenses in a Citrix ADC appliance and installing licenses in other Citrix products. For more information, seeCitrix Licensing Guide.
Prerequisites
Note:
Purchase separate licenses for each appliance in a high availability pair. Ensure that the same types of licenses are installed on both the appliances. For example, if you purchase a Premium license for one appliance, you must purchase another Premium license for the other appliance.
To use the hardware serial number or license access code to allocate your licenses:
You must be able to access public domains through the appliance. For example, the appliance should be able to access m.giftsix.com. The license allocation software internally accesses the Citrix licensing portal for your license. To access a public domain:
- Use a proxy server or set up a DNS server.
- 反对figure a Citrix ADC IP (NSIP) address or a subnet IP (SNIP) address on your Citrix ADC appliance.
Your license must be linked to your hardware, or you must have a valid license access code. Citrix sends your license access code by email when you purchase a license.
Allocate a license by using the GUI
If your license is already linked to your hardware, the license allocation process can use the hardware serial number. Otherwise, you must type the license access code.
You can partially allocate licenses as required for your deployment. For example, if your license file contains 10 licenses, but your current requirement is for only six licenses, you can allocate six licenses now, and allocate more licenses later. You cannot allocate more than the total number of licenses present in your license file.
To allocate your license
In a web browser, type the IP address of the Citrix ADC appliance (for example,
http://192.168.100.1).In User Name and Password, type the administrator credentials.
On the反对figurationtab, navigate toSystem > Licenses.
In the details pane, clickManage Licenses, clickAdd New License, and then select one of the following options:
Use Serial Number: The software internally fetches the serial number of your appliance and uses this number to display your licenses.
Use license access code: Citrix emails the license access code for the license that you purchased. Enter the license access code in the text box.
If you do not want to configure internet connectivity on the Citrix ADC appliance, you can use a proxy server. Select the反对nect through Proxy Servercheck box and specify the IP address and port of your proxy server.
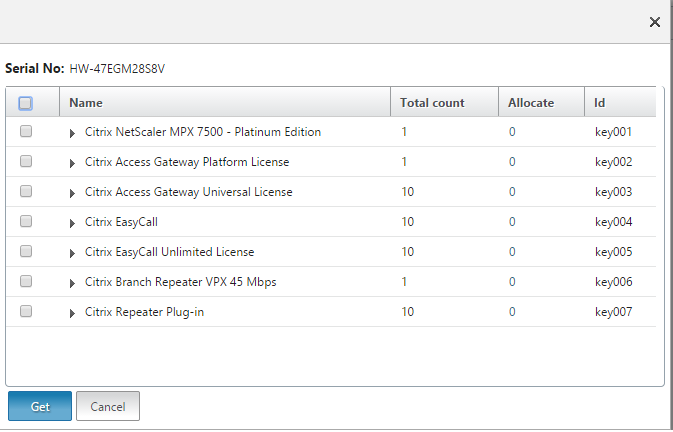
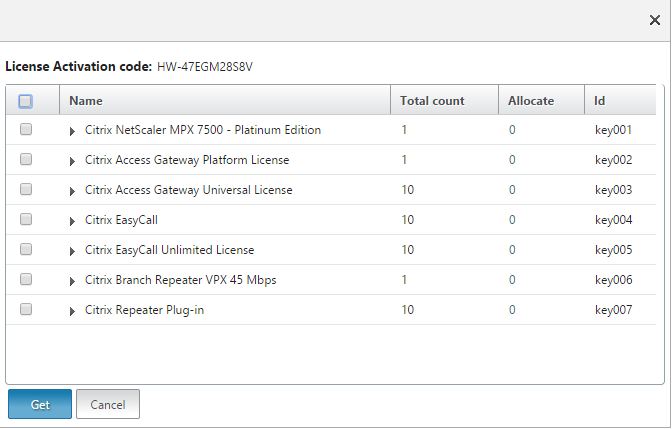
ClickGet Licenses. Depending on the option that you selected, one of the following dialog boxes appears.
The following dialog box appears if you selected Hardware Serial Number.
The following dialog box appears if you selected license access code.
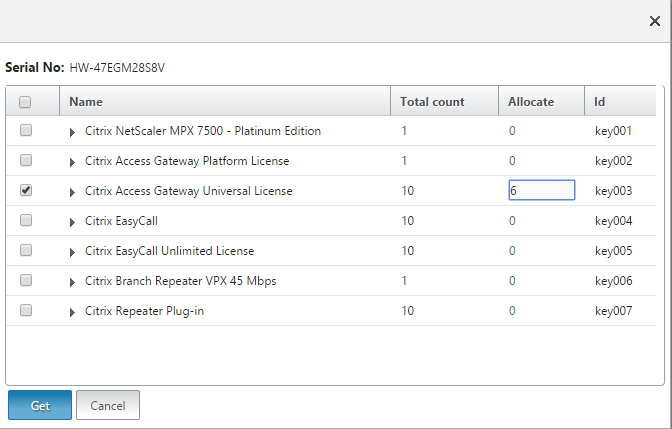
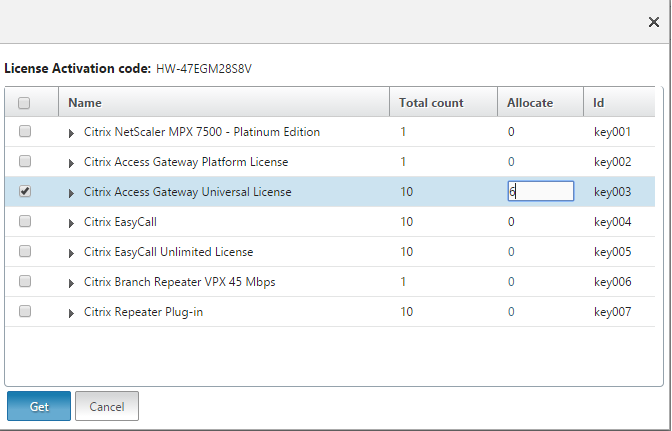
Select the license file that you want to use to allocate your licenses.
In theAllocatecolumn, enter the number of licenses to be allocated. Then clickGet.
If you selectedHardware Serial Number, enter the number of licenses, as shown in the following screenshot.
If you selectedlicense access code, enter the number of licenses, as shown in the following screenshot.
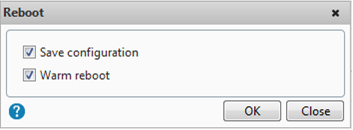
Click restart for the license to take effect.
In the restart dialog box, click好吧to proceed with the changes, or clickCloseto cancel the changes.


Install a license
If you downloaded your license file to your local computer by accessing the licensing portal, you must upload the license to the appliance.
To install a license file by using the GUI
- In a web browser, type the IP address of the Citrix ADC appliance (for example,
http://192.168.100.1). - In User Name and Password, type the administrator credentials.
- On the反对figurationtab, navigate to System Licenses.
- In the details pane, clickManage Licenses.
- ClickAdd New License, then selectUpload license files from a local computer.
- ClickBrowse. Navigate to the location of the license files, select the license file, and then clickOpen.
- Click restart to apply the license.
- In the restart dialog box, click好吧to proceed with the changes, or clickCloseto cancel the changes.
To install the licenses by using the CLI
Open anSSH connectionto the ADC appliance by using an SSH client, such as PuTTY.
Log on to the ADC appliance by using the administrator credentials.
Switch to the shell prompt, create a license subdirectory in the
nsconfigdirectory, if it does not exist, and copy one or more new license files to this directory.Example
login: nsroot Password: nsroot Last login: Mon Aug 4 03:37:27 2008 from 10.102.29.9 Done > shell Last login: Mon Aug 4 03:51:42 from 10.103.25.64 root@ns# mkdir /nsconfig/license root@ns# cd /nsconfig/licenseCopy one or more new license files to this directory.
Note:Citrix ADC设备不提示输入犹太人的尊称oot option when you use the command line interface to install the licenses. Run the reboot -w command to warm restart the system, or run the restart command to restart the system normally.
Verify licensed features
Before using a feature, ensure that your license supports the feature.
To verify the licensed features by using the CLI
Open anSSH connectionto the ADC appliance by using an SSH client, such as PuTTY.
Log on to the ADC appliance by using the administrator credentials.
At the command prompt, enter the sh ns license command to display the features supported by the license.
Example
sh ns license License status: Web Logging: YES Surge Protection: YES ....... HTML Injection: YES Done
To verify the licensed features by using the GUI
- In a web browser, type the IP address of the ADC appliance, such as
http://192.168.100.1. - In User Name and Password, type the administrator credentials.
- Provide the User name and Password and clickLogin.
- In the navigation pane, expandSystem, and then clickLicenses. You see a green check mark next to the licensed features.
Enable or disable a feature
When you use the Citrix ADC appliance for the first time, you must enable a feature before you can use its functionality. If you configure a feature before it is enabled, a warning message appears. The configuration is saved but it applies only after the feature is enabled.
To enable a feature by using the CLI
At the command prompt, type the following commands to enable a feature and verify the configuration:
enable feature
show feature
Example
enable feature lb cs done >show feature Feature Acronym Status ------- ------- ------ 1) Web Logging WL OFF 2) Surge Protection SP ON 3) Load Balancing LB ON 4) Content Switching CS ON 5) Cache Redirection CR ON . . . 24) NetScaler Push push OFF DoneThe example shows how to enable load balancing (lb) and content switching (cs).
If the license key is not available for a particular feature, the following error message appears for that feature:
ERROR: feature(s) not licensed
注意:启用一个可选的特性,你必须有a feature-specific license. For example, you have purchased and installed the Citrix NetScaler Advanced Edition license. However, to enable the Integrated Caching feature, you must purchase and install the AppCache license.
To disable a feature by using the CLI
At the command prompt, type the following commands to disable a feature and verify the configuration:
disable feature
show feature
Example
The following example shows how to disable load balancing (LB).
> disable feature lb Done > show feature Feature Acronym Status ------- ------- ------ 1) Web Logging WL OFF 2) Surge Protection SP ON 3) Load Balancing LB OFF 4) Content Switching CS ON . . . 24) NetScaler Push push OFF Done >
Check license expiry information
You can check Citrix ADC license expiry information through GUI or CLI.
To check Citrix ADC license expiry information through GUI:
Go to系统配置> >许可证.

A GUI alert appears when the ADC license expiry date is less than or equal to 30 days.

To check the license expiry information through CLI:
Type the command “show ns license”.
> sh license License status: Web Logging: YES Surge Protection: YES Web Logging: YES Surge Protection: YES … Days to expiry: 204 Done > After the license expires, the Citrix ADC appliance generates an SNMP alarm “NS_LICENSE_EXPIRY,” and an expiry event is logged to console.
Upon license expiry, the Citrix ADC appliance automatically restarts to revoke the license. If Citrix ADC appliance uses Citrix service provider (CSP) licenses, the appliance does not restart automatically to revoke the license. However, if the user restarts the appliance, it restarts as unlicensed.
Validate license files without rebooting the Citrix ADC appliance
With this feature, you can test licenses and see all the features available in the given license without applying them on the Citrix ADC appliance. This option allows you to test new licenses without rebooting the Citrix ADC appliance.
You can use this feature by both GUI and CLI.
Validate license files by using GUI
- Go toSystem -> Licences.
InADC Test Licensetab, clickManage Test Licenses.

ClickUpload, and upload one or more license files. If multiple license files are uploaded, the union of all license files is calculated.

After the license file upload is complete, again clickADC Test Licenseto display the licensed features of the uploaded license.
Section 1 shows license information and Section 2 shows all features that the license includes.

- Verify the information displayed and clickApplyto use the license. Reboot (warm) the Citrix ADC appliance for the license to take effect. Immediate reboot isn’t mandatory, and current license is applicable until the next reboot.


Validate license files by using CLI
Copy the test license file to the ADC appliance at path:
/nsconfig/testlicense.Example:
scp CNS_15082_SERVER_PLT_Retail.lic nsroot@:/nsconfig/testlicense/ 验证是否许可文件复制到correct location.
Example:
ls /nsconfig/testlicense/ CNS_15082_SERVER_PLT_Retail.licRun the
show ns testlicensecommand to see the license information.> sh ns testlicense License status: Web Logging: YES Surge Protection: YES Load Balancing: YES Content Switching: YES Cache Redirection: YES Compression Control: YES Delta Compression: NO SSL Offloading: YES Global Server Load Balancing: YES ..... API Gateway: YES Model Number ID: 15082 License Type: Platinum License Licensing mode: Local Days to expiration: 54Verify the information displayed, and run the
apply ns testlicensecommand to apply the license. Reboot (warm) the Citrix ADC appliance for the license to take effect.> apply ns testlicense Warning: The configuration changes will not take effect until the system is rebooted Done > reboot -w Are you sure you want to restart NetScaler (Y/N)? [N]:Y Done
Upgrade a license
You can upgrade a Citrix ADC appliance from one family edition to another and from one capacity range to another by purchasing a higher capacity license.
Upgrades are of two types:
Edition upgrades: Standard to Advanced, Standard to Premium, and Advanced to Premium. Edition upgrades must be within the same bandwidth.
低容量升级:你可以升级为higher capacity, for both vCPU and bandwidth. Capacity upgrades can only be performed on the same Edition (Standard, Advanced, or Premium).
If you want to upgrade both capacity and edition, first upgrade capacity, restart the appliance, and then upgrade the edition.
Example: To upgrade a VPX 10 Mbps Standard Edition license to the VPX 200 Mbps Premium Edition, the upgrade must be done in two steps.
- VPX upgrade from 10 Mbps Standard Edition to 200 Mbps Standard Edition.
- VPX upgrade from 200 Mbps Standard Edition to 200 Mbps Premium Edition.
Note
You can use Citrix Application Delivery Management (ADM) to create a licensing framework that comprises a common bandwidth and instance pool. For complete information, seeCitrix ADC pooled capacity.