
安装一个Citrix ADC VPX instance on Azure VMware Solution
Azure VMware Solution (AVS) provides you with private clouds that contain vSphere clusters, built from dedicated bare-metal Azure infrastructure. The minimum initial deployment is three hosts, but additional hosts can be added one at a time, up to a maximum of 16 hosts per cluster. All provisioned private clouds have vCenter Server, vSAN, vSphere, and NSX-T.
The VMware Cloud (VMC) on Azure enables you to create cloud software-defined data centers (SDDC) on Azure with the number of ESX hosts that you want. The VMC on Azure supports Citrix ADC VPX deployments. VMC provides a user interface same as on-prem vCenter. It functions similar to the ESX-based Citrix ADC VPX deployments.
The following diagram shows the Azure VMware solution on the Azure public cloud that an administrator or a client can access over the internet. An administrator can create, manage, and configure workload or server VMs using Azure VMware solution. The admin can access the AVS’s web-based vCenter and NSX-T Manager from a Windows Jumpbox. You can create the Citrix ADC VPX instances (standalone or high availability pair) and server VMs within Azure VMware Solution using vCenter, and manage the corresponding networking using NSX-T manager. The Citrix ADC VPX instance on AVS works similar to the on-prem VMware cluster of hosts. AVS is managed from a Windows Jumpbox that is created in the same virtual network.
A client can only access the AVS service by connecting to the VIP of ADC. Another Citrix ADC VPX instance outside Azure VMware Solution but in the same Azure virtual network helps add the VIP of the Citrix ADC VPX instance within Azure VMware Solution as a service. As per requirement, you can configure the Citrix ADC VPX instance to provide service over the internet.

Prerequisites
Before you begin installing a virtual appliance, do the following:
- For more information on Azure VMware solution and its prerequisites, seeAzure VMware Solution documentation.
- For more information on deploying Azure VMware solution, seeDeploy an Azure VMware Solution private cloud.
- For more information on creating a Windows Jump box VM to access and manage Azure VMware Solution, seeAccess an Azure VMware Solution private cloud
- In Windows Jump box VM, download the Citrix ADC VPX appliance setup files.
- Create appropriate NSX-T network segments on VMware SDDC to which the virtual machines connect. For more information, see添加a network segment in Azure VMware Solution
- Obtain VPX license files.
- Virtual machines (VMs) created or migrated to the Azure VMware Solution private cloud must be attached to a network segment.
VMware cloud hardware requirements
The following table lists the virtual computing resources that the VMware SDDC must provide for each VPX nCore virtual appliance.
Table 1. Minimum virtual computing resources required for running a Citrix ADC VPX instance
| Component | Requirement |
|---|---|
| Memory | 2 GB |
| Virtual CPU (vCPU) | 2 |
| Virtual network interfaces | In VMware SDDC, you can install a maximum of 10 virtual network interfaces if the VPX hardware is upgraded to version 7 or higher. |
| Disk space | 20 GB |
Note
This is in addition to any disk requirements for the hypervisor.
For production use of the VPX virtual appliance, the full memory allocation must be reserved.
OVF Tool 1.0 system requirements
OVF Tool is a client application that can run on Windows and Linux systems. The following table describes the system requirements for installing OVF tool.
Table 2. System requirements for OVF tool installation
| Component | Requirement |
|---|---|
| Operating system | For detailed requirements from VMware, search for the “OVF Tool User Guide” PDF file athttp://kb.vmware.com/. |
| CPU | 750 MHz minimum, 1 GHz or faster recommended |
| RAM | 1 GB Minimum, 2 GB recommended |
| NIC | 100 Mbps or faster NIC |
informa的tion about installing OVF, search for the “OVF Tool User Guide” PDF file athttp://kb.vmware.com/.
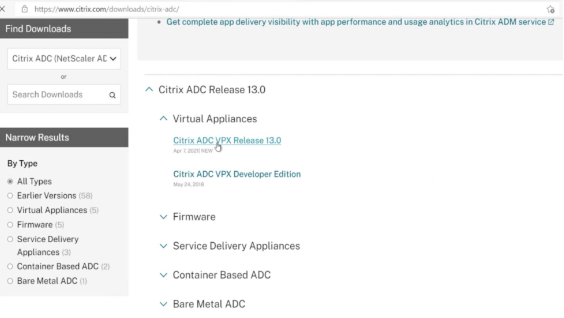
Downloading the Citrix ADC VPX setup files
The Citrix ADC VPX instance setup package for VMware ESX follows the Open Virtual Machine (OVF) format standard. You can download the files from the Citrix website. You need a Citrix account to log on. If you do not have a Citrix account, access the home page at//m.giftsix.com.Click theNew Users link, and follow the instructions to create a new Citrix account.
Once logged on, navigate the following path from the Citrix home page:
Citrix.com >Downloads > Citrix ADC > Virtual Appliances.
Copy the following files to a workstation on the same network as the ESX server. Copy all three files into the same folder.
- NSVPX-ESX-
- -disk1.vmdk (for example, NSVPX-ESX-13.0-79.64-disk1.vmdk) - NSVPX-ESX-
- .ovf (for example, NSVPX-ESX-13.0-79.64.ovf) - NSVPX-ESX-
- .mf (for example, NSVPX-ESX-13.0-79.64.mf)
Deploy Azure VMware solution
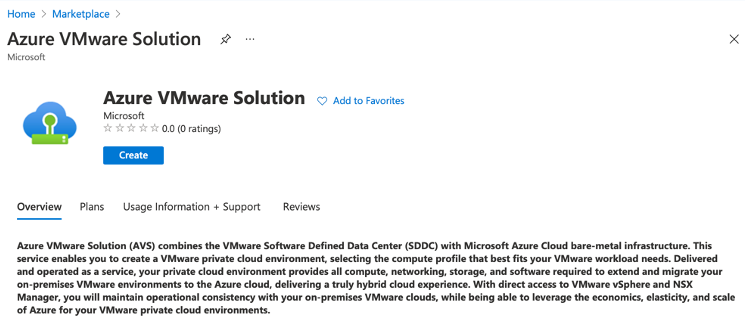
- Log in to yourMicrosoft Azure portal, and navigate toAzure Marketplace.
From theAzure Marketplace, searchAzure VMware Solutionand clickCreate.
In theCreate a private cloudpage, enter the following details:
- Select a minimum of 3 ESXi hosts to create the default cluster of your private cloud.
- For the添加ress blockfield, use/22address space.
- For theVirtual Network, make sure that the CIDR range doesn’t overlap with any of your on-premises or other Azure subnets (virtual networks) or with the gateway subnet.
- Gateway subnet is used to express route the connection with private cloud.

- ClickReview + Create.
Review the settings. If you must change any settings, clickPrevious.
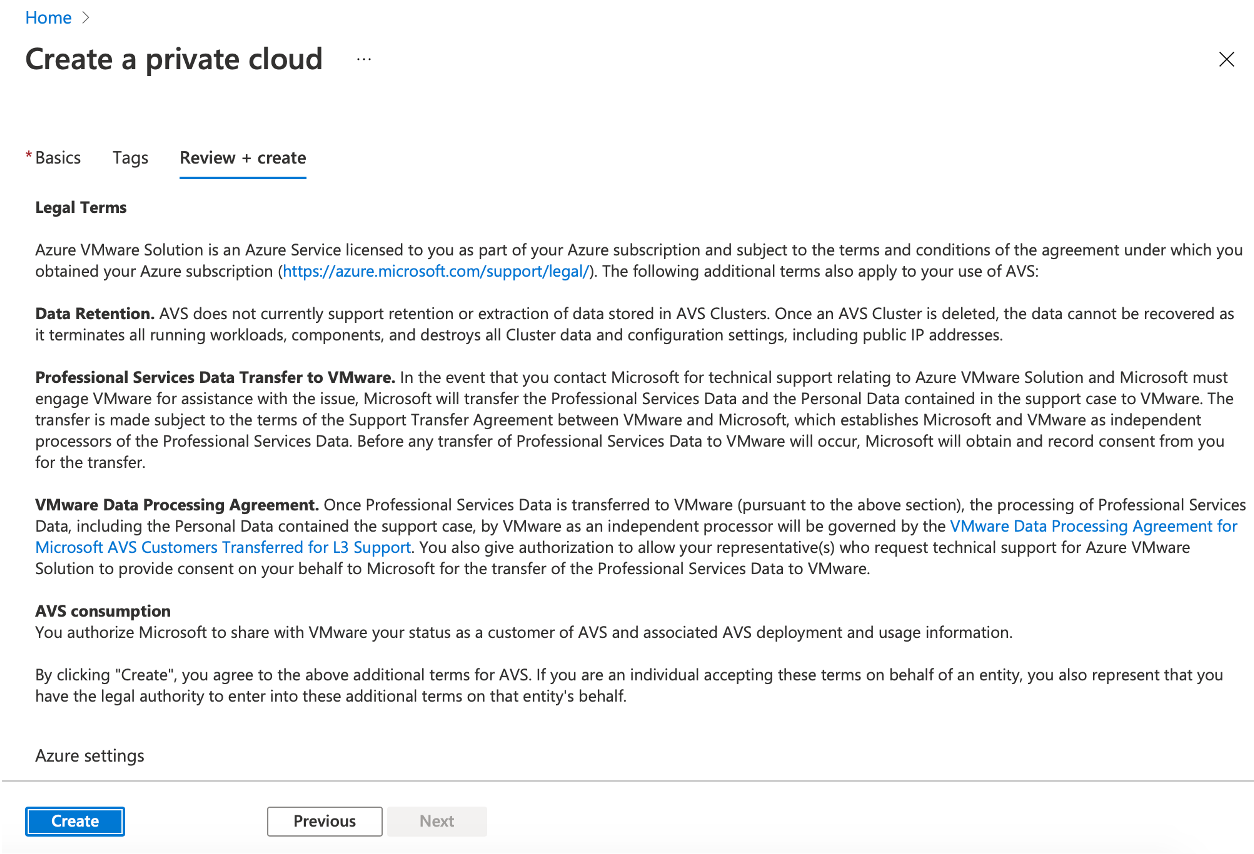
ClickCreate.Private cloud provisioning process starts. It can take up to two hours for the private cloud to be provisioned.

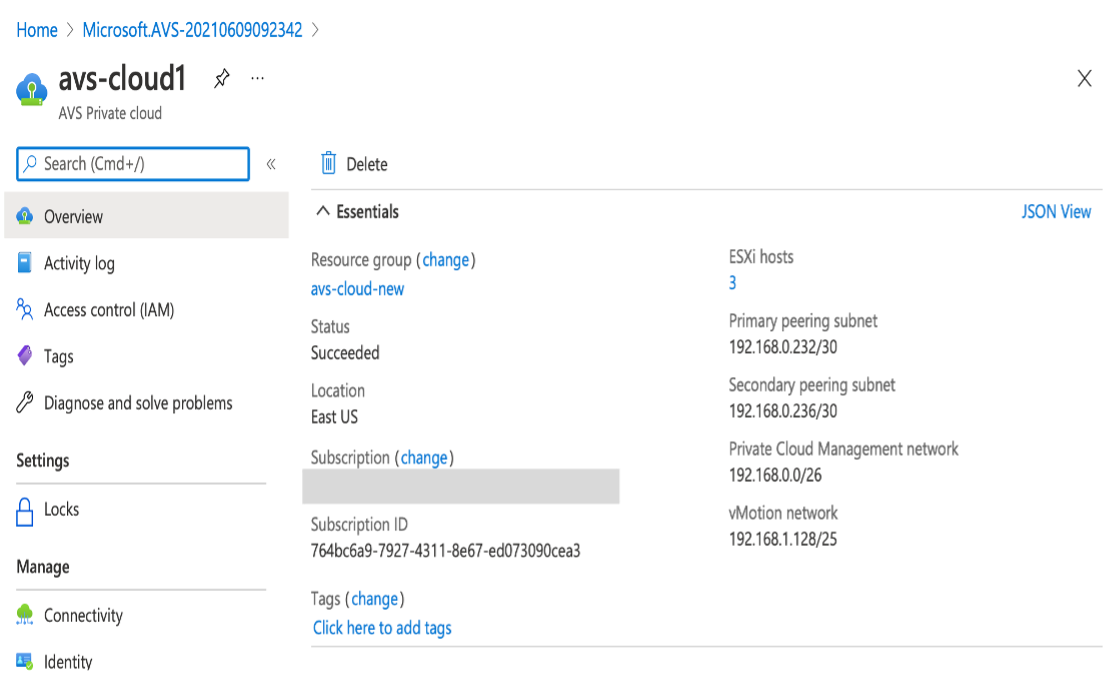
ClickGo to resource验证创建私有云。


Note
To access this resource, you need a VM in Windows that acts as a Jump box.
Connect to an Azure virtual machine running Windows
This procedure shows you how to use the Azure portal to deploy a virtual machine (VM) in Azure that runs Windows Server 2019. To see your VM in action, you then RDP to the VM and install the IIS web server.
To access the private cloud that you have created, you need to create a Windows Jump box within the same virtual network.
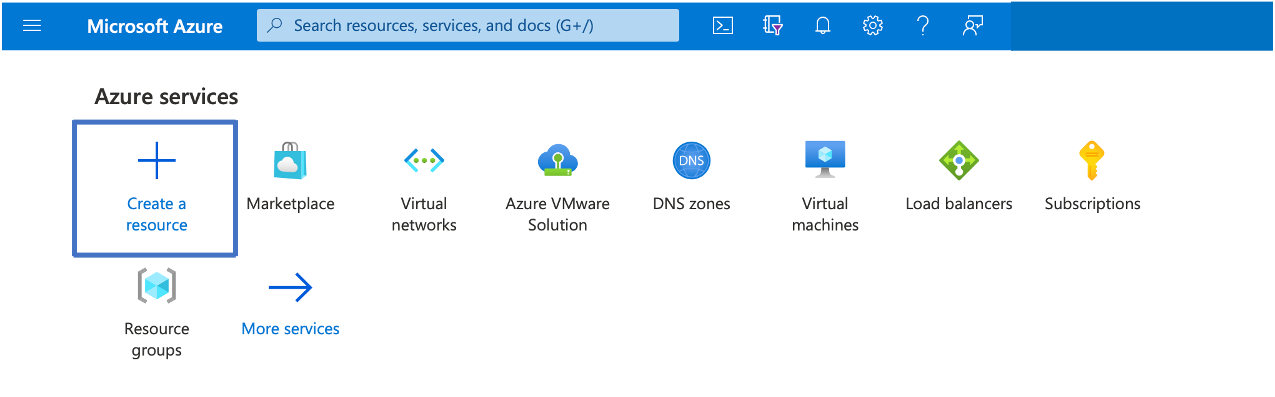
Go to theAzure portal, and clickCreate a Resource.
Search forMicrosoft Windows 10, and clickCreate.
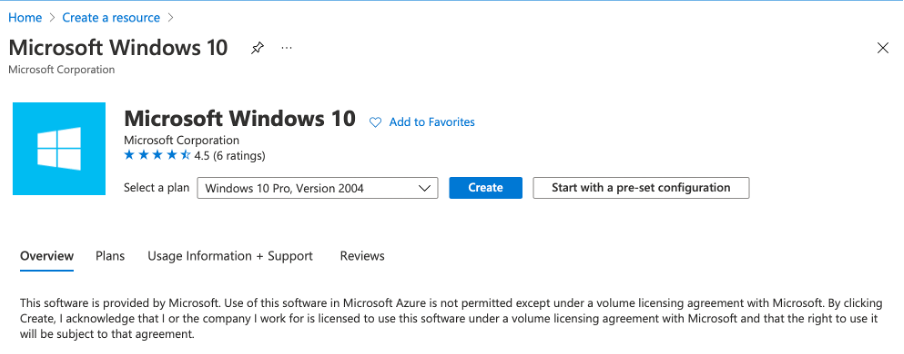
Create a virtual machine (VM) that runs Windows Server 2019. TheCreate a virtual machinepage appears. Enter all the details inBasicstab, and select theLicensingcheck box. Leave the remaining defaults and then select theReview + createbutton at the bottom of the page.
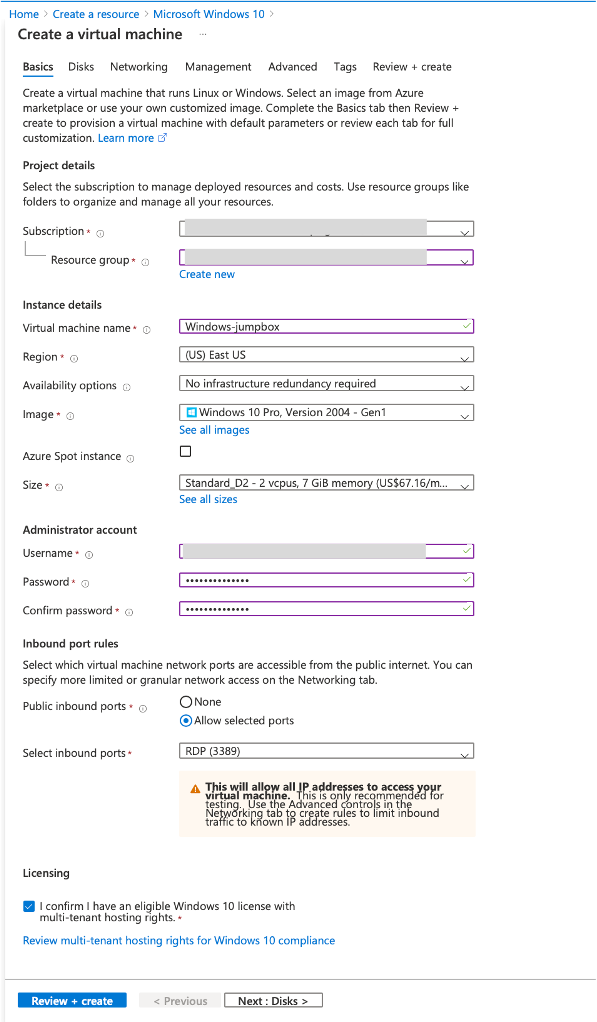
- After validation runs, select theCreatebutton at the bottom of the page.
- After the deployment is complete, selectGo to resource.
Go to the Windows VM that you have created. Use the public IP address of the Windows VM and connect using RDP.
Use theConnectbutton in the Azure portal to start a Remote Desktop (RDP) session from a Windows desktop. First you connect to the virtual machine, and then you sign on.
To connect to a Windows VM from a Mac, you must install an RDP client for Mac such as Microsoft Remote Desktop. For more information, seeHow to connect and sign on to an Azure virtual machine running Windows.


Access your Private Cloud vCenter portal
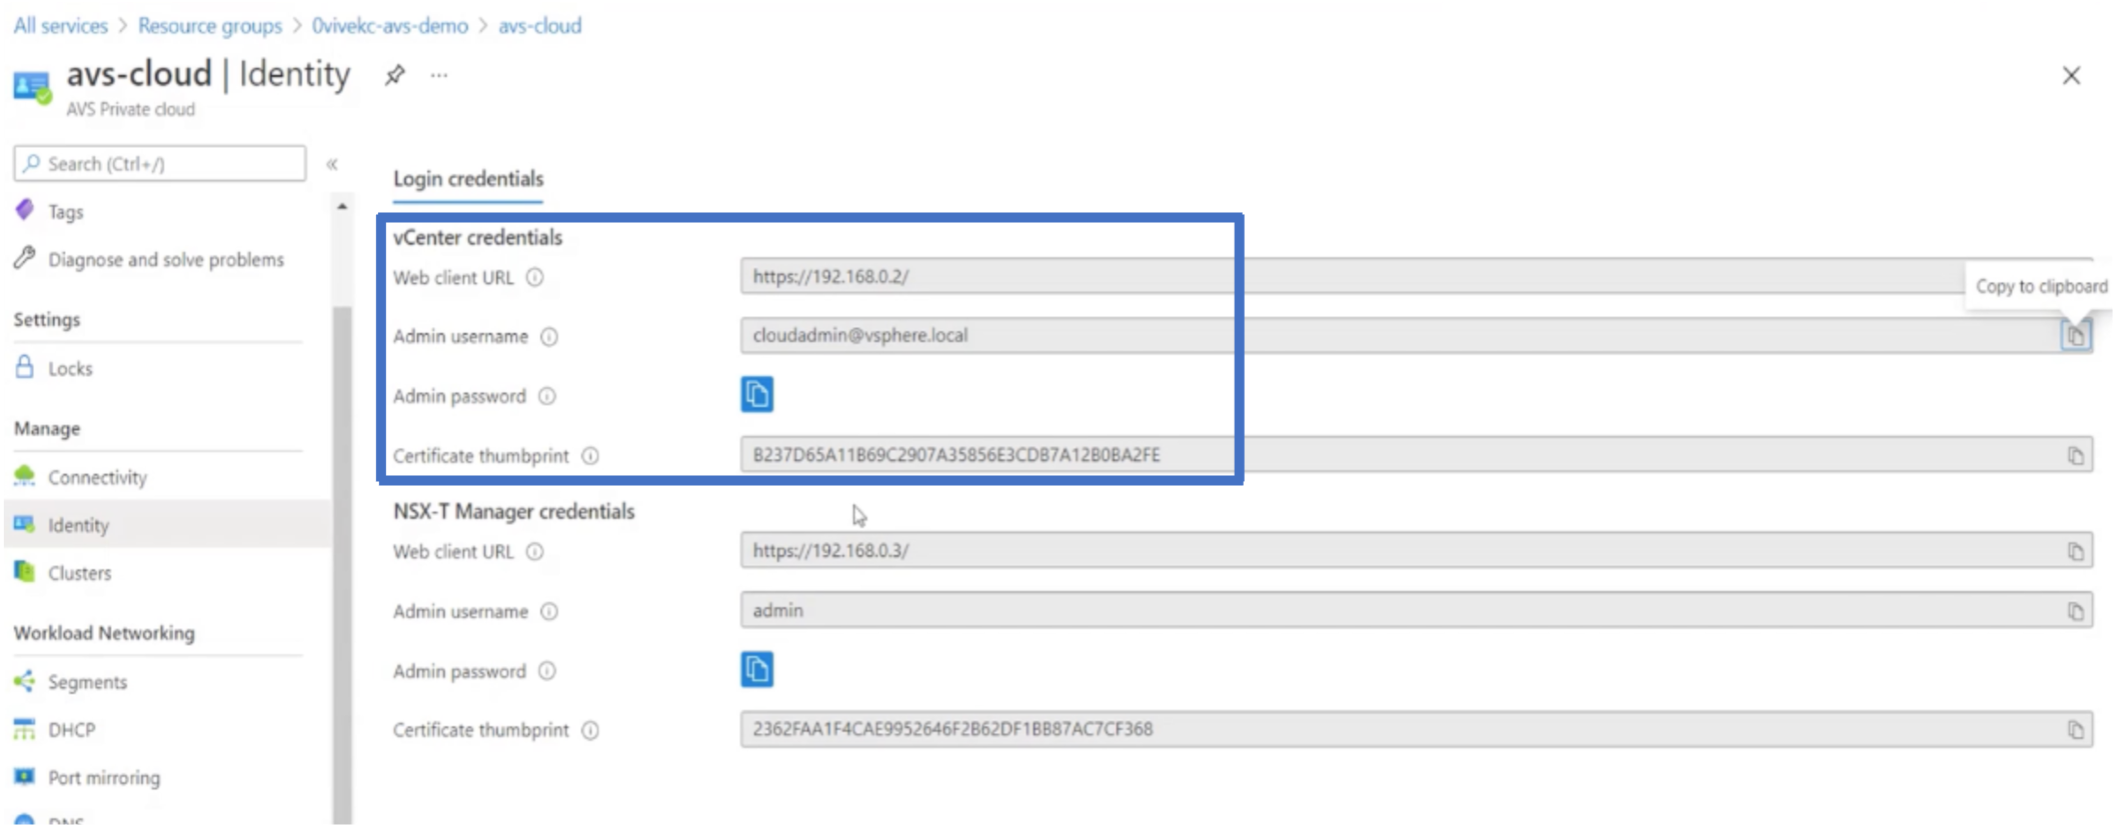
In your Azure VMware Solution private cloud, under管理, selectIdentity.Make note of the vCenter credentials.
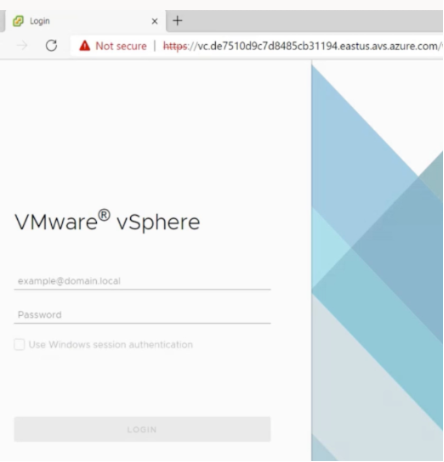
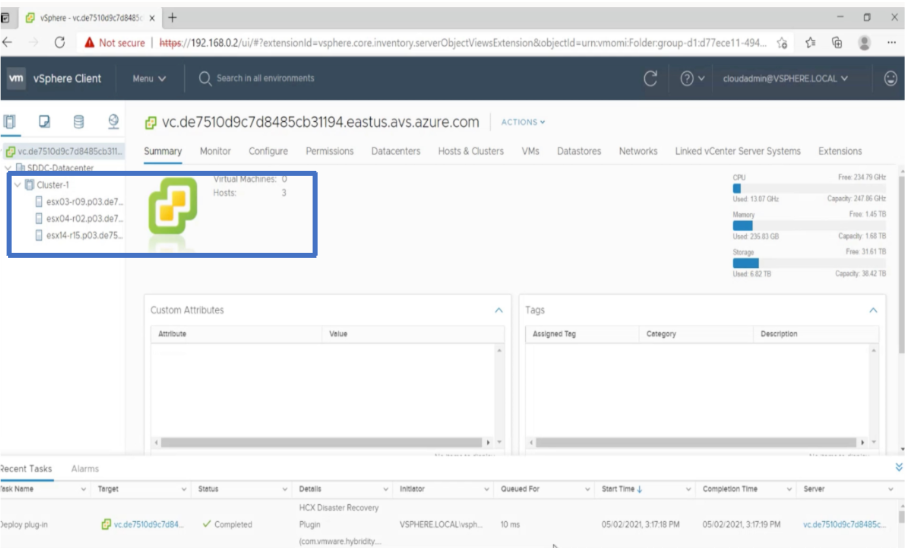
Launch the vSphere client by typing the vCenter web client URL.
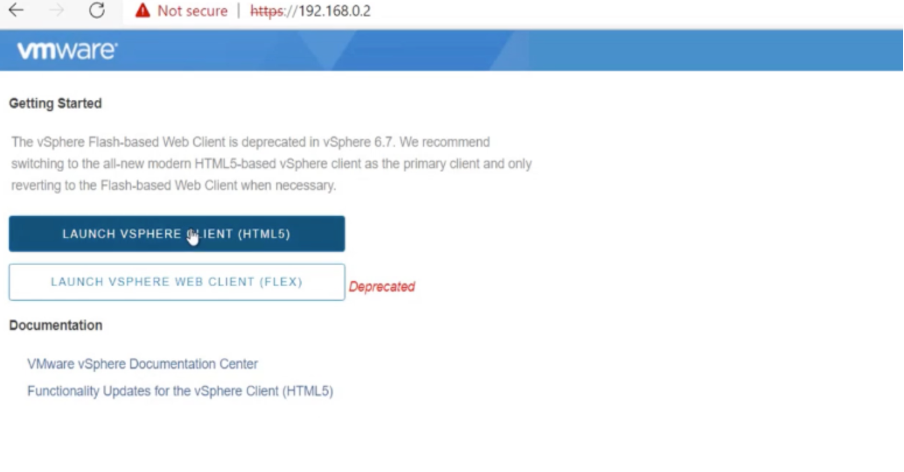
Log in to VMware vSphere using the vCenter credentials of your Azure VMware Solution private cloud.
In the vSphere client, you can verify the ESXi hosts that you created in Azure portal.


For more information, seeAccess your Private Cloud vCenter portal.
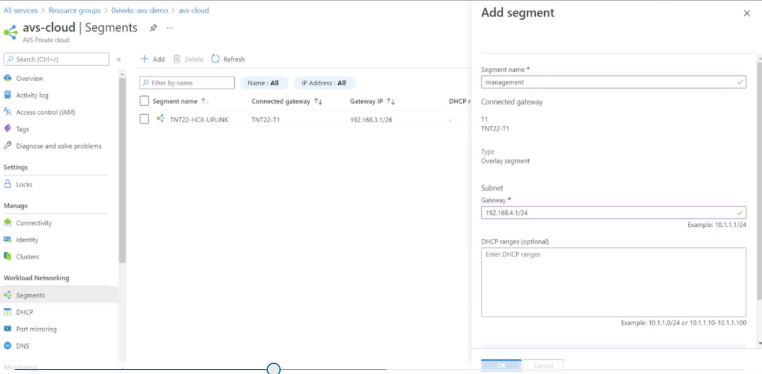
Create an NSX-T segment in the Azure portal
You can create and configure an NSX-T segment from the Azure VMware Solution console in the Azure portal. These segments are connected to the default Tier-1 gateway, and the workloads on these segments get East-West and North-South connectivity. Once you create the segment, it displays in NSX-T Manager and vCenter.
In your Azure VMware Solution private cloud, underWorkload Networking, selectSegments > Add.提供新的逻辑部分的详细信息and selectOK.You can create three separate segments for Client, Management, and Server interfaces.
In your Azure VMware Solution private cloud, under管理, selectIdentity.Make note of the NSX-T Manager credentials.
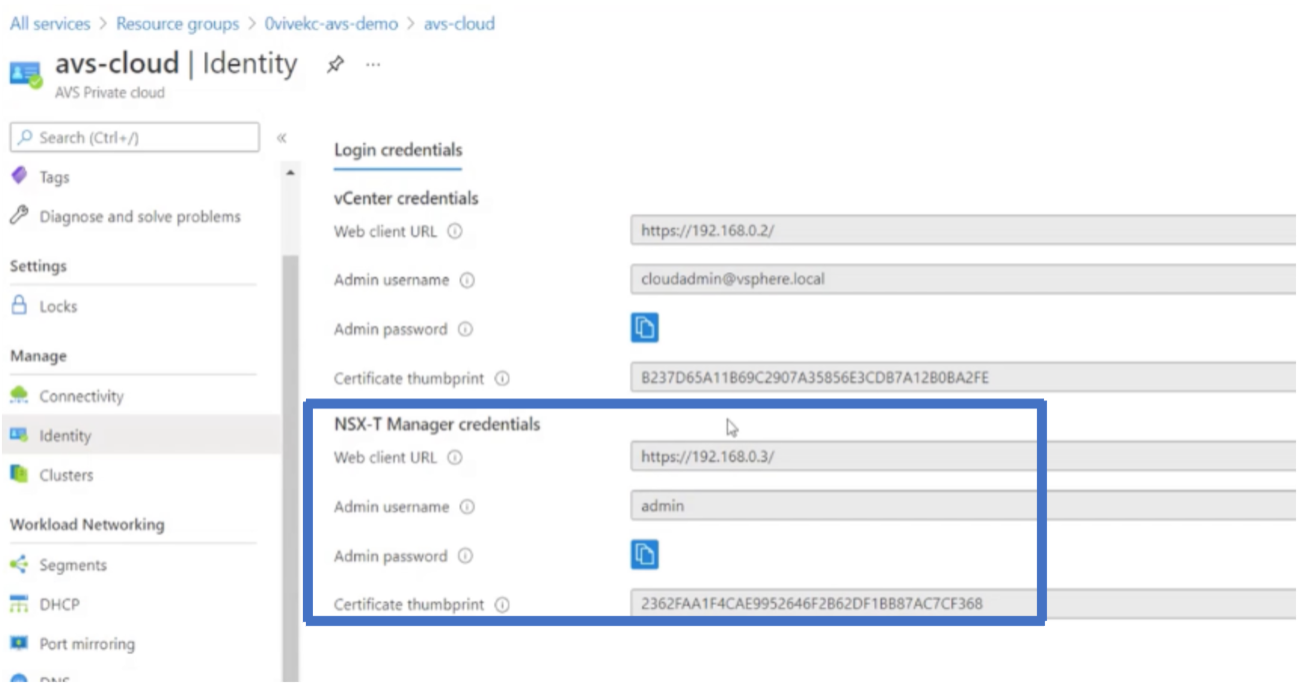
Launch the VMware NSX-T Manager by typing the NSX-T web client URL.
In the NSX-T manager, underNetworking > Segments, you can see all the segments that you have created. You can also verify the subnets.
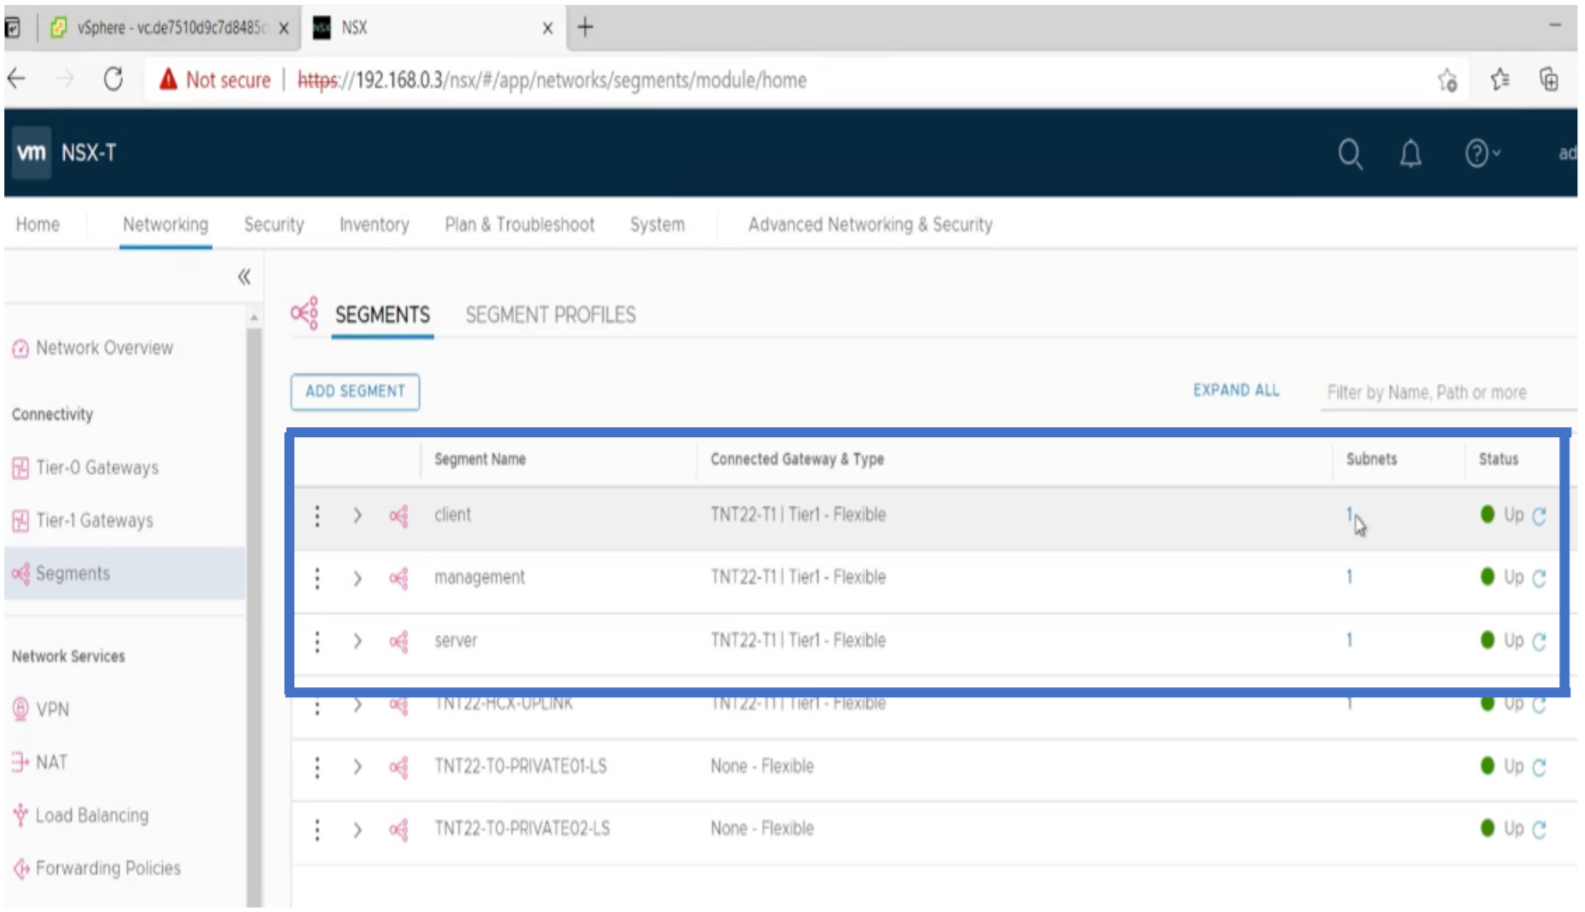


For more information, seeCreate an NSX-T segment in the Azure portal.
安装一个Citrix ADC VPX instance on VMware cloud
After you have installed and configured VMware Software-Defined Data Center (SDDC), you can use the SDDC to install virtual appliances on the VMware cloud. The number of virtual appliances that you can install depends on the amount of memory available on the SDDC.
To install Citrix ADC VPX instances on VMware cloud, perform these steps in Windows Jumpbox VM:
Download the Citrix ADC VPX instance setup files for ESXi host from the Citrix Downloads site.
- Open VMware SDDC in the Windows Jumpbox.
- In theUser NameandPasswordfields, type the administrator credentials, and then clickLogin.
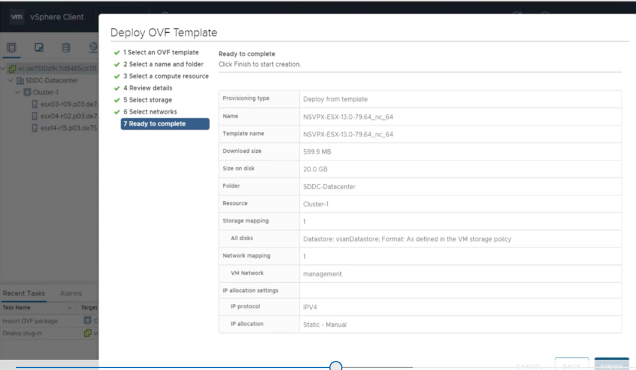
- On theFilemenu, clickDeploy OVF Template.
In theDeploy OVF Templatedialog box, inDeploy from filefield, browse to the location at which you saved the Citrix ADC VPX instance setup files, select the .ovf file, and clickNext.
NOTE
By default, the Citrix ADC VPX instance uses E1000 network interfaces. To deploy ADC with the VMXNET3 interface, modify the OVF to use VMXNET3 interface instead of E1000. Availability of VMXNET3 interface is limited by Azure infrastructure and might not be available in Azure VMware Solution.
Map the networks shown in the virtual appliance OVF template to the networks that you configured on the VMware SDDC. ClickOK.
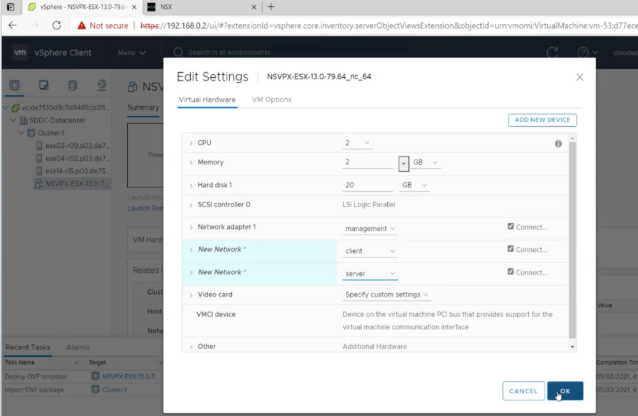
ClickFinishto start installing a virtual appliance on VMware SDDC.
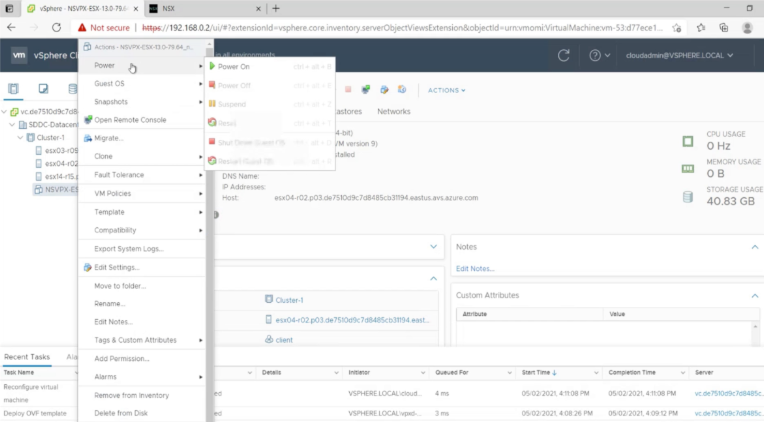
You are now ready to start the Citrix ADC VPX instance. In the navigation pane, select the Citrix ADC VPX instance that you have installed and, from the right-click menu, selectPower On.Click theConsoletab to emulate a console port.
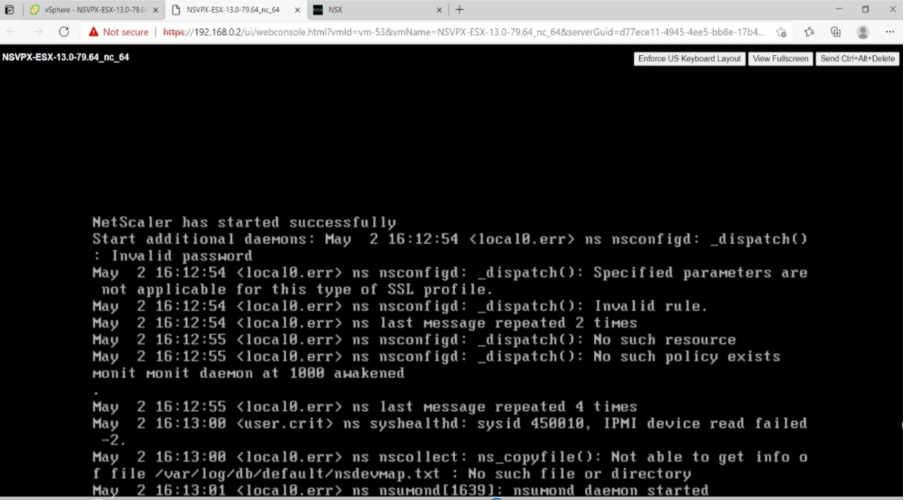
You are now connected to the Citrix ADC VM from the vSphere client.
To access the Citrix ADC appliance by using the SSH keys, type the following command in the CLI:
ssh nsroot@Example:
ssh nsroot@192.168.4.5You can verify the ADC configuration by using the
show ns ipcommand.


In this article
- Prerequisites
- VMware cloud hardware requirements
- OVF Tool 1.0 system requirements
- Downloading the Citrix ADC VPX setup files
- Deploy Azure VMware solution
- Connect to an Azure virtual machine running Windows
- Access your Private Cloud vCenter portal
- Create an NSX-T segment in the Azure portal
- 安装一个Citrix ADC VPX instance on VMware cloud