
User accounts, roles, and enrollment
You configure user accounts, roles, and enrollment in the XenMobile console on theManage选项卡,Settingspage. Unless otherwise indicated, the steps for the following tasks are provided in this article.
- User accounts and groups:
- FromManage > Users, add user accounts manually or use a .csv provisioning file to import the accounts and to manage local groups.
- FromSettings > Workflows, use workflows to manage the creation and removal of user accounts.
- Roles for user accounts and groups
- FromSettings > Role-Based Access Control, assign predefined roles, or sets of permissions, to users and groups. These permissions control the level of access users have to system functions. For more information, seeConfigure roles with RBAC.
- FromSettings > Notification Templates, to create or update the notification templates to use in automated actions, enrollment, and standard notification messages sent to users. You configure the notification templates to send messages over three different channels: Secure Hub, SMTP, or SMS. For more information, see:Create and update notification templates.
- Enrollment security mode and invitations
- FromSettings > Enrollment, configure up to seven enrollment security modes and send enrollment invitations. Each enrollment security mode has its own level of security and steps that users must take to enroll their devices.
- Enable AutoDiscovery in XenMobile for user enrollment
To add, edit, unlock, or delete local user accounts
You can add local user accounts to XenMobile manually or you can use a provisioning file to import the accounts. For the steps to import user accounts from a provisioning file, see即时通讯port user accounts.
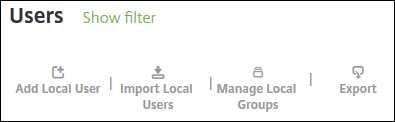
In the XenMobile console, clickManage > Users. TheUserspage appears.
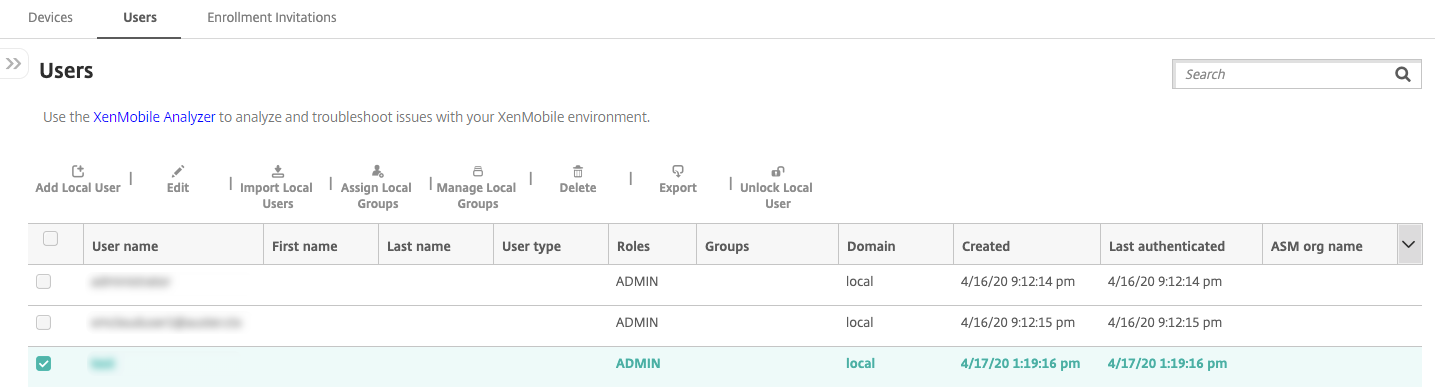
ClickShow filterto filter the list.

To add a local user account
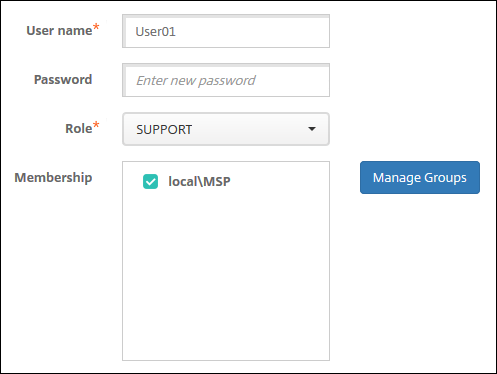
On theUserspage, clickAdd Local User. TheAdd Local Userpage appears.
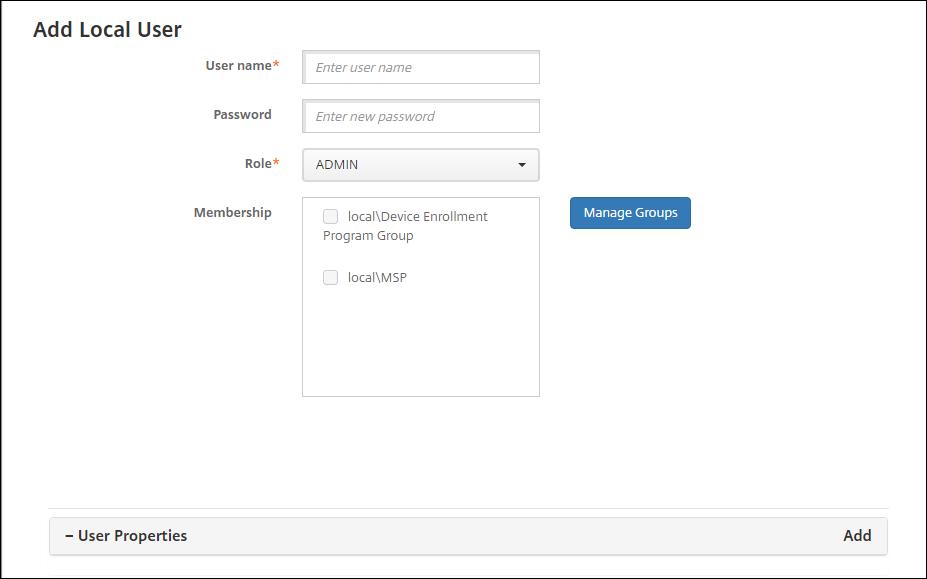
Configure these settings:
- User name:Type the name, a required field. You can include spaces in names, as well as upper and lowercase letters.
- 密码:Type an optional user password. The password must be at least 14 characters long and meet all of the following criteria:
- Include at least two numbers
- Include at least one uppercase and one lowercase letter
- Include at least one special character
- Don’t include dictionary words or restricted words, such as your Citrix user name or email address
- Don’t include more than three sequential and repeating characters or keyboard patterns, such as 1111, 1234, or asdf
- Role:In the list, click the user role. For more information about roles, seeConfigure Roles with RBAC. Possible options are:
- ADMIN
- DEVICE_PROVISIONING
- SUPPORT
- USER
- 会员:In the list, click the group or groups to which to add the user.
- User Properties:Add optional user properties. For each user property you want to add, clickAddand do the following:
- User Properties:In the list, click a property and then type the user property attribute in the field next to the property.
- ClickDoneto save the user property or clickCancel.
To delete an existing user property, hover over the line containing the property and then click the X on the right side. The property is deleted immediately.
To edit an existing user property, click the property and make changes. ClickDoneto save the changed listing orCancelto leave the listing unchanged.
ClickSave.

To edit a local user account
On theUserspage, in the list of users, click to select a user and then clickEdit. TheEdit Local Userpage appears.
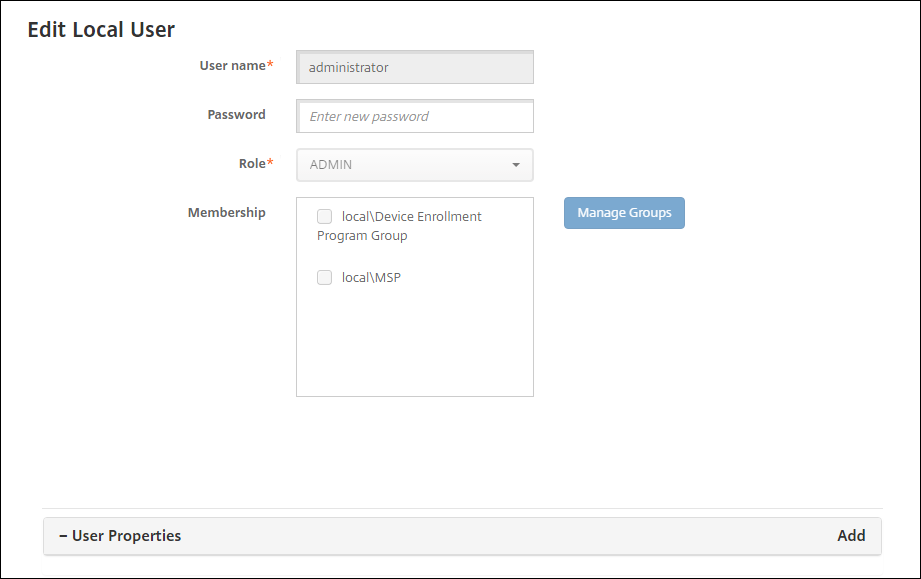
Change the following information as appropriate:
- User name:You cannot change the user name.
- 密码:Change or add a user password.
- Role:In the list, click the user role.
- 会员:In the list, click the group or groups to which to add or edit the user account. To remove the user account from a group, clear the check box next to the group name.
- User properties:Do one of the following:
- For each user property you want to change, click the property and make changes. ClickDoneto save the changed listing orCancelto leave the listing unchanged.
- For each user property you want to add, clickAddand do the following:
- User Properties:In the list, click a property and then type the user property attribute in the field next to the property.
- ClickDoneto save the user property or clickCancel.
- For each existing user property you want to delete, hover over the line containing the property and then click theXon the right side. The property is deleted immediately.
ClickSaveto save your changes or clickCancelto leave the user unchanged.

To unlock a local user account
On theUserspage, in the list of user accounts, click to select a user account.
ClickUnlock Local User. A confirmation dialog box appears.
ClickUnlockto unlock the user account or clickCancelto leave the user unchanged.
To delete a local user account
- On theUserspage, in the list of user accounts, click to select a user account.
You can select more than one user account to delete by selecting the check box next to each user account.
Click删除. A confirmation dialog box appears.
Click删除to delete the user account or clickCancel.
To delete Active Directory users
To delete one or more Active Directory users at a time, select the users and click删除.
If a user that you delete has enrolled devices and you want to re-enroll those devices, delete the devices before re-enrolling them. To delete a device, go toManage > Devices, select the device, and then click删除.
即时通讯port user accounts
You can import local user accounts and properties from a .csv file called a provisioning file, which you can create manually. For more information about formatting provisioning files, seeProvisioning file formats.
Note:
- For local users, use the domain name along with the user name in the import file. For example, specify username@domain. If the local user that you create or import is for a managed domain in XenMobile, the user cannot enroll by using the corresponding LDAP credentials.
- If importing user accounts to the XenMobile internal user directory, disable the default domain to speed up the import process. Keep in mind that disabling the domain affects enrollments, so reenable the default domain after the import of internal users completes.
- Local users can be in User Principal Name (UPN) format. However, Citrix recommends that you do not use the managed domain. For example, if example.com is managed, do not create a local user with this UPN format: user@example.com.
After you prepare a provisioning file, follow these steps to import the file to XenMobile.
In the XenMobile console, clickManage > Users. TheUserspage appears.
Click即时通讯port Local Users. The即时通讯port Provisioning Filedialog box appears.
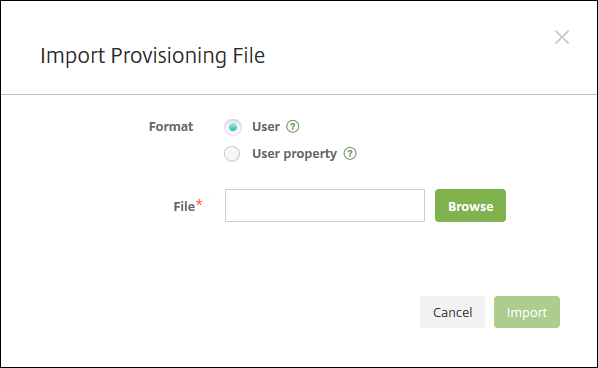
Select eitherUserorPropertyfor the format of the provisioning file you are importing.
Select the provisioning file to use by clickingBrowseand then navigating to the file location.
Click即时通讯port.

Provisioning file formats
You can manually create a provisioning file to import user accounts and properties to XenMobile. The valid formats are as follows:
- User provisioning file fields:
user;password;role;group1;group2 - User attribute provisioning file fields:
user;propertyName1;propertyValue1;propertyName2;propertyValue2
Note:
- Separate the fields within the provisioning file with a semi-colon (;). If part of a field contains a semi-colon, escape it with a backslash character (\). For example, type the property
propertyV;test;1;2aspropertyV\\;test\\;1\\;2in the provisioning file.- Valid values forRoleare the predefined roles USER, ADMIN, SUPPORT, and DEVICE_PROVISIONING, plus any other roles that you defined.
- 利用这段时间查racter (.) as a separator to create group hierarchy. Don’t use a period in group names.
- Use lowercase for property attributes in attribute provisioning files. The database is case sensitive.
Example of user provisioning content
The entryuser01;pwd\\;o1;USER;myGroup.users01;myGroup.users02;myGroup.users.users01means:
- User:
user01 - 密码:
pwd;01 - Role:
USER - Groups:
myGroup.users01myGroup.users02myGroup.users.users.users01
As another example,AUser0;1.password;USER;ActiveDirectory.test.netmeans:
- User:
AUser0 - 密码:
1.password - Role:
USER - Group:
ActiveDirectory.test.net
Example of user attribute provisioning content
The entryuser01;propertyN;propertyV\;test\;1\;2;prop 2;prop2 valuemeans:
- User:
user01 - Property 1
- name:
propertyN - value:
propertyV;test;1;2
- name:
- 性质2:
- name:
prop 2 - value:
prop2 value
- name:
Configure enrollment security modes
You configure a device enrollment security mode to specify a security level and notification template for device enrollment in XenMobile.
XenMobile offers seven enrollment security modes, each with its own level of security and steps users must take to enroll their devices. You configure enrollment security modes in the XenMobile Server console from theSettings > Enrollmentpage.
You can make some modes available on the Self-Help Portal. From the portal, users generate enrollment links that allow them to enroll their devices. iOS, iPadOS, macOS, Android Enterprise, and legacy Android users can choose to send themselves an enrollment invitation from the portal. Enrollment invitations aren’t available for Windows devices.
You send enrollment invitations from theManage > Enrollment Invitationspage. For information, seeSend an enrollment invitation.
Note:
If you plan to use custom notification templates, you must set up the templates before you configure enrollment security modes. For more information about notification templates, seeCreating or Updating Notification Templates.
On the XenMobile console, click the gear icon in the upper-right corner of the console. TheSettingspage appears.
ClickEnrollment. TheEnrollmentpage appears, containing a table of all available enrollment security modes. By default, all enrollment security modes are enabled.
Select any enrollment security mode in the list to edit it. Then, set the mode as the default, disable the mode, or allow users access through the Self-Help Portal.
Note:
When you select the check box next to an enrollment security mode, the options menu appears above the enrollment security mode list. When you click anywhere else in the list, the options menu appears on the right side of the listing.
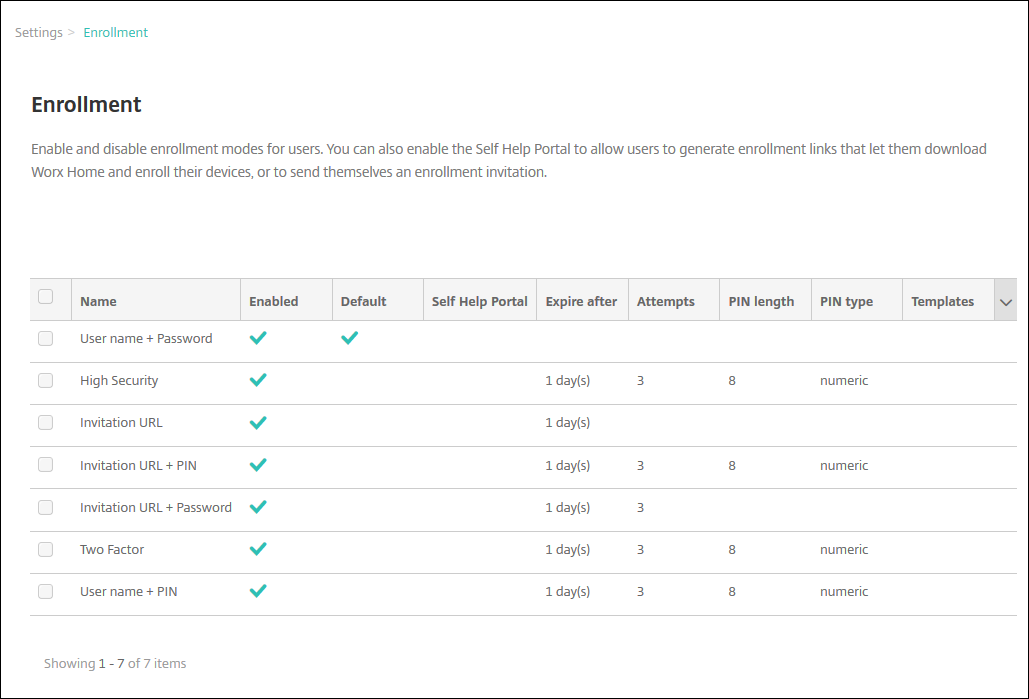
Choose from these enrollment security modes:
- User name + Password
- High Security
- Invitation URL
- Invitation URL + PIN
- Invitation URL + Password
- 两因素身份验证
- User name + PIN
You can use enrollment invitations to restrict enrollment to users with an invitation only. To send enrollment invitations, you can only useInvitation URL,Invitation URL + PIN, orInvitation URL + Passwordenrollment security modes. For devices enrolling withUser name + Password,Two-factor authentication, orUser name + PIN, users must manually enter their credentials in Secure Hub.
You can use one-time PIN (OTP) enrollment invitations as a two-factor authentication solution. OTP enrollment invitations control the number of devices a user can enroll. OTP invitations aren’t available for Windows devices.

To edit an enrollment security mode
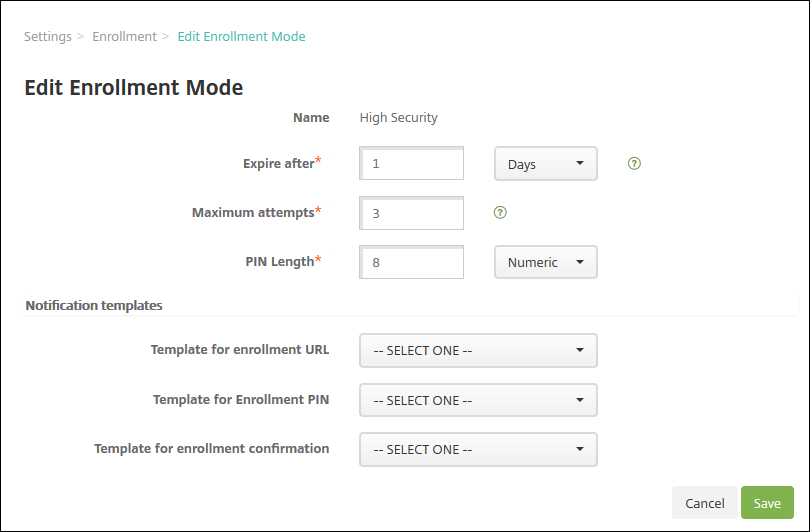
In theEnrollmentlist, select an enrollment security mode and then clickEdit. TheEdit Enrollment Modepage appears. The mode you select determines the options shown.
Change the following information as appropriate:
Expire after:Type an expiration deadline after which users cannot enroll their devices. This value appears in the user and group enrollment invitation configuration pages.
Type0to prevent the invitation from expiring.
- Days:In the list, clickDaysorHoursto correspond to the expiration deadline you entered inExpire after.
Maximum attempts:Type the number of attempts to enroll that a user can make before being locked out of the enrollment process. This value appears in the user and group enrollment invitation configuration pages.
Type0to allow unlimited attempts.
- PIN length:Type a numeral to set the length of the generated PIN.
Numeric:In the list, clickNumericorAlphanumericfor the PIN type.
Notification templates:
- Template for enrollment URL:在列表中,单击模板用于注册lment URL. For example, the Enrollment invitation template sends users an email or SMS. The method depends on how you configured the template that lets them enroll their devices in XenMobile. For more information on notification templates, seeCreating or updating Notification Templates.
- Template for enrollment PIN:在列表中,单击模板用于注册lment PIN.
- Template for enrollment confirmation:In the list, click a template to use to inform a user that they enrolled successfully.
ClickSave.

To set an enrollment security mode as default
When you set an enrollment security mode as the default, the mode is used for all device enrollment requests unless you select a different enrollment security mode. If no enrollment security mode is set as the default, you must create a request for enrollment for each device enrollment.
Note:
The only enrollment security modes that you can use as a default areOnly User name + Password,Two Factor, orUser name + PIN.
Select the default enrollment security mode, eitherUser name + Password,Two Factor, orUser name + PIN.
To use a mode as the default, first enable it.
ClickDefault. The selected mode is now the default. If any other enrollment security mode was set as the default, the mode is no longer the default.
To disable an enrollment security mode
Disabling an enrollment security mode makes it unavailable for use, both for group enrollment invitations and on the Self-Help Portal. You can change how users can enroll their devices by disabling one enrollment security mode and enabling another.
Select an enrollment security mode.
You cannot disable the default enrollment security mode. If you want to disable the default enrollment security mode, you must first remove its default status.
ClickDisable. The enrollment security mode is no longer enabled.
To enable an enrollment security mode on the Self-Help Portal
Enabling an enrollment security mode on the Self-Help Portal lets users enroll their devices in XenMobile individually.
Note:
- 登记必须启用安全模式和bound to notification templates to be made available on the Self-Help Portal.
- You can only enable one enrollment security mode on the Self-Help Portal at a time.
Select an enrollment security mode.
ClickSelf Help Portal. The enrollment security mode you selected is now available to users on the Self-Help Portal. Any mode already enabled on the Self-Help Portal is no longer available to users.
Adding or removing groups
You manage groups in theManage Groupsdialog box in the XenMobile console on these pages:Users,Add Local User, orEdit Local User. There is no group edit command.
If you remove a group, keep in mind that removing the group has no effect on user accounts. Removing a group simply removes user association with that group. Users also lose access to apps or profiles provided by the Delivery Groups that are associated with that group; any other group associations, however, remain intact. If users are not associated with any other local groups, they are associated at the top level.
To add a local group
Do one of the following:
- On theUserspage, clickManage Local Groups.
- On either theAdd Local Userpage or theEdit Local Userpage, clickManage Groups.
TheManage Groupdialog box appears.
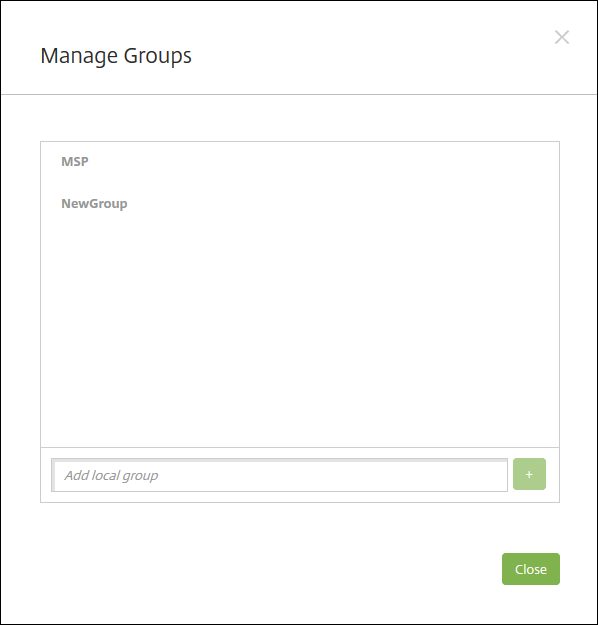
Below the group list, type a new group name and then click the plus sign (+). The user group is added to the list.
ClickClose.


To remove a group
Removing a group has no effect on user accounts. Removing a group simply removes the user association with that group. Users also lose access to apps or profiles provided by the Delivery Groups that are associated with that group. However, any other group associations remain intact. If users are not associated with any other local groups, they are associated at the top level.
Do one of the following:
- On theUserspage, clickManage Local Groups.
- On either theAdd Local Userpage or theEdit Local Userpage, clickManage Groups.
TheManage Groupsdialog box appears.
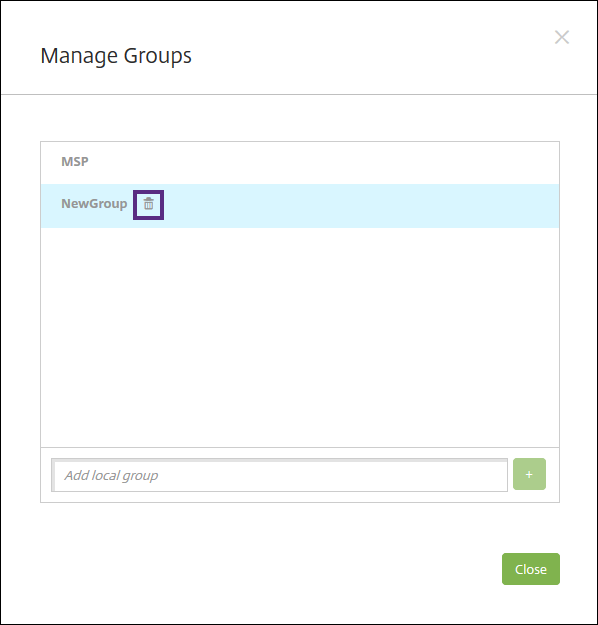
On theManage Groupsdialog box, click the group you want to delete.
Click the trash can icon to the right of the group name. A confirmation dialog box appears.
Click删除to confirm the operation and remove the group.
即时通讯portant:
You cannot undo this operation.
On theManage Groupsdialog box, clickClose.

Create and manage workflows
You can use workflows to manage the creation and removal of user accounts. Before you can use a workflow, identify individuals in your organization who have the authority to approve user account requests. Then, you can use the workflow template to create and approve user account requests.
When you set up XenMobile for the first time, you configure workflow email settings, which must be set before you can use workflows. You can change workflow email settings at any time. These settings include the email server, port, email address, and whether the request to create the user account requires approval.
You can configure workflows in two places in XenMobile:
- In theWorkflowspage in the XenMobile console. On theWorkflowspage, you can configure multiple workflows for use with app configurations. When you configure workflows on the Workflows page, you can select the workflow when you configure the app.
- When you configure an application connector in the app, you provide a workflow name and then configure the individuals who can approve the user account request. SeeAdding Apps to XenMobile.
You can assign up to three levels for manager approval of user accounts. If you need other persons to approve the user account, you can search for and select them by using their name or email address. When XenMobile finds the person, you then add them to the workflow. All individuals in the workflow receive emails to approve or deny the new user account.
In the XenMobile console, click the gear icon in the upper-right corner of the console. TheSettingspage appears.
ClickWorkflows. TheWorkflowspage appears.
ClickAdd. TheAdd Workflowpage appears.
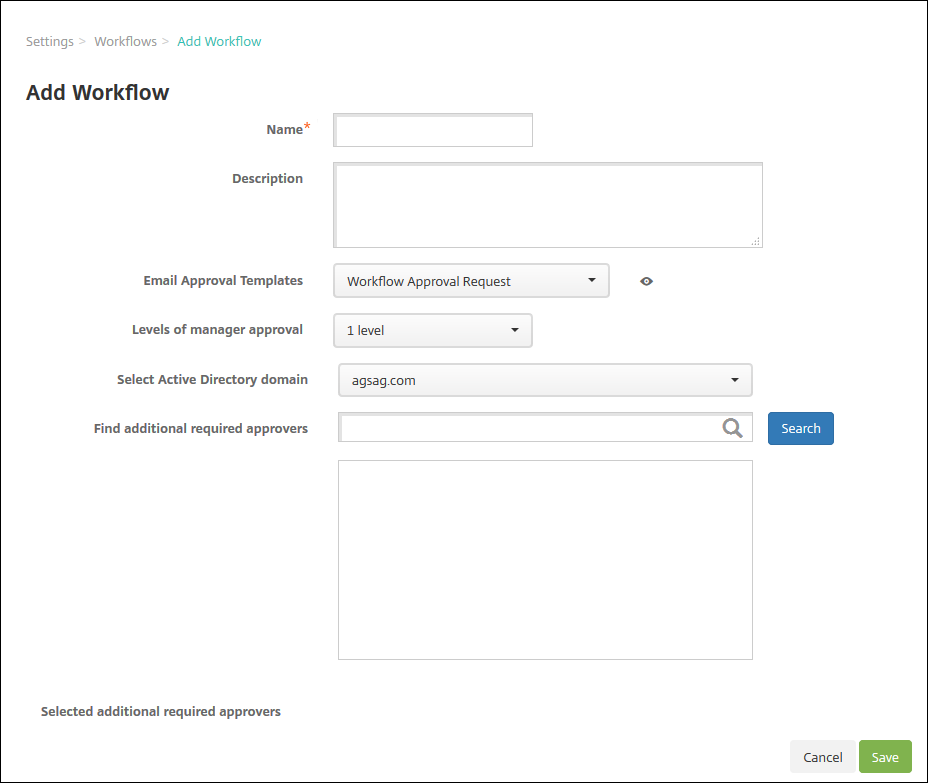
Configure these settings:
- Name:Type a unique name for the workflow.
- Description:Optionally, type a description for the workflow.
- Email Approval Templates:In the list, select the email approval template to be assigned. You create email templates in theNotification Templatessection underSettingsin the XenMobile console. When you click the eye icon to the right of this field, you see a preview of the template you are configuring.
- Levels of manager approval:在列表中,选择的数量水平of manager approval required for this workflow. The default is1 level. Possible options are:
- Not Needed
- 1 level
- 2 levels
- 3 levels
- Select Active Directory domain:In the list, select the appropriate Active Directory domain to be used for the workflow.
- Find additional required approvers:Type a name in the search field and then clickSearch. Names originate in Active Directory.
- When the name appears in the field, select the check box next to the name. The name and email address appear in theSelected additional required approverslist.
- To remove a name from the list, do one of the following:
- ClickSearchto see a list of everyone in the selected domain.
- Type a full or partial name in the search box, and then clickSearchto limit the search results.
- Persons in theSelected additional required approverslist have check marks next to their name in the search results list. Scroll through the list and clear the check box next to each name that you want to remove.
- To remove a name from the list, do one of the following:
ClickSave. The created workflow appears on theWorkflowspage.

After you create the workflow, you can view the workflow details, view the apps associated with the workflow, or delete the workflow. You cannot edit a workflow after you create the workflow. If you need a workflow with different approval levels or approvers, create another workflow.
To view details and delete a workflow
On theWorkflowspage, in the list of existing workflows, select a specific workflow. To do that, click the row in the table or select the check box next to the workflow.
To delete a workflow, click删除. A confirmation dialog box appears. Click删除again.
即时通讯portant:
You cannot undo this operation.