
Distribute Android Enterprise apps
XenMobile manages apps deployed to devices. You can organize and deploy the following types of Android Enterprise apps.
- Managed app store apps:These apps include free apps available in the managed Google Play Store. For example, GoToMeeting.
- MDX:Apps prepared with the MAM SDK or wrapped with the MDX Toolkit. These apps include MDX policies. You get MDX apps from internal sources and public stores. Deploy Citrix mobile productivity apps as MDX apps.
- Enterprise:Private apps you develop or obtain from another source. You provide these apps to your users through the managed Google Play Store. The managed Google Play Store is the Google enterprise app store.
- MDX-enabled private apps:Enterprise apps prepared with the MAM SDK or wrapped with the MDX Toolkit.
You can add enterprise apps and MDX-enabled private apps two different ways.
- Add the apps to the XenMobile console as enterprise apps, as described in theEnterprise appsandMDX-enabled private appssections in this article.
- Publish the apps directly to the managed Google Play Store using your Google developer account. Then add the apps to the XenMobile console as managed app store apps. SeeManaged app store apps.
If you publish apps using your Google developer account and then switch to using the XenMobile console, the ownership of the apps differs. Manage your apps in both locations, in this case. Citrix recommends adding your apps using one method or the other.
If you need to remove self-managed apps from the managed Google Play Store, open a ticket with Google. Developers can disable, but not delete, apps from the managed Google Play Store.
The following sections provide more in depth information for Android Enterprise app configuration. For information about distributing apps, seeAdd Apps. That article includes:
- The general workflows for adding web and SaaS apps or web links
- The required app workflow for enterprise and public store apps
- How to deliver enterprise apps from the Citrix Content Delivery Network (CDN) for Enterprise Apps
Managed app store apps
You can add free apps available on the managed Google Play Store to XenMobile.
Note:
To make all apps in the Google Play store accessible from managed Google Play, use theAccess all apps in the managed Google Play storeserver property. SeeServer properties. Setting this property totrueallows all Android Enterprise users to access public Google Play store apps. You can then use theRestrictions device policyto control access to these apps.
Step 1: Add and configure apps
In the XenMobile console, navigate toConfigure > Apps. ClickAdd.
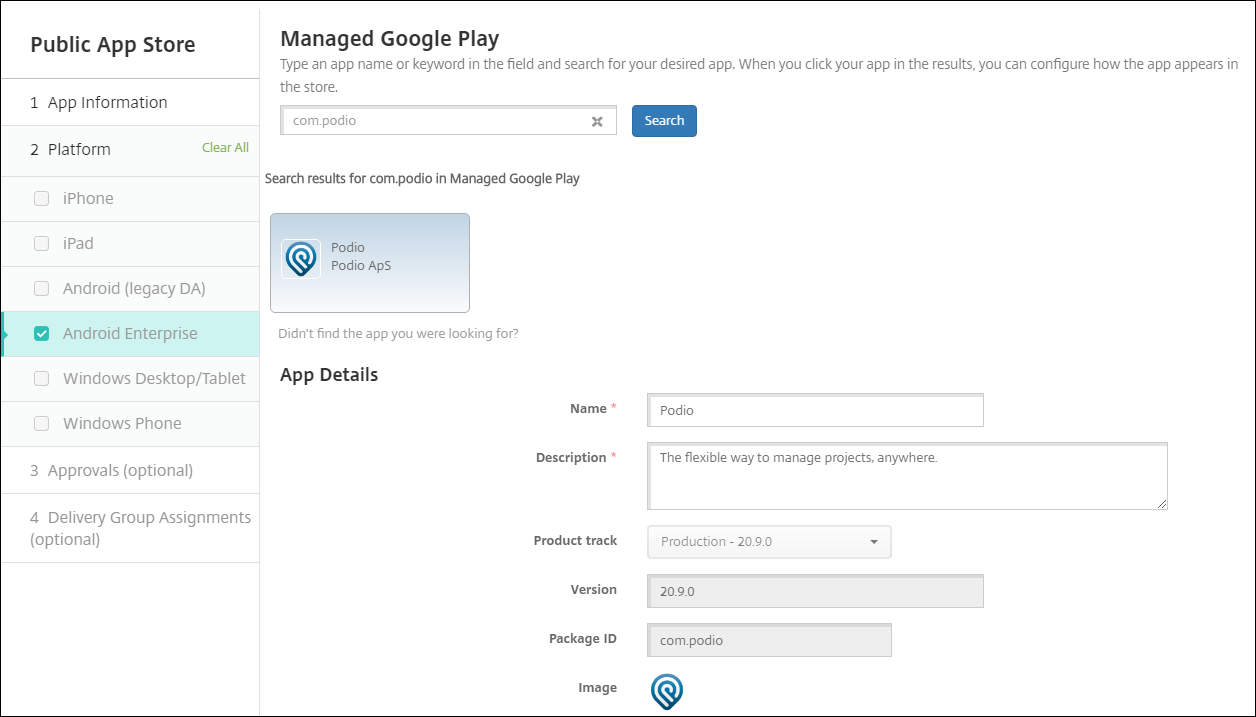
ClickPublic App Store.
In theApp Informationpane, type the following information:
- Name:Type a descriptive name for the app. The name appears underApp Nameon theAppstable.
- Description:Type an optional description of the app.
- App category:Optionally, in the list, click the category to which you want to add the app. For more information about app categories, seeAbout app categories.
SelectAndroid Enterpriseas the platform.
Type the app name or package ID in the search box and clickSearch. You can locate the package ID in the Google Play store. The ID is in the URL of the app. For example,
com.Slackis the package ID inhttps://play.google.com/store/apps/details?id=com.Slack&hl=en_US.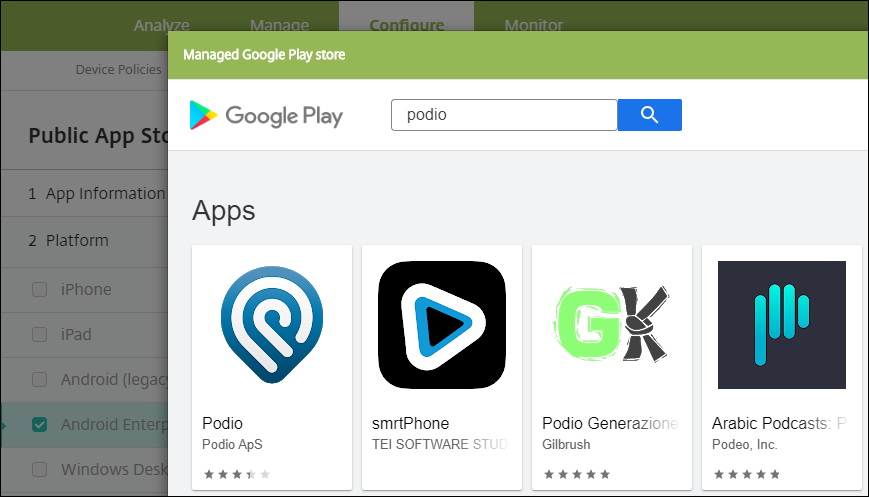
Apps matching the search criteria appear. Click the desired app then clickApprove.
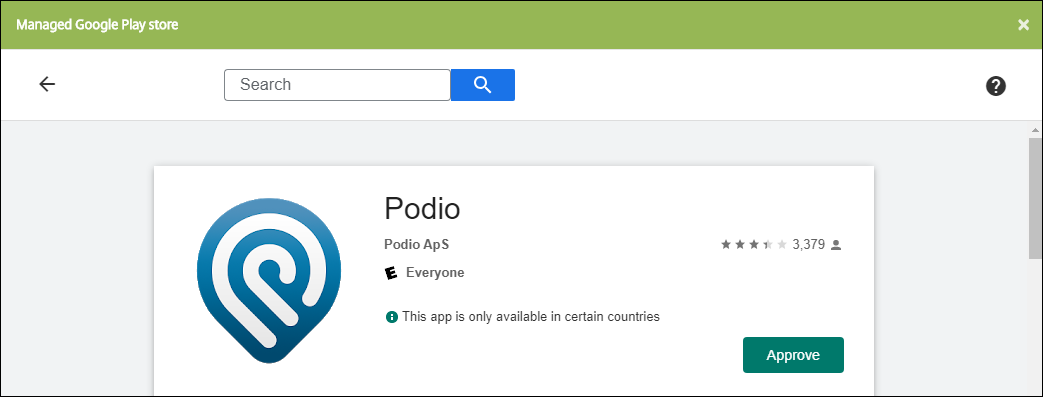
ClickApproveagain.
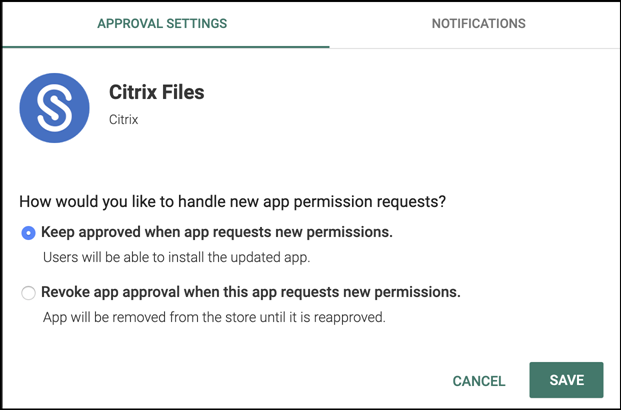
SelectKeep approved when app requests new permissions. ClickSave.
Click the app icon and configure the appNameandDescription.
Assign any delivery groups to the app and clickSave. For information, seeDeploy resources.


Step 2: Configure app deployment
- Navigate toConfigure > Delivery Groupsand select the delivery group you configured. ClickEdit.
- In theAppssection, drag the desired apps to theRequired Appsbox.
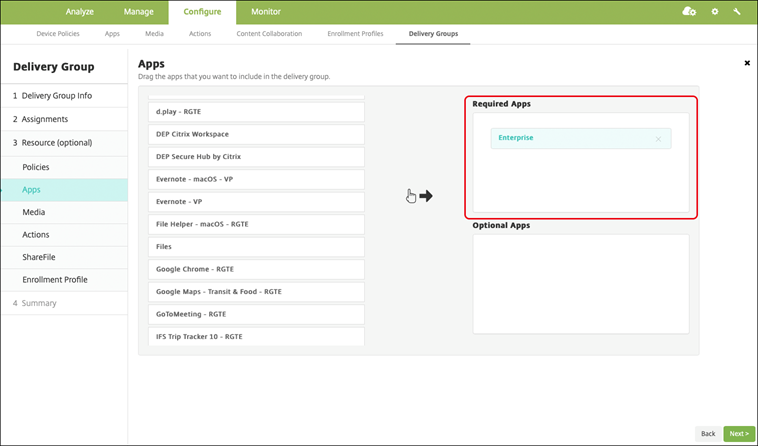
- On theSummarypage, clickSave.
- On theDelivery Groupspage, select the delivery group and clickDeploy.

MDX apps
Add MDX files to XenMobile and configure app details and policy settings. To configure Citrix mobile productivity apps for Android Enterprise, add them as MDX apps. For information about the app policies that are available for each device platform type, see:
Step 1: Add and configure apps
For Citrix mobile productivity apps, download the public-store MDX files: Go to//m.giftsix.com/downloads. Navigate toCitrix Endpoint Management (XenMobile) > Citrix Endpoint Management Productivity Apps.
For other types of MDX apps, obtain the MDX file.
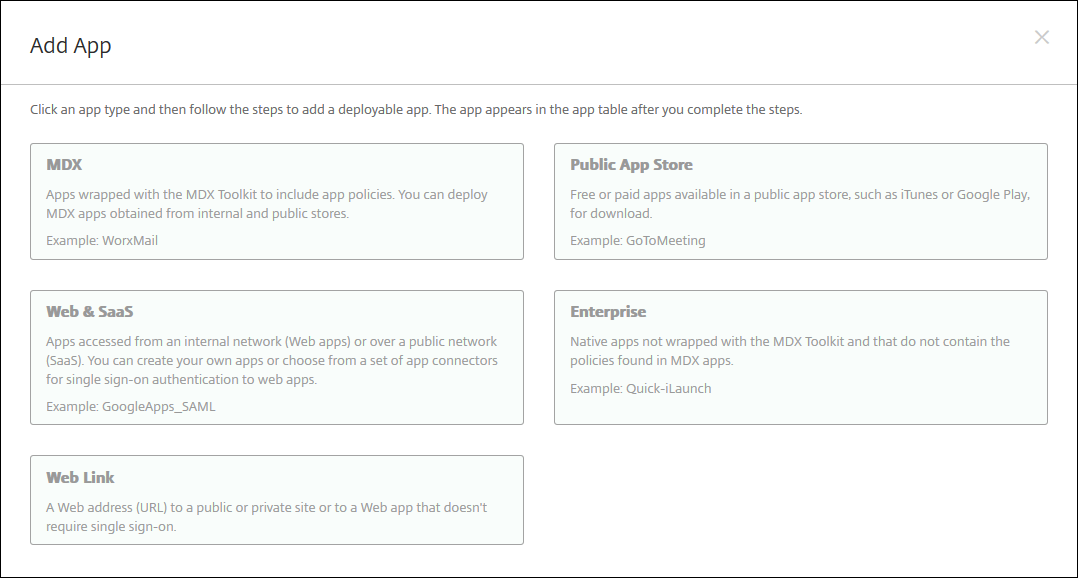
In the XenMobile console, clickConfigure > Apps. ClickAdd. TheAdd Appdialog box appears.
ClickMDX. TheMDX App Informationpage appears. In theApp Informationpane, type the following information:
- Name:Type a descriptive name for the app. The name appears underApp Nameon theAppstable.
- Description:Type an optional description of the app.
- App category:Optionally, in the list, click the category to which you want to add the app. For more information about app categories, seeAbout app categories.
SelectAndroid Enterpriseas the platform.
ClickUploadand navigate to the MDX file. Android Enterprise only supports apps prepared with the MAM SDK or MDX Toolkit.
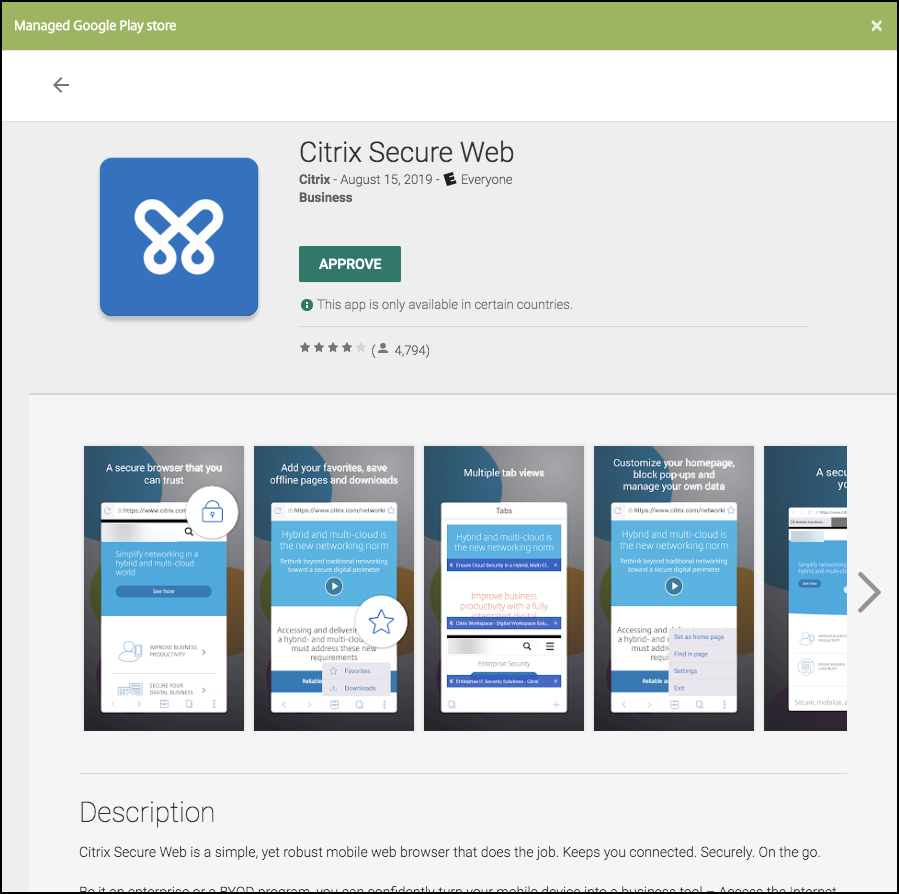
The UI notifies you if the attached application requires approval from the managed Google Play Store. To approve the application without leaving the XenMobile console, clickYes.
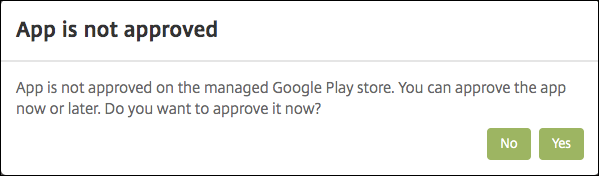
After the managed Google Play Store opens, follow the instructions to approve and save the app.
When you successfully add the app, theApp detailspage appears.
Configure these settings:
- File name:Type the file name associated with the app.
- App Description:Type a description for the app.
- App version:Optionally, type the app version number.
- Package ID:Type the package ID for the app, obtained from the managed Google Play Store.
- Minimum OS version:Optionally, type the oldest operating system version that the device can run to use the app.
- Maximum OS version:Optionally, type the most recent operating system that the device must run to use the app.
- Excluded devices:Optionally, type the manufacturer or models of devices that cannot run the app.
Configure theMDX Policies. MDX policies vary by platform and include options for policy areas, including authentication, device security, and app restrictions. In the console, each of the policies has a tooltip that describes the policy. For information about the app policies that are available for each device platform type, see:
配置和存储configura部署规则tion.
Assign any delivery groups to the app and clickSave. For information, seeDeploy resources.


Step 2: Configure app deployment
Navigate toConfigure > Delivery Groupsand select the delivery group you configured. ClickEdit.
In theAppssection, drag the desired apps to theRequired Appsbox.
On theSummarypage, clickSave.
On theDelivery Groupspage, select the delivery group and clickDeploy.
Enterprise apps
Enterprise apps represent private apps that are not prepared with the MAM SDK or MDX Toolkit. You develop these apps yourself or obtain them directly from other sources. To add an enterprise app, you need the APK file associated with the app. Ensure that you follow GoogleBest practices for private apps.
Step 1: Add and configure apps
Add the app one of two ways:
- Publish the app directly to the managed Google Play Store and add it to the XenMobile console as a Managed play store app. Follow the Google documentation on how toPublish private apps, and then follow the steps in theManaged app store appssection.
- Add the app to the XenMobile console as an enterprise app. Perform the following steps:
In the XenMobile console, clickConfigure > Apps. ClickAdd. TheAdd Appdialog box appears.
ClickEnterprise. In theApp Informationpane, type the following information:
- Name:Type a descriptive name for the app. This name is listed under App Name on the Apps table.
- Description:Type an optional description of the app.
- App category:Optionally, in the list, click the category to which you want to add the app. For more information about app categories, seeAbout app categories.
SelectAndroid Enterpriseas the platform.
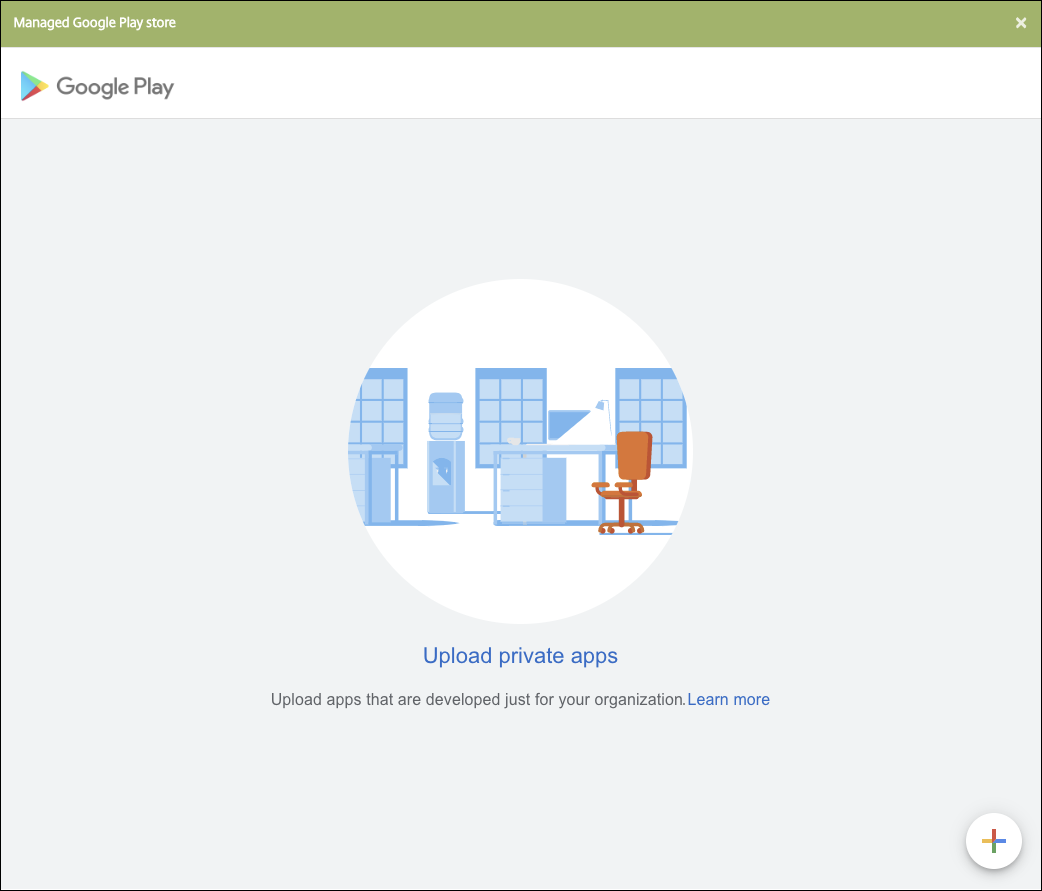
TheUploadbutton opens the managed Google Play Store. You do not need to register for a developer account to publish a private app. Click thePlusicon in the lower right corner to continue.
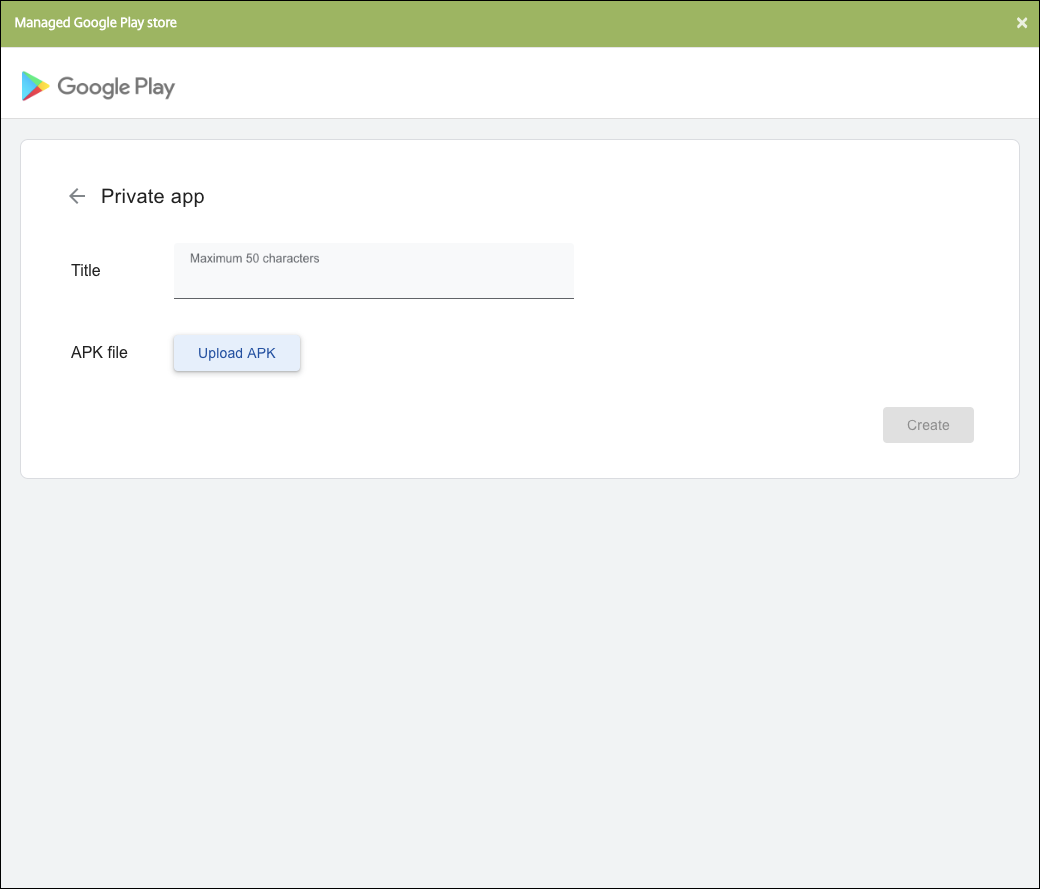
Type the name for your app and upload the .apk file. When finished, clickCreate. It might take up to 10 minutes for your private app to publish.
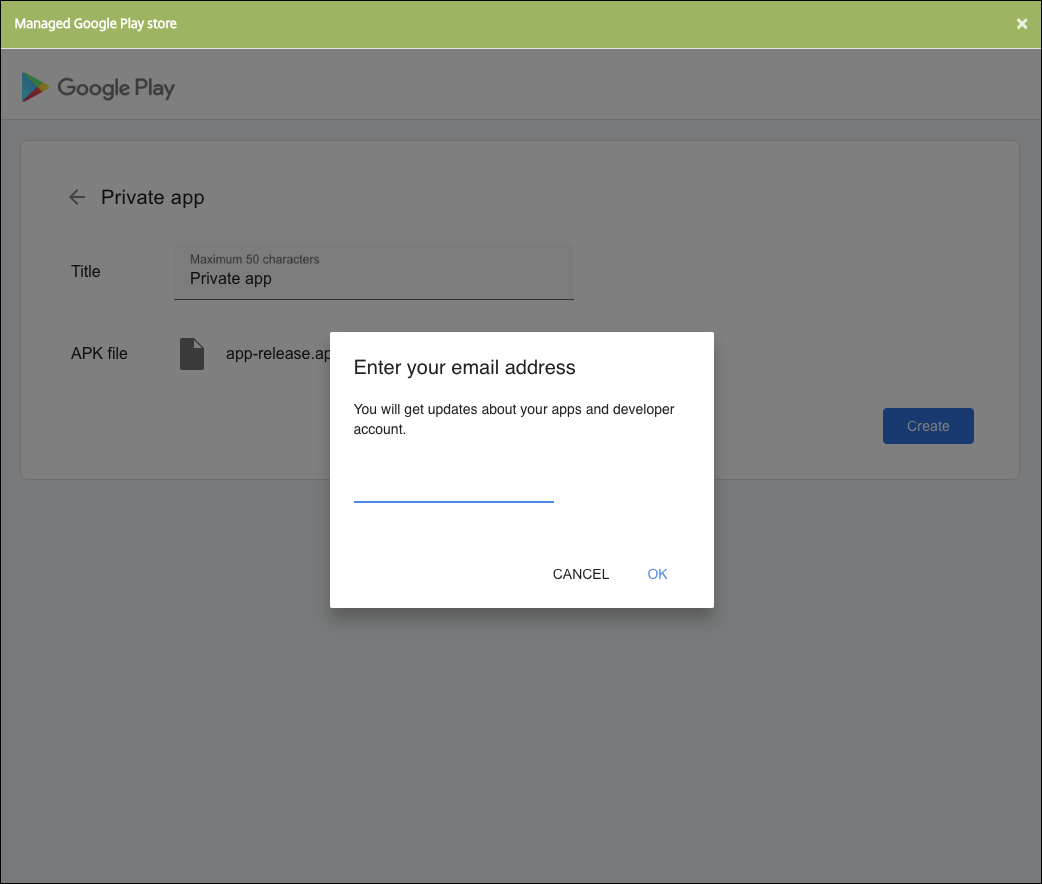
Enter an email address to get updates about your apps.
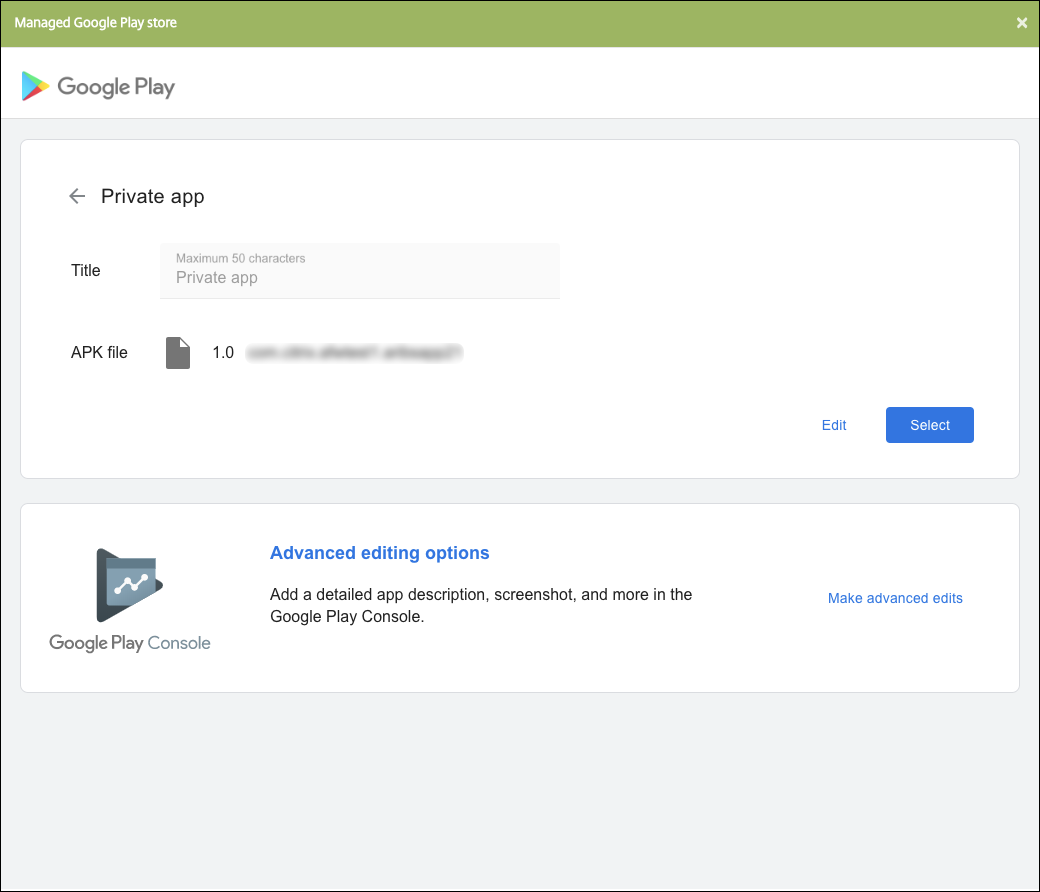
After your application is published, click the icon for the private app. If you want to add an app description, change the app icon, and other actions, clickMake advanced edits. Otherwise, clickSelectto open the app information page.
ClickNext. The app information page for the platform appears.
Configure the settings for the platform type, such as:
- File name:Optionally, type a new name for the app.
- App description:Optionally, type a new description for the app.
- App version:You can’t change this field.
- Package ID:Unique identifier of your app.
- Minimum OS version:Optionally, type the oldest operating system version that the device can run to use the app.
- Maximum OS version:Optionally, type the most recent operating system that the device must run to use the app.
- Excluded devices:Optionally, type the manufacturer or models of devices that cannot run the app.
配置和存储configura部署规则tion.
Assign any delivery groups to the app and clickSave. For information, seeDeploy resources.


Step 2: Configure app deployment
Navigate toConfigure > Delivery Groupsand select the delivery group you configured. ClickEdit.
In theAppssection, drag the desired apps to theRequired Appsbox.
On theSummarypage, clickSave.
On theDelivery Groupspage, select the delivery group and clickDeploy.
MDX-enabled private apps
To add Android Enterprise apps as MDX-enabled enterprise apps:
- Create a private Android Enterprise app and MDX-enable the app.
- Add the app to the XenMobile console.
- Host and publish the app on the managed Google Play Store.
- Add the app to the XenMobile console as an Enterprise app.
- Add the MDX file to XenMobile.
If you decide to host and publish apps through the Google Play Store, don’t opt in for Google certificate signing. Sign the app with the same certificate used to MDX-enable the app. For more information on publishing apps, see Google documentation onPublishing your appandSigning your app. The MAM SDK doesn’t wrap apps, so it doesn’t require a certificate other than the one used to develop the app.
For more information about publishing private apps through the Google Play Console, see the Google documentation on how toPublish private apps from the Play Console.
To publish an app through XenMobile, see the following sections.
Prepare a private Android Enterprise app
When you create a private Android Enterprise app, ensure that you follow GoogleBest practices for private apps.
After you create a private Android Enterprise app, integrate the MAM SDK with the app or wrap the app by using the MDX Toolkit. Then, add the resulting files to XenMobile.
You can update the app by uploading an updated.apk file. The following steps cover app wrapping with the MDX Toolkit.
Create your private Android Enterprise app and generate a signed .apk file.
The following sample file contains all known policies, some of which might not be applicable for your environment. Any unusable settings are ignored. Create an XML file with the following parameters:
1.0 false false 72 false true false false AllowAppAfterWarning false false 168 false 60 Unrestricted Unrestricted Unrestricted Unrestricted TLS false false false false false false false false false false MvpnNetworkAccessUnrestricted False NetworkAccessUnrestricted false file,console 15 2 2 false false 0 0 0 false OfflineAccessOnly 480 5 Wrap the app using the MDX Toolkit. For information about using the MDX Toolkit, seeWrapping Android mobile apps.
Set theapptypeparameter toPremium. Use the XML file from the previous step in the command described next.
If you know the store URL for the app, set thestoreURLparameter to the store URL. Users download the app from the store URL after you publish the app.
Here is an example of an MDX Toolkit command used to wrap an app called SampleAEapp:
``` java -Dfile.encoding=UTF-8 -Duser.country=US -Duser.language=en -Duser.variant -jar /Applications/Citrix/MDXToolkit/ManagedAppUtility.jar wrap -in ~/Desktop/AEAppFiles/SampleAEApp-input.apk -out ~/Desktop/AEAppFiles/SampleAEApp.mdx -MinPlatform 5.0 -keystore /MyKeystore -storepass mystorepwd123 -keyalias key0 -keypass mykeypwd123 -storeURL "https://play.google.com/store/apps/details?id=SampleAEappPackage" -appType Premium -premiumMdxPolicies``` Wrapping the app generates a wrapped .apk file and a .mdx file.
添加包裹. apk文件
Add the app one of two ways:
- Publish the app directly to the managed Google Play Store and add it to the XenMobile console as a Managed play store app. Follow the Google documentation on how toPublish private apps, and then follow the steps in theManaged app store appssection.
- Add the app to the XenMobile console as an enterprise app. Perform the following steps:
In the XenMobile console, clickConfigure > Apps. TheAppspage opens.
ClickAdd. TheAdd Appdialog box appears.
ClickEnterprise. In theApp Informationpane, type the following information:
- Name:Type a descriptive name for the app. This name is listed under App Name on the Apps table.
- Description:Type an optional description of the app.
- App category:Optionally, in the list, click the category to which you want to add the app. For more information about app categories, seeAbout app categories.
SelectAndroid Enterpriseas the platform.
TheUploadbutton opens the managed Google Play Store. You do not need to register for a developer account to publish a private app. Click thePlusicon in the lower right corner to continue.
Type the name for your app and upload the .apk file. When finished, clickCreate. It might take up to 10 minutes for your private app to publish.
Enter an email address to get updates about your apps.
After your application is published, click a private app’s icon and clickSelectto open the app information page.
ClickNext. The app information page for the platform appears.
Configure the settings for the platform type, such as:
- File name:Optionally, type a new name for the app.
- App description:Optionally, type a new description for the app.
- App version:You can’t change this field.
- Package ID:Unique identifier of your app.
- Minimum OS version:Optionally, type the oldest operating system version that the device can run to use the app.
- Maximum OS version:Optionally, type the most recent operating system that the device must run to use the app.
- Excluded devices:Optionally, type the manufacturer or models of devices that cannot run the app.
配置和存储configura部署规则tion.
In theAndroid Enterprise Enterprise Apppage, clickNext. TheApprovalspage appears.
To use workflows to require approval before allowing users to access the app, seeApply workflows. If you don’t need an approval workflow, you can skip to Step 13.
ClickNext.
TheDelivery Group Assignmentpage appears. No action is needed on this page. You configure the delivery groups and deployment schedule for this app when you add the .mdx file. ClickSave.
Optional: Add or change the store URL
If you didn’t know the store URL when you wrapped the app, add the store URL now.
View the app in the managed Google Play Store. When you select the app, the store URL appears in the address bar of your browser. Copy the package name of the app from the URL form. For example:
https://play.google.com/store/apps/details?id=SampleAEappPackage. The URL you copy might begin withhttps://play.google.com/work/. Ensure that you changeworktostore.Use the MDX Toolkit to add the store URL to the .mdx file:
java -jar /Applications/Citrix/MDXToolkit/ManagedAppUtility.jar \ setinfo \ -in ~/Desktop/SampleApps/Sample.mdx \ -out ~/Desktop/SampleApps/wrapped/Sample.mdx \ -storeURL "https://play.google.com/store/apps/details?id=SampleAEappPackage"
Add the .mdx file
In the XenMobile console, clickConfigure > Apps. ClickAdd. TheAdd Appdialog box appears.
ClickMDX. TheMDX App Informationpage appears. In theApp Informationpane, type the following information:
- Name:Type a descriptive name for the app. The name appears underApp Nameon theAppstable.
- Description:Type an optional description of the app.
- App category:Optionally, in the list, click the category to which you want to add the app. For more information about app categories, seeAbout app categories.
SelectAndroid Enterpriseas the platform.
- ClickUploadand navigate to the MDX file. Android Enterprise only supports apps wrapped with the MDX Toolkit.
The UI notifies you if the attached application requires approval from the managed Google Play Store. To approve the application without leaving the XenMobile console, clickYes.
After the managed Google Play Store opens, follow the instructions to approve and save the app.
When you successfully add the app, theApp detailspage appears.
Configure these settings:
- File name:Type the file name associated with the app.
- App Description:Type a description for the app.
- App version:Optionally, type the app version number.
- Package ID:Type the package ID for the app, obtained from the managed Google Play Store.
- Minimum OS version:Optionally, type the oldest operating system version that the device can run to use the app.
- Maximum OS version:Optionally, type the most recent operating system that the device must run to use the app.
- Excluded devices:Optionally, type the manufacturer or models of devices that cannot run the app.
Configure theMDX Policies. MDX policies vary by platform and include options for policy areas, including Authentication, Device Security, and App Restrictions. In the console, each of the policies has a tooltip that describes the policy. For information about the app policies that are available for each device platform type, see:
配置和存储configura部署规则tion.
TheDeploy for always-on connectionapplies when you have configured the scheduling background deployment key inSettings > Server Properties.
The always-on option:
- Is not available Android Enterprise customers who began using Endpoint Management with version 10.18.19 or later
- Is not recommended for Android Enterprise customers who began using Endpoint Management before version 10.18.19
The deployment schedule that you configure is the same for all platforms. Any changes you make apply to all platforms, except forDeploy for always-on connection.
- Assign any delivery groups to the app and clickSave. For information, seeDeploy resources.
Update the app
To update the Android Enterprise app, wrap and upload an updated .apk file:
Wrap the .apk file for the updated app using the MAM SDK or MDX Toolkit.
In the XenMobile console, clickConfigure > Apps. TheAppspage opens.
ClickAdd. TheAdd Appdialog box appears.
ClickEnterprise. In theApp Informationpane, type the following information:
- Name:Type a descriptive name for the app. This name is listed under App Name on the Apps table.
- Description:Type an optional description of the app.
- App category:Optionally, in the list, click the category to which you want to add the app. For more information about app categories, seeAbout app categories.
SelectAndroid Enterpriseas the platform.
ClickNext. TheAndroid Enterprise Enterprise Apppage appears.
ClickUpload.
In the managed Google Play Store page, select the app you want to update.
In the app information page, clickeditnext to the .apk file name.
Navigate to the new .apk file and upload it.
In the managed Google Play Store page, clickSave.