
Firebase Cloud Messaging
Note:
Firebase Cloud Messaging (FCM) was previously known as Google Cloud Messaging (GCM). Some XenMobile console labels and messages use the GCM terminology.
Citrix recommends that you use Firebase Cloud Messaging (FCM) to control how and when Android devices connect to XenMobile. XenMobile, when configured for FCM, sends connection notifications to Android devices that are enabled for FCM. Any security action or deploy command triggers a push notification to prompt the user to reconnect to the XenMobile server.
After you complete the configuration steps in this article and a device checks in, the device registers with the FCM service in XenMobile Server. That connection enables near real-time communication from your XenMobile service to your device by using FCM. FCM registration works for new device enrollments and previously enrolled devices.
When XenMobile needs to initiate a connection to the device, it connects to the FCM service. Then, the FCM service notifies the device to connect. This type of connection is similar to what Apple uses for its Push Notification Service.
Prerequisites
- Latest Secure Hub client
- Google developer account credentials
- Google Play services installed on FCM-enabled Android devices
Firewall ports
- Open port 443 on XenMobile to
fcm.googleapis.comandGoogle.com. - Open outgoing, Internet communication for device Wi-Fi on ports 5228, 5229, and 5230.
- 允许输出连接,FCM建议紧密相联的wing ports 5228 through 5230 with no IP restrictions. However, if you require IP restrictions, FCM recommends allowing all the IP addresses in the IPv4 and IPv6 blocks. Those blocks are listed in the GoogleASN of 15169. Update that list monthly. For more information about FCM ports, see the Google documentation onFCM ports.
For more information, seePort requirements.
Architecture
This diagram shows the communication flow for FCM in the external and internal network.

To configure your Google account for FCM
Sign in to the following URL using your Google developer account credentials:
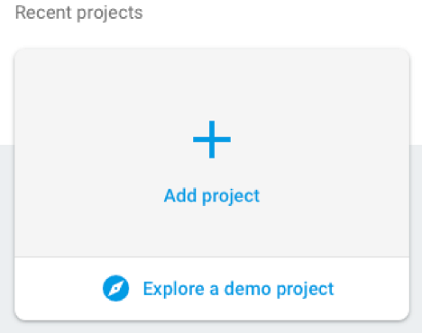
ClickAdd project.
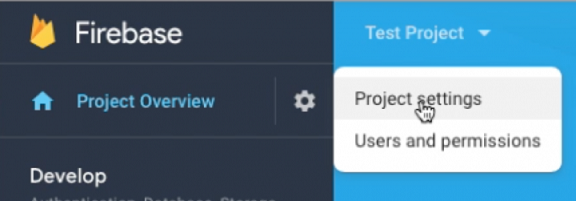
After you create the project, clickProject settings.
Click theCloud Messagingtab.
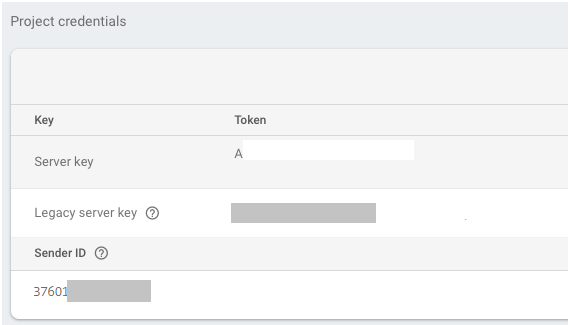
If theCloud Messaging API (Legacy)is disabled, then theServer keyis not be displayed.
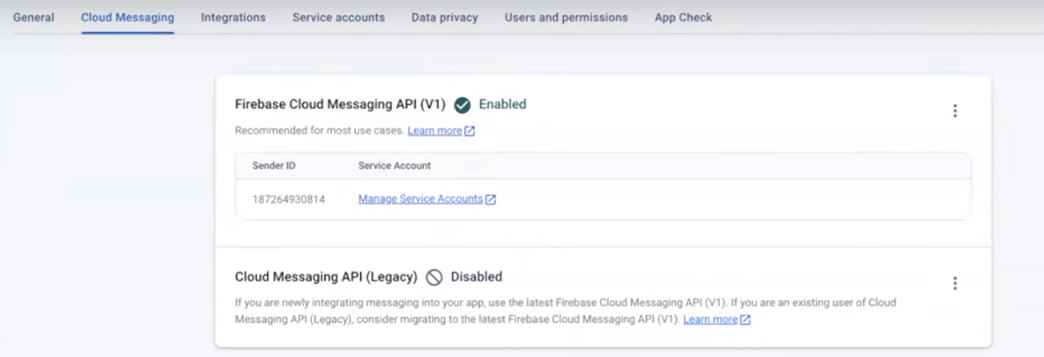
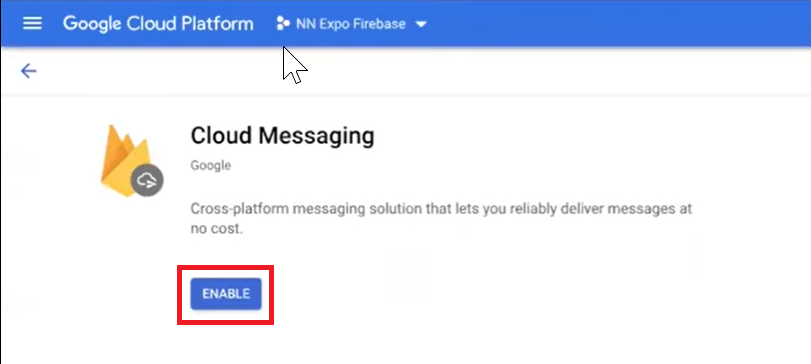
Enable theCloud Messaging API (Legacy)as follows:
Click theEllipsesbutton next toCloud Messaging API (Legacy)and then clickManage API in Google Cloud Console.
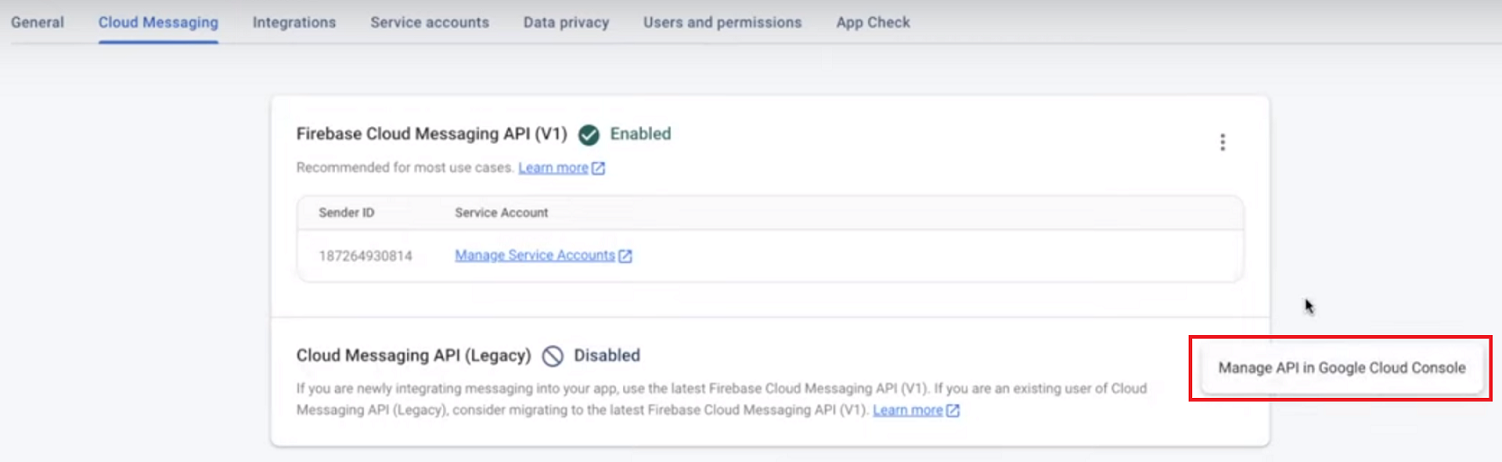
UnderCLoud Messaging, clickEnablebutton.
Copy theServer keyandSender IDvalues. In the next procedure, you paste those values in the XenMobile console. As of October 2016, you must create Server Keys in the Firebase console.


For steps to set up an FCM client app on Android, see this Google Developers Cloud Messaging article:https://firebase.google.com/docs/cloud-messaging/android/client.
To configure XenMobile for FCM
In the XenMobile console, go toSettings > Firebase Cloud Messaging.
EditAPI key, and type the Firebase Cloud MessagingServer keythat you copied in the last step of Firebase Cloud Messaging configuration.
EditSender ID, and type theSender IDvalue you copied in the previous procedure.

After you complete the setup, you can remove your Scheduling device policy or change that policy to connect less often.
To test your configuration
Enroll an Android device.
Leave the device idle for some time, so that it disconnects from XenMobile.
Sign in to the XenMobile console, clickManage, select the Android device, and then clickSecure.

UnderDevice Actions, clickSelective Wipe.
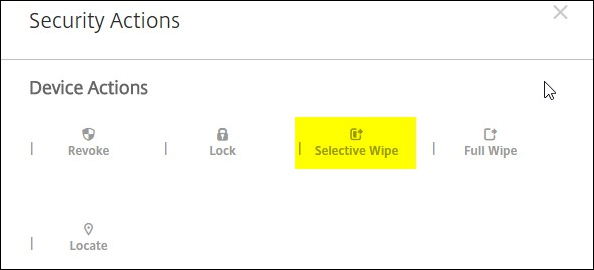
In a successful configuration, selective wipe occurs on the device.

