
Enroll devices
To manage user devices remotely and securely, you enroll user devices in XenMobile. The XenMobile client software is installed on the user device and the user identity is authenticated. Then, XenMobile and the user profile are installed. Next, in the XenMobile console, you can perform device management tasks. You can apply policies, deploy apps, push data to the device, and lock, wipe, and locate lost or stolen devices.
Azure支持活动目录登记iOS, Android, and Windows 10 and Windows 11 devices. For more information about configuring Azure as your identity provider (IDP), seeXenMobile Integration with Azure Active Directory as IDP.
Note:
Before you can enroll iOS device users, you must request an APNs certificate. For details, seeCertificates and authentication.
To update configuration options for users and devices, go to theManage > Enrollment Invitationspage. For details, seeSend an enrollment invitationin this article.
Android devices
Note:
For information about enrolling Android Enterprise devices, seeAndroid Enterprise.
- Go to the Google Play store on your Android device, download the Citrix Secure Hub app, and then tap the app.
- When prompted to install the app, clickNextand then clickInstall.
- After Secure Hub installs, tapOpen.
- Enter your corporate credentials, such as your XenMobile Server name, User Principal Name (UPN), or email address. Then, clickNext.
- In theActivate device administratorscreen, tapActivate.
- Enter your corporate password and then tapSign On.
- Depending on the way XenMobile is configured, you may be asked to create a Citrix PIN. You can use the PIN to sign on to Secure Hub and other XenMobile-enabled apps, such as Secure Mail and Citrix Files. You enter your Citrix PIN twice. On theCreate Citrix PINscreen, enter a PIN.
- Reenter the PIN. Secure Hub opens. You can then access the XenMobile Store to view the apps you can install on your Android device.
- If you configured XenMobile to push apps to devices automatically after enrollment, users are prompted to install the apps. In addition, policies that you configure in XenMobile are deployed to the device. TapInstallto install the apps.
To unenroll and reenroll an Android device
Users can unenroll from within Secure Hub. When users unenroll by using the following procedure, the device still appears in the device inventory in the XenMobile console. You cannot perform actions on the device, however. You cannot track the device, and you cannot monitor the device compliance.
Tap to open the Secure Hub app.
Depending on whether you have a phone or a tablet, do the following:
On a phone:
Swipe from the left of the screen to open a settings pane.
TapPreferences, tapAccounts, and then tap删除Account.
On a tablet:
Tap the arrow next to your email address on the upper-right corner.
TapPreferences, tapAccounts, and then tap删除Account.
TapRe-Enroll.A message appears to confirm you want to reenroll your device.
TapOK.
Your device is unenrolled.
Follow the on-screen instructions to reenroll your device.
Enroll iOS devices
This section shows how users enroll iOS devices (12.2 or later) into XenMobile Server. For more information about the iOS enrollment, open the following video:
- Go to the Apple store on your iOS device, download the Citrix Secure Hub app, and then tap the app.
- When prompted to install the app, tapNextand then tapInstall.
- After Secure Hub installs, tapOpen.
- Enter your corporate credentials, such as your XenMobile Server name, User Principal Name (UPN), or email address. Then, clickNext.
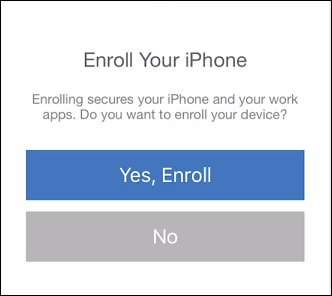
TapYes, Enrollto enroll your iOS device.
After you type your credentials, tapAllowwhen prompted, to download the configuration profile.
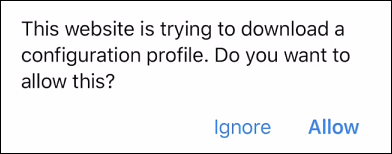
After you download the configuration profile, tapClose.

- In your device settings, install the iOS certificate and add the device to the trusted list.
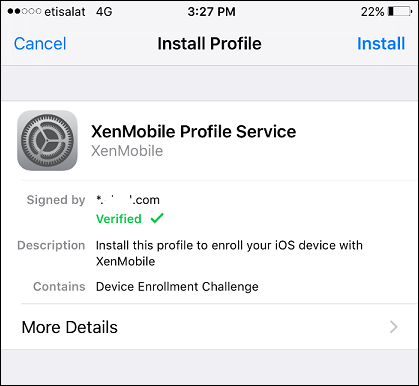
Go toSettings > General > Profile > XenMobile Profile Serviceand tapInstallto add the profile.
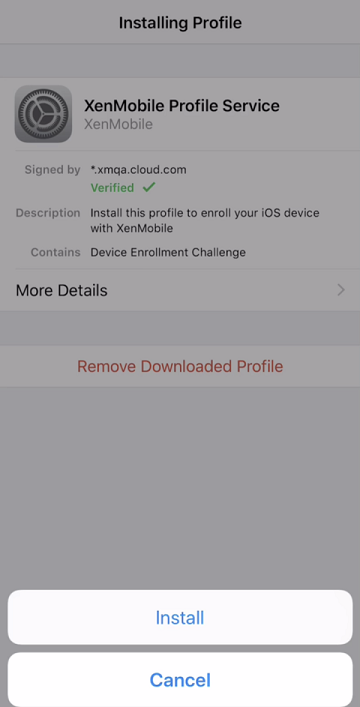
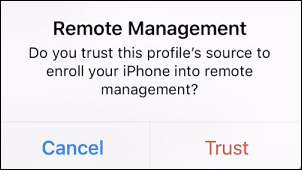
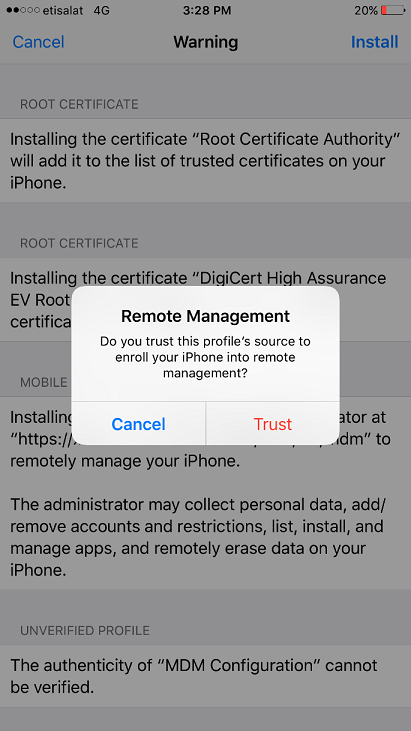
In the notification window, tapTrustto enroll your device into remote management.
- Sign in to Secure Hub. If you are enrolling into MDM+MAM: After your credentials validate, create and confirm your Citrix PIN when prompted.
- After the workflow completes, the device is enrolled. You can then access the app store to view the apps you can install on your iOS device.


iOS devices
Download the Secure Hub app from the Apple iTunes App Store on the device and then install the app on the device.
On the iOS device Home screen, tap the Secure Hub app.
When the Secure Hub app opens, enter the server address that your help desk provided.
The screens presented might differ from these examples, depending on how XenMobile is configured.
When prompted, enter your user name and password or PIN. ClickNext.
When prompted to enroll, clickYes, Enrolland then enter your credentials when prompted.
TapInstallto install the Citrix Profile Services.
TapTrust.
TapOpenand then enter your credentials.


macOS devices
XenMobile provides two methods to enroll devices that are running macOS. Both methods enable macOS users to enroll over the air, directly from their devices.
Send users an enrollment invitation:This enrollment method enables you to set any of the following enrollment security modes for macOS devices:
User name + password
User name + PIN
Two Factor
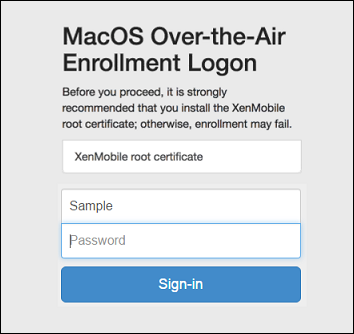
When the user follows the instructions in the enrollment invitation, a sign-on screen with the user name filled in appears.
Send users an installation link:This enrollment method for macOS devices sends users an enrollment link, which they can open in Safari or Chrome browsers. A user then enrolls by providing their user name and password.
To prevent the use of an enrollment link for macOS devices, set the server property,Enable macOS OTAEtofalse.As a result, macOS users can enroll only by using an enrollment invitation.
Send users an enrollment invitation
Optionally set up macOS device policies in the XenMobile console. For more information about device policies, seeDevice Policies.
Add an invitation for macOS user enrollment. For more information, seeSend an enrollment invitationin this article.
After users receive the invitation and click the link, the following screen appears in the Safari browser. XenMobile fills in the user name. If you choseTwo Factorfor the enrollment security mode, another field appears.
Users install certificates as necessary. Whether users see the prompt to install certificates depends on whether you configured the following for macOS: A publicly trusted SSL certificate and a publicly trusted digital signing certificate. For more information about certificates, seeCertificates and authentication.
Users provide the requested credentials.
The Mac device policies install. You can now start managing Macs with XenMobile just as you manage mobile devices.

Send users an installation link
Optionally set up macOS device policies in the XenMobile console. For more information about device policies, seeDevice Policies.
Send the enrollment link
https://serverFQDN:8443/instanceName/macos/otae, which users can open in Safari or Chrome browsers.- serverFQDNis the fully qualified domain name (FQDN) of the server running XenMobile.
- Port8443is the default secure port. If you configured a different port, use that port instead of 8443.
- TheinstanceName, often shown as zdm, is the name specified during server installation.
For more information about sending installation links, seeTo send an installation link.
Users install certificates as necessary. If you configured a publicly trusted SSL certificate and digital signing certificate for iOS and macOS, users see the prompt to install certificates. For more information about certificates, seeCertificates and authentication.
Users sign on to their Macs.
The Mac device policies install. You can now start managing Macs with XenMobile just as you manage mobile devices.
Windows devices
Windows 10 and Windows 11 devices enroll with Azure as a federated means of Active Directory authentication. You can join Windows 10 and Windows 11 devices to Microsoft Azure AD in any of the following ways:
- Enroll in MDM as part of Azure AD Join out-of-the-box the first time the device is powered on.
- Enroll in MDM as part of Azure AD Join from the Windows Settings page after the device is configured.
You can enroll devices in XenMobile that are running the following Windows operating systems:
- Windows 10
- Windows 11
Users can enroll directly through their devices.
Note:
For Windows 10 RS2 Phone and Tablet, during re-enrollment, a user isn’t prompted for the Server URL. To work around this issue, restart the device. Or, on the email address screen, tap the X across fromConnecting to a serviceto go to the Server URL page. This is a third-party issue.
You must configure autodiscovery and the Windows discovery service for user enrollment to enable the management of supported Windows devices.
Before Windows device users can enroll by using Azure, you must configure the Microsoft Azure server settings in XenMobile. For details, seeMicrosoft Azure Active Directory server settings.
To enroll Windows devices with self-discovery
To enable management of Windows devices, Citrix recommends you configure the AutoDiscovery Service and the Windows discovery service. For details, seeXenMobile AutoDiscovery Service.
On the device, check for and install all available Windows Updates.
In the charms menu, tapSettingsand then tapAccounts > Access work or school > Connect to work or school.
For Windows 10 and Windows 11: Enter your corporate email address and then tapContinue.For Windows 8.1: TapTurn on device management.To enroll as a local user, enter a nonexistent email address with the correct domain name (for example,
foo@mydomain.com). This permits you to bypass a known Microsoft limitation where enrollment is performed by the built-in Device Management on Windows; in theConnecting to a servicedialog box, enter the user name and password associated with the local user. The device automatically discovers a XenMobile Server and starts the enrollment process.Enter your password. Use the password associated with an account that is part of a user group in XenMobile.
For Windows 10 and Windows 11: In theTerms of usedialog box, indicate that you agree to have your device managed and then tapAccept.For Windows 8.1: In theAllow apps and services from IT admindialog box, indicate that you agree to have your device managed and then tapTurn on.
To enroll Windows devices without self-discovery
It is possible to enroll Windows devices without autodiscovery. Citrix, however, recommends that you configure autodiscovery. Enrollment without autodiscovery results in a call to port 80 before connecting to the desired URL, so it is not considered best practice for production deployment. Citrix recommends that you use this process only in test environments and proof of concept deployment.
On the device, check for and install all available Windows Updates.
For Windows 10 and Windows 11: In the charms menu, tapSettingsand then tapAccounts > Access work or school > Connect to work or school.For Windows 8.1: TapPC Settings > Network > Workplace.
Enter your corporate email address.
For Windows 10 and Windows 11: If autodiscovery is not configured, an option appears where you can enter the server details, as described in step 5. For Windows 8.1: IfAutomatically detect server addressis set toon, tap to turn the optionoff.
For Windows 10 and Windows 11, in theEnter server addressfield, type the address:
https://serverfqdn:8443/serverInstance/wpe.If a port other than 8443 is used for unauthenticated SSL connections, use that port number in place of 8443 in this address.
For Windows 8.1: Type the server address in the following format:
https://serverfqdn:8443/serverInstance/Discovery.svc.If a port other than 8443 is used for unauthenticated SSL connections, use that port number in place of 8443 in this address.
Type your password.
For Windows 10 and Windows 11: In theTerms of usedialog box, indicate that you agree to have your device managed and then tapAccept.For Windows 8.1: In theAllow apps and services from IT admindialog box, indicate that you agree to have your device managed and then tapTurn on.
Send an enrollment invitation
In the XenMobile console, you can send an enrollment invitation to users with iOS, macOS, Android Enterprise, and legacy Android devices. You can also send an installation link to users with iOS, Android Enterprise, or legacy Android devices.
Enrollment invitations are sent as follows:
If the enrollment invitation is for one local or Active Directory user: The user receives the invitation from SMS at the phone number and carrier name you specify.
如果入学邀请一组:users receive invitations from SMS. If Active Directory users have an email address and mobile phone number in Active Directory, they receive the invitation. Local users receive the invitation at the email and phone number specified in user properties.
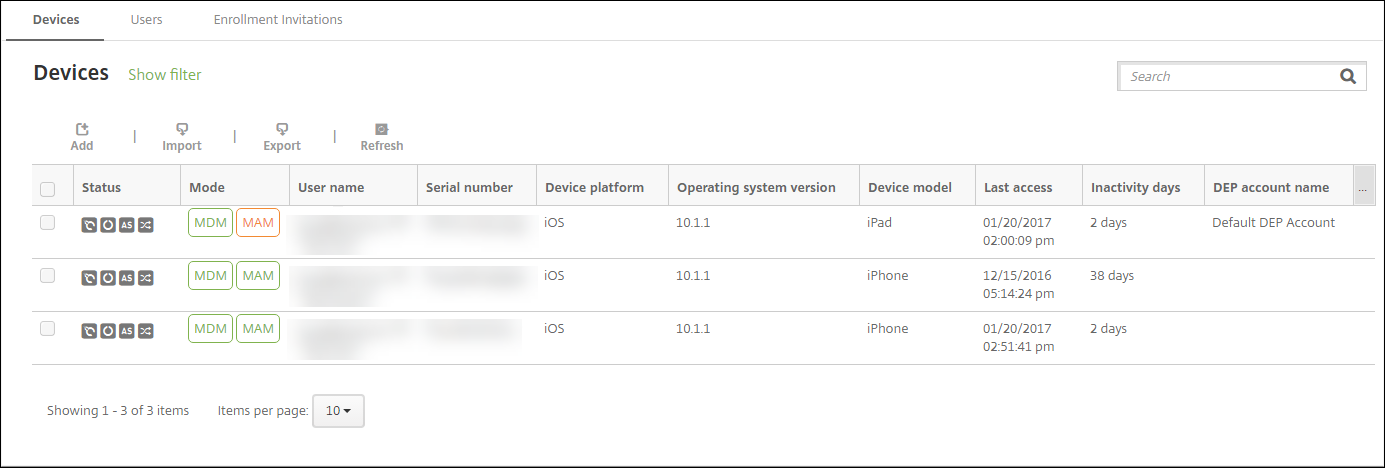
After users enroll, their devices appear as managed onManage > Devices.The status of the invitation URL is shown asRedeemed.
Prerequisites
- XenMobile Server configured in Enterprise (XME) or MDM mode
- LDAP configured
If using local groups and local users:
One or more local groups.
Local users assigned to local groups.
Delivery groups are associated with local groups.
If using Active Directory:
- Delivery groups are associated with Active Directory groups.
Create an enrollment invitation
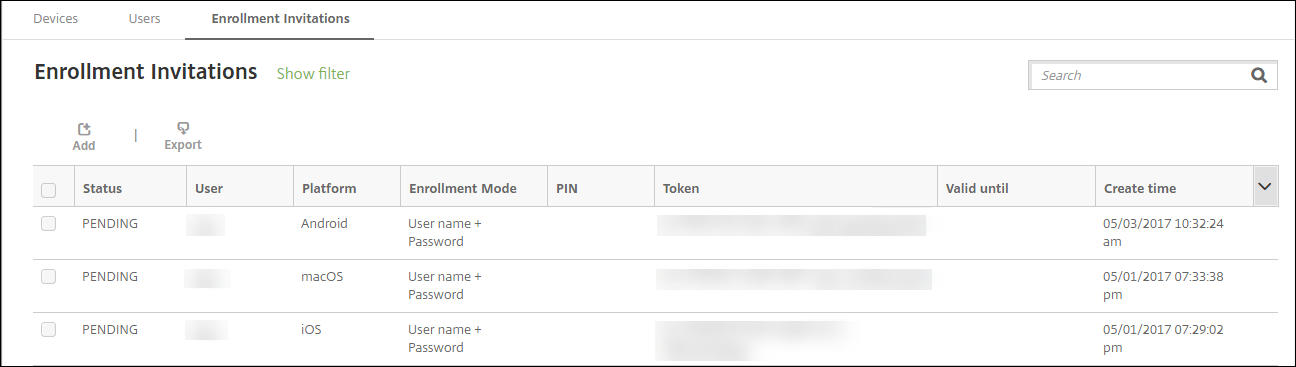
In the XenMobile console, clickManage > Enrollment Invitations.TheEnrollment Invitationspage appears.

ClickAdd.A menu of enrollment options appears.

- To send an enrollment invitation to a user or group, clickAdd Invitation.
- To send an enrollment installation link to a list of recipients over SMTP or SMS, clickSend Installation Link.
Sending enrollment invitations and installation links are described after these steps.
ClickAdd Invitation.TheEnrollment Invitationscreen appears.
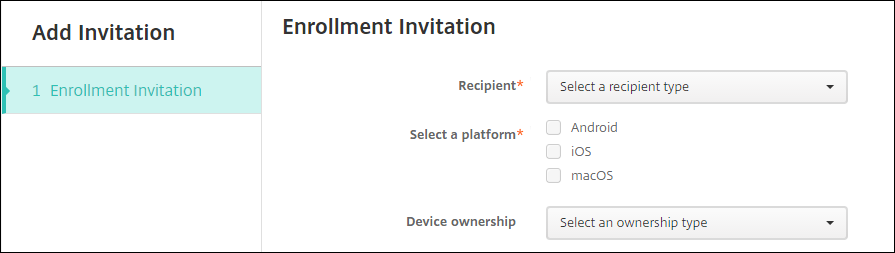
Configure these settings:
- Recipient:ChooseGrouporUser.
Select a platform:IfRecipientisGroup, all platforms are selected. You can change the platform selection. IfRecipientisUser, no platforms are selected. Select a platform.
To create an enrollment invitation for Android Enterprise devices, selectAndroid > Android Enterprise.
- Device ownership:SelectCorporateorEmployee.
Settings for users or groups appear, as described in the following sections.


To send an enrollment invitation to a user

Configure theseUsersettings:
- User name:Type a user name. The user must exist in the XenMobile Server as a local user or as a user in Active Directory. If the user is local, ensure that the email property of the user is set so you can send that user notifications. If the user is in Active Directory, ensure that LDAP is configured.
- Device info:This setting doesn’t appear if you select multiple platforms or if you select only macOS. ChooseSerial number,UDID, orIMEI.After you choose an option, a field appears where you can type the corresponding value for the device.
- Phone number:This setting doesn’t appear if you select multiple platforms or if you select only macOS. Optionally, type the phone number of the user.
- Carrier:This setting doesn’t appear if you select multiple platforms or if you select only macOS. Choose a carrier to associate to the phone number of the user.
- Enrollment mode:Choose the enrollment security mode for users. The default isUser name + Password.Some of the following options aren’t available for all platforms:
- User name + Password
- High Security
- Invitation URL
- Invitation URL + PIN
- Invitation URL + Password
- Two Factor
- User name + PIN
To send enrollment invitations, you can only useInvitation URL,Invitation URL + PIN, orInvitation URL + Passwordenrollment security modes. For devices enrolling withUser name + Password,Two Factor, orUser name + PIN, users must manually enter their credentials in Secure Hub.
A PIN for enrollment is also called a one-time PIN. Such PINs are valid only when the user enrolls.
Note:
When you select any enrollment security mode that includes a PIN, theTemplate for enrollment PINfield appears, where you clickEnrollment PIN.
- Template for agent download:Choose the download link template namedDownload link., template is for all supported platforms.
- Template for enrollment URL:ChooseEnrollment Invitation.
- Template for enrollment confirmation:ChooseEnrollment Confirmation.
- Expire after:This field is set when you configure the Enrollment Mode and indicates when the enrollment expires. For more information about configuring enrollment security modes, seeConfigure enrollment security modes.
- Maximum Attempts:This field is set when you configure theEnrollment Modeand indicates the maximum number of times the enrollment process occurs. For more information about configuring enrollment security modes, seeConfigure enrollment security modes.
- Send invitation:SelectONto send the invitation immediately. SelectOFFto add the invitation to the table on theEnrollment Invitationspage, but not send it.
ClickSave and Sendif you enabledSend invitation.Otherwise, clickSave.The invitation appears in the table on theEnrollment Invitationspage.

To send an enrollment invitation to a group
The following figure shows the settings for configuring an enrollment invitation to a group.

Configure these settings:
- Domain:Choose the domain of the group to receive the invitation.
- Group:Choose the group to receive the invitation.
- Enrollment mode:Choose how you want users in the group to enroll. The default isUser name + Password.Some of the following options aren’t available for all platforms:
- User name + Password
- High Security
- Invitation URL
- Invitation URL + PIN
- Invitation URL + Password
- Two Factor
- User name + PIN
To send enrollment invitations, you can only useInvitation URL,Invitation URL + PIN, orInvitation URL + Passwordenrollment security modes. For devices enrolling withUser name + Password,Two Factor, orUser name + PIN, users must manually enter their credentials in Secure Hub.
Only the enrollment security modes that are valid for each of the selected platforms appear.
Note:
When you select any enrollment security mode that includes a PIN, theTemplate for enrollment PINfield appears, where you clickEnrollment PIN.
- Template for agent download:Choose the download link template namedDownload link:., template is for all supported platforms.
- Template for enrollment URL:ChooseEnrollment Invitation.
- Template for enrollment confirmation:ChooseEnrollment Confirmation.
- Expire after:This field is set when you configure the Enrollment Mode and indicates when the enrollment expires. For more information about configuring enrollment security modes, seeConfigure enrollment security modes.
- Maximum Attempts:This field is set when you configure the Enrollment Mode and indicates the maximum number of times the enrollment process occurs. For more information about configuring enrollment security modes, seeConfigure enrollment security modes.
- Send invitation:SelectONto send the invitation immediately. SelectOFFto add the invitation to the table on theEnrollment Invitationspage, but not send it.
ClickSave and Sendif you enabledSend invitation.Otherwise, clickSave.The invitation appears in the table on theEnrollment Invitationpage.

To send an installation link
Before you can send an enrollment installation link, you must configure channels (SMTP or SMS) on the notification server from theSettingspage. For details, seeNotifications.

Configure these settings and then clickSave.
- Recipient:For each recipient that you want to add, clickAddand then do the following:
- Email:Type the email address of the recipient. This field is required.
- Phone number:Type the phone number of the recipient. This field is required.
Note:
To delete an existing recipient, hover over the line containing the listing and then click the trash icon on the right side. A confirmation dialog box appears. Click删除to delete the listing or clickCancelto keep the listing.
To edit an existing recipient, hover over the line containing the listing and then click the pen icon on the right-hand side. Update the listing and then clickSaveto save the changed listing orCancelto leave the listing unchanged.
- Channels:Select a channel to use for sending the enrollment installation link. You can send notifications overSMTPorSMS.这些通道不能被激活,直到你反对figure the server settings on theSettingspage inNotification Server.For details, seeNotifications.
- SMTP:Configure these optional settings. If you do not type anything in these fields, the default values specified in the notification template configured for the platform you selected are used:
- Sender:Type an optional sender.
- Subject:Type an optional subject for the message. For example, “Enroll your device.”
- Message:Type an optional message to be sent to the recipient. For example, “Enroll your device to gain access to organizational apps and email.”
- SMS:Configure this setting. If you do not type anything in this field, the default value specified in the notification template configured for the platform you selected is used:
- Message:Type a message to be sent to the recipients. This field is required for SMS-based notification.
Note:在北美,超过160 cha的短信racters are delivered in multiple messages.
- Recipient:For each recipient that you want to add, clickAddand then do the following:
ClickSend.
Note:
If your environment uses sAMAccountName: After users receive the invitation and click the link, they must edit the user name to complete the authentication. The user name appears in the form of sAMAccountName@domainname.com. Users must remove the @domainname.com portion.
Enrollment security modes by platform
The following table displays security modes that you can use to enroll user devices. In the table,Yesindicates which device platforms support specific enrollment and management modes with different enrollment profiles.
| MDM enrollment security mode | MAM enrollment security mode on Citrix Gateway | Management modes | Support different enrollment profiles | Android (legacy) | Android Enterprise | iOS (user enrollment mode) | iOS | macOS | Windows |
|---|---|---|---|---|---|---|---|---|---|
| Azure AD and Okta as identity providers through Citrix Cloud | Client certificate | MDM+MAM or MDM | Yes | Yes | Yes | Yes | Yes | No | No |
| User name + Password | LDAP, LDAP + client certificate, and client certificate only | MDM+MAM, MDM, or MAM (MAM-only mode doesn’t support client certificates on Citrix Gateway) | Yes | Yes | Yes | Yes | Yes | Yes | Yes |
| Invitation URL | Client certificate | MDM+MAM or MDM | Yes | Yes | Yes | No | Yes | No | No |
| Invitation URL + PIN | Client certificate | MDM+MAM or MDM | Yes | Yes | Yes | No | Yes | No | No |
| Invitation URL + Password | LDAP, LDAP + client certificate, and client certificate only | MDM+MAM or MDM | Yes | Yes | Yes | No | Yes | No | No |
| Two-factor authentication (user name + password + PIN) | LDAP, LDAP + client certificate, and client certificate only | MDM+MAM or MDM | Yes | Yes | Yes | No | Yes | Yes | No |
| User name + PIN | Client certificate | MDM+MAM or MDM | Yes | Yes | Yes | No | Yes | Yes | No |
The following describes how the enrollment security modes behave on iOS, Android, and Android Enterprise devices:
- User name + Password(default)
- Sends a user a single notification that contains an enrollment URL. When the user clicks the URL, Secure Hub opens. The user then types a user name and password to enroll the device in XenMobile.
- Invitation URL
- Sends a user a single notification that contains an enrollment URL. When the user clicks the URL, Secure Hub opens. The XenMobile server name and theYes, Enrollbutton appear. The user tapsYes, Enrollto enroll the device in XenMobile.
- Invitation URL + PIN
- Sends a user the following emails:
- An email with an enrollment URL, which lets the user enroll the device in XenMobile through Secure Hub.
- An email with a one-time PIN that the user must type when enrolling the device, along with the user’s Active Directory (or local) password.
- With this mode, the user enrolls only by using the enrollment URL in the notification. If the user loses the notification invitation, the user cannot enroll. However, you can send another invitation.
- Sends a user the following emails:
- Invitation URL + Password
- Sends a user a single notification that contains an enrollment URL. When the user clicks the URL, Secure Hub opens. The XenMobile server name appears, along with a field that lets the user type a password.
- Two Factor
- Sends a user a single notification that contains an enrollment URL and a one-time PIN. When the user clicks the URL, Secure Hub opens. The XenMobile server name appears, along with two fields that let the user type a password and the PIN number.
- User name + PIN
- Sends a user the following emails:
- An email with an enrollment URL, which lets the user download and install Secure Hub. After Secure Hub opens, the user is prompted to type a user name and password to enroll the device in XenMobile.
- An email with a one-time PIN that the user must type when enrolling the device, along with the user’s Active Directory (or local) password.
- If the user loses the notification invitation, the user cannot enroll. However, you can send another invitation.
- Sends a user the following emails:
The following describes how the enrollment security modes behave on macOS devices:
- User name + Password
- Sends a user a single notification that contains an enrollment URL. When the user clicks the URL, the Safari browser opens. A sign-in page appears, prompting the user to type a user name and password to enroll the device in XenMobile.
- Two Factor
- Sends a user a single notification that contains an enrollment URL and a one-time PIN. When the user clicks the URL, the Safari browser opens. A sign-in page appears, displaying two fields that let the user type a password and the PIN number.
- User name + PIN
- Sends a user the following emails:
- An email with an enrollment URL. When the user clicks the URL, the Safari browser opens. A sign-in page appears, prompting the user to type a user name and password to enroll the device in XenMobile.
- An email with a one-time PIN that the user must type when enrolling the device, along with the user’s Active Directory (or local) password.
- If the user loses the notification invitation, the user cannot enroll. However, you can send another invitation.
- Sends a user the following emails:
You cannot send enrollment invitations to Windows devices. Windows users enroll directly through their devices.