
Inline device integration with Citrix ADC
Security devices such as Intrusion Prevention System (IPS) and Next Generation Firewall (NGFW) protect servers from network attacks. These devices are deployed in layer 2 inline mode and their primary function is to protect servers from network attacks and report security threats on the network. To prevent vulnerable threats and provide advanced security protection, a Citrix ADC appliance is integrated with one or more inline devices. The inline devices can be any security device such as IPS, NGFW. Following are some of the use cases that benefit in using the inline device integration with Citrix ADC appliance:
- Inspecting encrypted traffic. Most IPS and NGFW appliances bypass encrypted traffic, thereby leaving servers vulnerable to attacks. A Citrix ADC appliance can decrypt traffic and send it to inline devices for inspection. This enhances customer’s network security.
- Offloading inline devices from TLS/SSL processing. TLS/SSL processing is expensive and this issue can result in high system CPU in IPS or NGFW appliances if they decrypt the traffic. As encrypted traffic is growing at a fast pace, these systems fail to decrypt and inspect encrypted traffic. Citrix ADC helps in offloading inline devices from TLS/SSL processing. This results in inline device supporting a high volume of traffic inspection.
- Loading balancing inline devices. The Citrix ADC appliance load balances multiple inline devices when there is a high volume of traffic.
- Smart selection of traffic. Every packet flowing into the appliance might be content inspected, for example download of text files. User can configure the Citrix ADC appliance to select specific traffic (for example .exe files) for inspection and send the traffic to inline devices for processing the data
How Citrix ADC is integrated with inline devices
The following diagram shows how a Citrix ADC is integrated with inline security devices.
When you integrate inline devices with Citrix ADC appliance, the component interacts as given below:
- A client sends a request to Citrix ADC appliance.
- The appliance receives the request and sends it to an inline device based on policy evaluation.Note: If there are two or more inline devices, the appliance load balances the devices and sends the traffic. If the incoming traffic is an encrypted one, the appliance decrypts the data and sends it as a plain text to the inline device for content inspection.
- The inline device inspects the data for threats and decides whether to drop, reset, or send the data back to the appliance.
- If there are security threats, the device modifies the data and sends it to the appliance.
- The Citrix ADC in turn re-encrypts the data and forwards the request to the back-end server.
- The back-end server sends the response to the Citrix ADC appliance.
- The appliance again decrypts the data and sends it to the inline device for inspection.
- Appliance re-encrypts the data and sends the response to the client
Software licensing
To deploy the inline device integration, your Citrix ADC appliance must be provisioned with one of the licenses given below:
- ADC Premium
- ADC Advanced
- Telco Advanced
- Telco Premium
- SWG license
Configuring inline device integration
You can configure a Citrix ADC appliance with an inline device in three different ways. The configuration scenarios are given below.
Scenario 1 for using a single inline device
If you want to integrate a security device (IPS or NGFW) in inline mode, you must begin by first enabling the Content Inspection feature and enabling Citrix ADC in MBF (MAC-based forwarding) in global mode. Once you have enabled the features, you must add the Content Inspection profile, add Content Inspection action for inline devices to reset, block, or drop the traffic based on inspection. Then, add the Content Inspection policy for the appliance to decide what subset of traffic to send to the inline devices. Then, configure the load balancing virtual server with layer 2 connection enabled on the server. Finally, bind the content inspection policy to the load balancing virtual server.

Enable MBF (MAC-based forwarding) mode
If you want the Citrix ADC appliance to be integrated to inline devices such as IPS, or firewalls, you must enable this mode. For more information about MBF, see Configure MAC-based Forwarding topic.
At the command prompt, type:
enable ns mode mbf
Enable Content Inspection
If you want Citrix ADC appliance to decrypt and then send the content for inspection to the inline devices, you must enable the Content Inspection and load balancing features.
enable ns feature contentInspection LoadBalancing
Add Content Inspection profile for service
Inline device configuration for a Citrix ADC appliance can be specified in an entity called Content Inspection profile. The profile has a collection of settings that explains how to integrate with an inline device.
At the command prompt, type:
add contentInspection profile
Example:
add contentInspection profile Inline_profile1 -type InlineInspection -ingressinterface “1/2” -egressInterface “1/3”
Add IPS-TCP monitor
If you want to configure monitors, you first decide whether to use a built-in monitor or add a TCP monitor.Note: If you want to configure monitors, you must use a custom monitor. When adding a monitor, you must enable the transparent parameter.
add lb monitor
Example:
add lb monitor ips_tcp TCP -destIP 192.168.10.2 -destPort 80 -transparent YES
Add a service
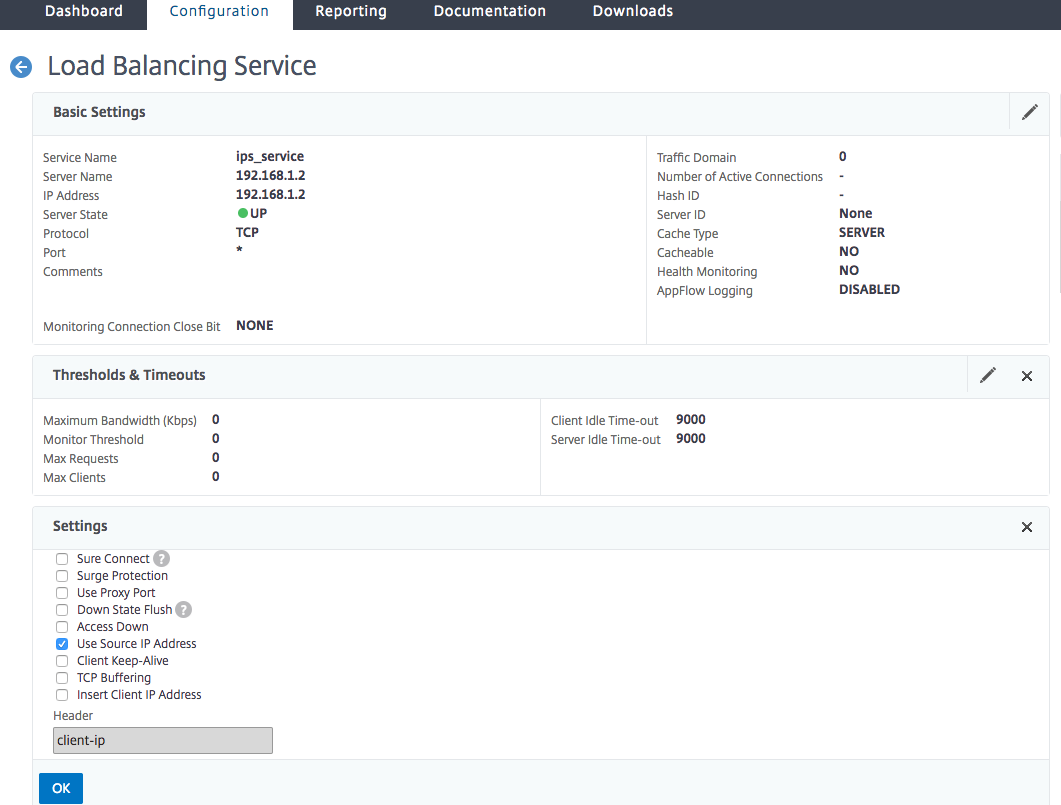
Add a service. Specify a dummy IP address that is not owned by any of the devices, including the inline devices. Setuse source IP address(USIP) to YES. Setuseproxyportto NO. By defaut, health monitoring is ON, bind the service to a health monitor, and also set the TRANSPARENT option in the monitor ON.
At the command prompt, type:
add service
Example:
add service ips_service 198.51.100.2 TCP * -healthMonitor YES -usip YES -useproxyport NO -contentInspectionProfileName ipsprof
Add a health monitor
By default the health monitor is turned on and you also have the option to disable it, if required. At the command prompt, type:
add lb monitor
Example:
add lb monitor ips_tcp TCP -destIP 192.168.10.2 -destPort 80 -transparent YES
Bind the service to the health monitor
After configuring the health monitor, you must bind the service to the health monitor. At the command prompt, type:
bind service
Example:
bind service ips_svc -monitorName ips_tcp
Add Content Inspection action for service
After you enable the Content Inspection feature and then after add the inline profile and service, you must add the Content Inspection action for handling the request. Based on the content inspection action, the inline device can drop, reset, or block action after it has inspected the data.
At the command prompt, type:
add contentInspection action
add ContentInspection action < action_name > -type InlineINSPECTION -serverName Service_name/Vserver_name>
Example:
add ContentInspection action
Add content inspection policy for inspection
在您创建一个内容spection action, you must add Content Inspection policies to evaluate requests for inspection. The policy is based on a rule which consists of one or more expressions. The policy evaluates and selects the traffic for inspection based on the rule.
At the command prompt, type the following:
add contentInspection policy
Exampleadd contentInspection policy Inline_pol1 –rule true –action Inline_action
Add content switching or load balancing virtual server of type HTTP/SSL
To receive the web traffic, you must add a load balancing virtual server. Also you must enable the layer2 connection on the virtual server.
At the command prompt, type:
add lb vserver
Example:
add lb vserver HTTP_vserver HTTP 10.102.29.200 8080 –l2Conn ON
Bind Content Inspection policy to content switching virtual server or load balancing virtual server of type HTTP/SSL
You must bind the load balancing virtual server or content switching virtual server of type HTTP/SSL to the Content Inspection policy. At the command prompt, type the following:
bind lb vserver
Example:
bind lb vserver HTTP_vserver -policyName Inline_pol1 -priority 100 -type REQUEST
Scenario 2: Load balancing multiple inline devices using dedicated interfaces
If you are using two or more inline devices, you must load balance the devices using different content inspection services in a dedicated VLAN setup. In this case, the Citrix ADC appliance load balances the devices on top of sending a subset of traffic to each device through a dedicated interface. For basic configuration steps, refer to scenario 1.

Add content inspection profile1 for service1
Inline configurations for a Citrix ADC appliance can be specified in an entity called Content Inspection profile. The profile has a collection of device settings. The Content Inspection profile1 is created for inline service 1 and the communication is through 1/2 and 1/3 dedicated interfaces.
At the command prompt, type:
add contentInspection profile
Example:
add contentInspection profile Inline_profile1 -type InlineInspection -ingressinterface “1/2” -egressInterface “1/3”
Add content inspection profile2 for service2
The Content Inspection profile2 is added for service2 and the inline device communicates with the appliance through 1/4 and 1/5 dedicated interfaces. At the command prompt, type:
add contentInspection profile
Example:
add contentInspection profile Inline_profile2 -type InlineInspection -ingressinterface “1/4” -egressInterface “1/5”
Add service 1 for inline device 1
After you enable the Content Inspection feature and add the inline profile, you must add an inline service 1 for inline device 1 to be part of the load balancing setup. The service that you add, provides all the inline configuration details.
At the command prompt, type:
add service
Example:
add service Inline_service1 10.102.29.200 TCP 80 -contentInspectionProfileName Inline_profile1 -healthmonitor OFF -usip ON -useproxyport OFF
Add service 2 for inline device 2
After you enable the Content Inspection feature and add the inline profile, you must add an inline service 2 for inline device 2. The service that you add, provides all the inline configuration details.
At the command prompt, type:
add service
Example:
add service Inline_service1 10.29.20.205 TCP 80 -contentInspectionProfileName Inline_profile2 -healthmonitor OFF -usip ON -useproxyport OFF
Add load balancing virtual server
After you have added the inline profile and the services, you must add a load balancing virtual server for load balancing the services.
At the command prompt, type:
add lb vserver
Example:
add lb vserver lb-Inline_vserver TCP *
Bind service 1 to the load balancing virtual server
After you add the load balancing virtual server, now bind the load balancing virtual server to the first service.
At the command prompt, type:
bind lb vserver
Example:
bind lb vserver lb-Inline_vserver Inline_service1
Bind service 2 to the load balancing virtual server
After you add the load balancing virtual server, now bind the server to the second service.
At the command prompt, type:
bind lb vserver
Example:
bind lb vserver lb-Inline_vserver Inline_service2
Add content inspection action for the service
After you enable the Content Inspection feature, you must add the Content Inspection action for handling the inline request information. Based on the action selected, the inline device drops, resets, or blocks after it has examined the given subset of traffic.
At the command prompt, type:
add contentInspection action
add ContentInspection action < action_name > -type InlineINSPECTION -serverName Service_name/Vserver_name>
Example:
add ContentInspection action Inline_action -type InlineINSPECTION –serverName lb-Inline_vserver
Add content inspection policy for inspection
在您创建一个内容spection action, you must add Content Inspection policy to evaluate requests for service. The policy is based on a rule which consists of one or more expressions. The rule is associated to the Content Inspection action that is associated if a request matches the rule.
At the command prompt, type the following:
add contentInspection policy
Example:
add contentInspection policy Inline_pol1 –rule true –action Inline_action
Add content switching or load balancing virtual server of type HTTP/SSL
Add a content switching or load balancing virtual server to accept web traffic. Also you must enable the layer2 connection on the virtual server. For more information about load balancing, seeHow load balancing workstopic.
At the command prompt, type:
add lb vserver
Example:
add lb vserver http_vserver HTTP 10.102.29.200 8080 –l2Conn ON
Bind Content Inspection policy to load balancing virtual server of type HTTP/SSL
You must bind the content switching or load balancing virtual server of type HTTP/SSL to the Content Inspection policy.
At the command prompt, type the following:
bind lb vserver
Example:
bind lb vserver http_vserver -policyName Inline_pol1 -priority 100 -type REQUEST
Scenario 3: Load balancing multiple inline devices using shared interfaces
You can refer to this configuration, if you are using multiple inline devices and if you want to load balance the devices using different services in a shared VLAN interface.
This configuration using shared VLAN interfaces is similar to use case 2. For basic configuration, refer to scenario 2.

Bind VLAN A with sharing option enabled
At the command prompt, type the following:
bind vlan
Example:
bind vlan 100 –ifnum 1/2 tagged
Bind VLAN B with sharing option enabled
At the command prompt, type the following:
bind vlan
Example:
bind vlan 200 –ifnum 1/3 tagged
Bind VLAN C with sharing option enabled
At the command prompt, type the following:
bind vlan
Example:
bind vlan 300 –ifnum 1/2 tagged
Bind VLAN D with sharing option enabled
At the command prompt, type the following:
bind vlan
Example:
bind vlan 400 –ifnum 1/3 tagged
Add content inspection profile1 for service1
Inline configurations for a Citrix ADC appliance can be specified in an entity called Content Inspection profile. The profile has a collection of device settings. The Content Inspection profile1 is created for inline service 1 and the communication is through 1/2 and 1/3 dedicated interfaces.
At the command prompt, type:
add contentInspection profile
Example:
add contentInspection profile Inline_profile1 -type InlineInspection -ingressinterface “1/2” -egressInterface “1/3” –egressVlan 100 -ingressVlan 300
Add content inspection profile2 for service2
The Content Inspection profile2 is added for service2 and the inline device communicates with the appliance through 1/2 and 1/3 dedicated interfaces.
At the command prompt, type:
add contentInspection profile
Example:
add contentInspection profile Inline_profile2 -type InlineInspection -ingressinterface “1/2” -egressInterface “1/3” –egressVlan 200 -ingressVlan 400
配置使用Cit内联服务集成rix ADC GUI
- Log on to Citrix ADC appliance and navigate toConfigurationtab page.
- Navigate toSystem>Settings>Configure Modes.
- In theConfigure Modes页面,选择Mac Based Forwarding.
ClickOKandClose.

- Navigate toSystem>Settings>Configure Advanced Features.
- In theConfigure Advanced Feature页面,选择Content Inspection.
ClickOKandClose.

- Navigate toSecurity>Content Inspection>ContentInspection Profiles.
- In theContentInspection Profilespage, clickAdd.
In the克雷亚te ContentInspection Profilespage, set the following parameters.
- Profile Name. Name of the content inspection profile.
- Type. Select the profile type as inlineInspection.
- Egress Interface. Interface through which the appliance sends traffic from Citrix ADC to the Inline device.
- Ingress Interface. Interface through which the appliance receives traffic from Inline device to Citrix ADC.
- Egress VLAN. Interface VLAN ID through which the traffic is sent to the Inline device.
- Ingress VLAN. Interface VLAN ID through which the appliance receives traffic from Inline to Citrix ADC (if it is configured).

- Click克雷亚teandClose.
- Navigate toTraffic Management>Load Balancing>Servicesand clickAdd.
In theServicespage, set the following parameters:
- Service name. Name of the load balancing service.
- IP address. Use a dummy IP address. Note: Address should not be owned by any device.
- Protocol. Select protocol type as TCP.
- Port. Enter *
- Health Monitoring. Turn off this option and enable this only if you want to bind the service to TCP type monitor. If you want to bind monitor to service then TRANSPARENT option in monitor should be ON. See step 14 on how to add monitor and how to bind it to service.
- ClickOK.

In theSettingssection, edit the following and clickOK.
- Use Proxy Port: Turn it OFF
- Use Source IP Address: Turn it ON
- In theAdvanced Settingssection, clickProfiles.
Go toProfiles部分,并添加内联内容检验专业file and clickOK.

- Go toMonitorssection,Add Bindings>Select Monitor>Add.
- Name: Name of monitor
- Type: Select TCP type
- Destination IP, PORT: Destination IP address and Port.
- Transparent: Turn ON
Note: Monitor packets should flow through inline device to monitor inline device status.
Click克雷亚te.

- ClickDone.
- Navigate toTraffic Management>Load Balancing>Virtual Servers. Add a virtual server of type HTTP or SSL.
- After entering the server details, clickOKand againOK.
- In theTraffic Settingssection of Load Balancing Virtual Server, turn Layer 2 Parameters ON.
- In theAdvanced Settingssection, clickPolicies.
- Go thePoliciessection and click the “+” icon to configure content inspection policy.
- On theChoose Policy页面,选择Content Inspection. ClickContinue.
In thePolicy Bindingsection, clickAddto add a Content Inspection policy.

- In the克雷亚te ContentInspection Policypage, enter a name for the Inline content inspection policy.
- In theActionfield, clickAddto create an Inline content inspection action.
In the克雷亚te CI Actionpage, set the following parameters:
- Name. Name of the content inspection Inline policy.
- Type. Select the type as inlineInspection.
- Server. Select the server/service as Inline devices.
- If Server Down. Select an operation if server goes down.
- Request Time-out. Select a time-out value. You can use default values.
- Request Time-out Action. Select a time-out action. You can use default values.
Click克雷亚te.

- Click克雷亚te.
- In the克雷亚te CI Policypage, enter other details:
- ClickOKandClose.


