
PoC Guide: Automated Configuration Tool
Overview
TheAutomated Configuration toolfacilitates migrating and exporting configurations to theCitrix Desktops-as-a-Service(DaaS). This Proof of Concept guide illustrates the step by step instructions on how to use this tool.
Administrators can easily test and explore theCitrix DaaSfeatures and advantages, while simultaneously running existing On-Premises environments and even facilitate moves between cloud regions, back up existing configurations, and other use cases. TheAutomated Configuration download linkalso containsadditional informationanddetailed documentationon saiduse casesandcustomizations.
What is the Automated Configuration tool for Citrix Virtual Apps and Desktops?
This tool is designed to help automate the migration ofCVADconfiguration (policies, applications, catalogs, admin roles, scopes and others) from one or more On-Premises site(s) toCitrix DaaShosted on Citrix Cloud. It can also be used to migrate information betweendifferent Cloud regionsortenants.
The migration can be performed in stages by running the tool multiple times, allowing administrators to easily achieve the desired configuration state. There is a 2-minute video that provides aquick tour of the Automated Configuration tool:
Why use this tool?
IT Administrators in charge of large or complex environments often find migrations to be a tedious process. They frequently end up writing their own tools to accomplish this task successfully since it tends to be specific to their use cases.
Citrix wants to help ease this process by providing a tool that addresses use cases through automation. Administrators can easily test current configurations inCitrix Cloudand take advantage of the benefits offered byCitrix DaaSwhile keeping their current environments intact. Such benefits include reduced administrative overload when Citrix manages part of the back-end and control plane, automatic and customizableCitrix Cloudcomponent updates, and others.
How is this tool implemented?
Citrix uses industry standard configuration as code to provide a mechanism to help automate migration processes. This tool discovers and exports one or more on-premises sites asa collection of configuration files, which administrators can optionally edit. These files’ configuration can then be imported into Citrix DaaS.
This code is not limited to migrations, it is the future for creating configuration for Citrix sites, and as such, applicable formany different use cases. Disaster recovery, Development/Testing/Staging to Production site synchronization, Geographic (GEO) moves, and several other scenarios are supported. For administrators using public cloud providers, this can help create a combination of objects automatically (parallel to Microsoft Azure ARM templates and AWS CloudFormation).
The tool also allows administrators tomerge multiple on-premises sites into a single site, while avoiding name collisions. Administrators can control whether the On-Premises or Cloud controls resources. Files can now be placedin a secure network file sharethat requires authentication when using theSecurityFileFolderparameter which points to theCvadAcSecurity.ymlfile.
Pre-requisites
On-Premises environment
- Citrix Virtual Apps and Desktops (CVAD) On-Premises environment withat least one registered VDA.
- CVAD On-Premises environment running on one of the following versions: AnyLong Term Service Release (LTSR)versions with their latest CU (1912, 2203); Or one of the corresponding latest twoCurrent Releases (CR)versions (for example: 2112, 2206).
- The domain-joined machine where you plan on running theAutomated Configuration tool commandsmust be running.NET 4.7.2 version or higher.
- A machine with theCitrix PowerShell SDK, which is automatically installed on the DDC.Note:If running the tool on a different machine, it must be domain-joined andStudiomust have the correctPowerShell snap-insinstalled. This installer can be found on your corresponding versionsProduct ISO installation media, which can be obtained from theCitrix Downloads > Citrix Virtual Apps and Desktopswebsite.
- Download the Automated Configuration tool MSI from theOfficial Downloads website
Cloud-related components
Note:If migrating between cloud sites (cloud to cloud migration) refer to theOfficial Documentationfor detailed steps.
- ValidCitrix DaaSorWorkspace Premium Pluslicenses.
- Administrator must be able to log into theCloud Portaland obtain: Theresource location name,customer ID,client Secret(app IDandSecret Key)
- The existing Citrix CloudResource Locationhas at leastone Cloud Connector, which is marked as green (Healthy) and is part of the same domain as the On-Premises setup.Note:Citrix recommends havingtwo or more Cloud Connectors(for redundancy and High Availability). For information on how to set up your Cloud Connectors, refer tothis guide.
This proof of concept guide demonstrates how to
- Complete the On-Premises pre-requisites
- Export your On-Premises site configuration into YAML (.yml) files
- Complete the cloud pre-requisites
- Complete the requisites for importing site configuration when using different provisioning methods (Machine Creation Services (MCS) for both Pooled and Static Catalogs)
- Import your Site Configuration into Cloud (by editing the required files)
- Troubleshooting tips and where to find more information
Complete Pre-requisites for Exporting from on-premises site
These steps must be run in your DDC or the domain-joined machine where you want to run theAutomated Configurationtool.
- Download the latestAutomated Configuration tool MSIto yourOn-Premises DDCor a domain-joined machine.Note:See thePre-requisites sectionfor more details on how to run it from a different machine. The tool can be downloaded fromhere.Note:See thePre-requisites sectionfor more details on how to run it from a different machine.
- Run theMSIon yourOn-Premises DDC, by right-clicking on theAutoConfig_PowerShell_x64.msiinstaller and clicking onInstall.

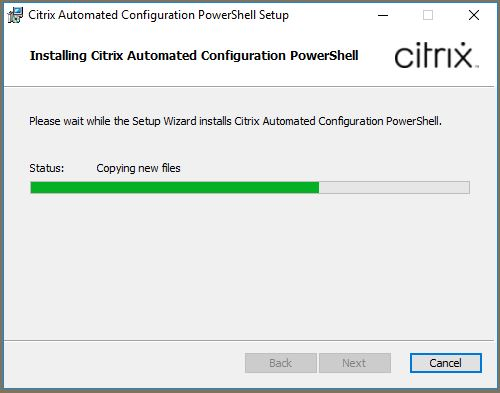
- Read theLicense Agreementand check the box if you accept the terms. Then clickInstall:

Files are copied and the progress bar continues moving until it finishes the install.
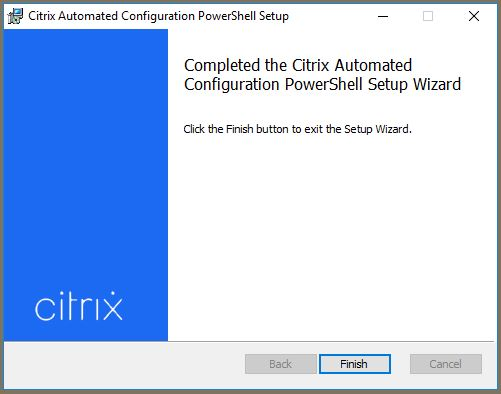
- After theMSIruns, a window indicating successful completion pops up. ClickFinishto close theMSI setupwindow.


- Note: Upon successful execution a desktop icon calledAuto Configis created. When launched, the corresponding folder structure located in
C:\Users\, is created. This tool is the one used on subsequent steps.\Documents\Citrix\AutoConfig
Export your On-Premises site configuration
Using anexportPowerShell command, you can export your existing On-Premises configuration and obtain the necessary.ymlfiles. These files are used to import your desired configuration intoCitrix Cloud.
- After running theMSIinstaller on the previous step, you get anAuto Configshortcut automatically created on the Desktop. Right-click this shortcut and clickRun as Administrator.
Run the
Export-CvadAcToFilecommand. This command exports policies, manually provisioned catalogs, and delivery groups. It also exports applications, application folders, icons, zone mappings, tags, admin roles and scopes, and other items.Note:ForMCSmachine catalogs and delivery groups, refer to the steps onRequisites for Importing Site Configuration using different Provisioning Methods sectionin this guide.
Once the tool finishes running, theOverall statusshows asTrueand the export process is completed (the output lines shown match the following illustration).Note:If there are any errors, diagnostic files are created in the action-specific subfolders
(Export, Import, Merge, Restore, Sync, Backup, Compare), which can be found under%HOMEPATH%\Documents\Citrix\AutoConfig. Refer to theTroubleshooting Tips sectionif you encounter any errors.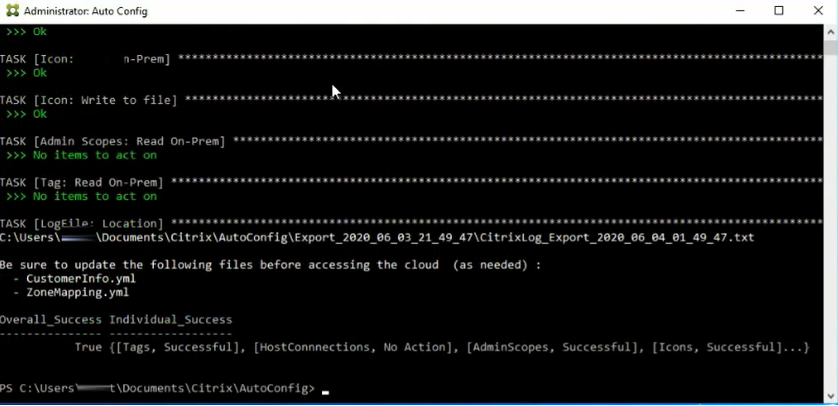
- The resulting.ymlfiles are now in the current users
Documents\Citrix\AutoConfigpath: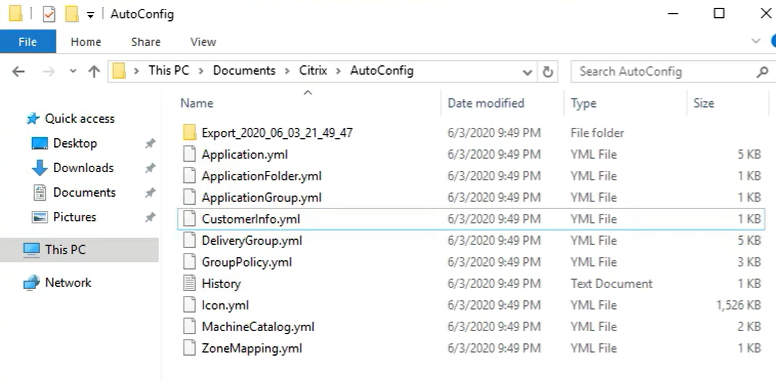


- Note:See the following image for an example of the contents on a.ymlfile (
Application.yml)

- Note:If necessary, copy the.ymlfiles to the machine you want to use to import settings to yourCitrix Cloudenvironment. Exporting and importing can be done from the same machine.
Complete Prerequisites in Cloud
Go to yourResource Locationand make sure yourCloud Connectorsare both showing green (Available).Note:If you need instructions on how to set up yourCloud Connectors, refer tothis guide.
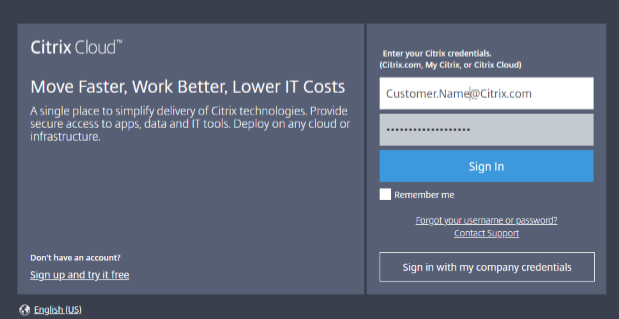
To verify the health status of yourCloud Connectors, first log in to yourcloud portalwith your Citrix administrator credentials (or your Azure AD credentials, when applicable).
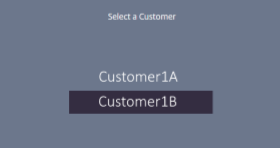
If you have more than oneOrganization ID(Org ID), select your corresponding tenant.
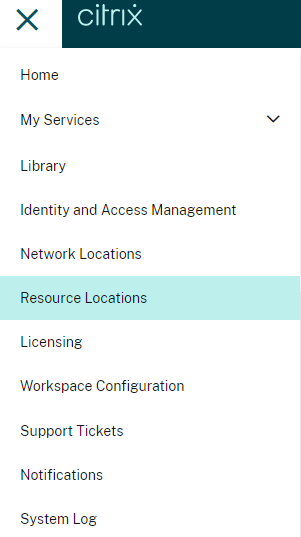
Upon logon, go to thehamburger menuon the top left corner and then clickResource Locations:
Access theCloud Connector(s)tile under yourResource Location.
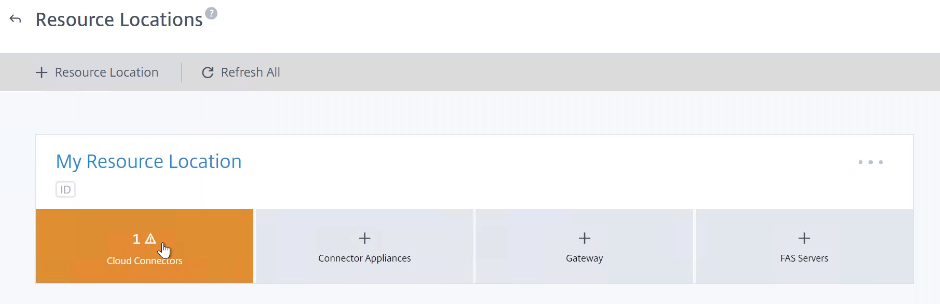


- Note:TheCloud Connector(s)must show green, indicating a Healthy status, as seen on the following image. Citrix recommends having more than oneCloud ConnectorperResource Location, for redundancy purposes.

Requisites for Importing Site Configuration using different Provisioning Methods
Dealing with Provisioning Services (PVS) Machine Catalogs, Delivery and Application Groups and Policies
No extra steps are required to import yourPVS Catalogsand their corresponding applications at this time. Follow the steps mentioned on theImport your Site Configuration into Cloudsection in this guide.
Dealing with Machine Creation Services (MCS): Pooled VDI multi-session (Random) and RDS Machine Catalogs
Note:一个单独的部分可以与指示for Static assigned virtual machines. Refer to the steps mentioned on theMCS Static Assigned VDIssection in this guide.
The import and export commands are supported for this task now. Both the golden image and the configuration in Catalogs withUser data: Discardcan be migrated. However the virtual machines in these catalogs do not get migrated, since the site you are importing from is responsible for maintaining the life cycle of the virtual machine.
When machines are turned on, their state might change, affecting import data for the virtual machines synchronization. Therefore when migrating these catalogs using the tool, it creates a catalog metadata and initiates master image creation. However zero machines are imported.
Important Considerations:
- The MCS catalog import process can take a couple of hours based on the size of the master image. Therefore the import command within the tool only starts the MCS catalog creation and does not wait for it to finish.
- After the import has completed, the catalog creation progress can be monitored via Studio in the cloud deployment.
- Once the master image is created you can provision machines. Consider your hypervisor’s existing capacity, since you have consumption from your on-premises usage.
- All other objects (including the Delivery Group, applications, policies, and everything that uses the catalog) can be imported, without having to wait for the master image creation. The same commands available within the tool can be used to migrate catalogs and all other objects.
- When the catalog has finished creating, machines can be added to the imported catalog, and then users can launch their resources.
Note:After these considerations, followImport your Site Configuration into Cloud sectionin this guide to merge your configuration as needed.
Dealing with Machine Creation Services (MCS): Static Assigned Machines
Note:一个单独的部分可以与指示for Pooled and RDS Machines. Refer to the steps mentioned on theMCS Pooled VDI and RDS Machines
The import and export commands are supported for this task now. This process imports some low-level details which are stored in the database soit needs to be run from a machine with database access. The tool import process migrates the configuration, master image and the machines as well. It is a quick operation since no images are created.
Important Considerations:
- The VDAsneedto be pointed to the Cloud Connectors for them to register withCitrix Cloud.
- Refer to theActivating sitesdocumentation to activate your Cloud site and thus control reboot schedule, power management, and others, viaCitrix Cloud.
- Once the migration is completed, if you want to delete the corresponding catalog from youron-premises site, youmustselect the option toleave VM and AD account. Otherwise both records will be deleted and the Cloud site left pointing to the deleted virtual machine.
Note:After these considerations, followImport your Site Configuration into Cloud sectionin this guide to merge your configuration as needed.
Import your Site Configuration into Cloud
During this step, you obtain thecustomer connection details, manually create yourZone mappings,and导入配置to your Cloud tenant.Note:ForMCS, first follow the corresponding subsections under theImport your Site Configuration into Cloud sectionin this guide.
Obtaining Customer Connection Details
Administrators must edit theCustomerInfo.ymlfile and add the correspondingCustomerName,CustomerID,andSecretKeyvalues to it. These values can be obtained and generated from theCloud portal, as shown in the following steps.
First, open your
CustomerInfo.ymlfile using a text editor application, such asNotepad. The following screenshot shows theCustomerInfo.ymlfile values that must be edited (underlined in red):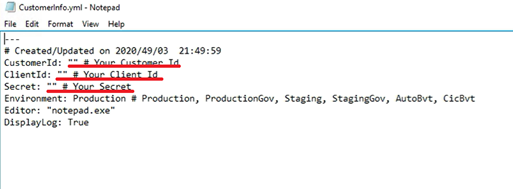
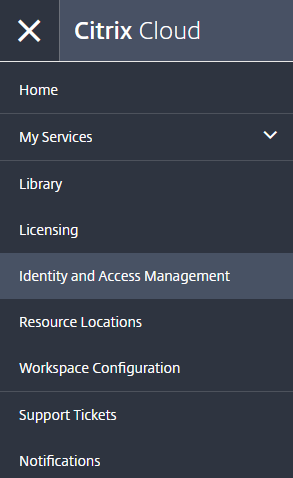
On yourCloud portalclick thehamburger menuagain and go toIdentity and Access Management:
Go to theAPI Accesstab and copy theCustomer IDvalue, which can be found next to the
customer IDtext as seen on the following screenshot (red rectangle):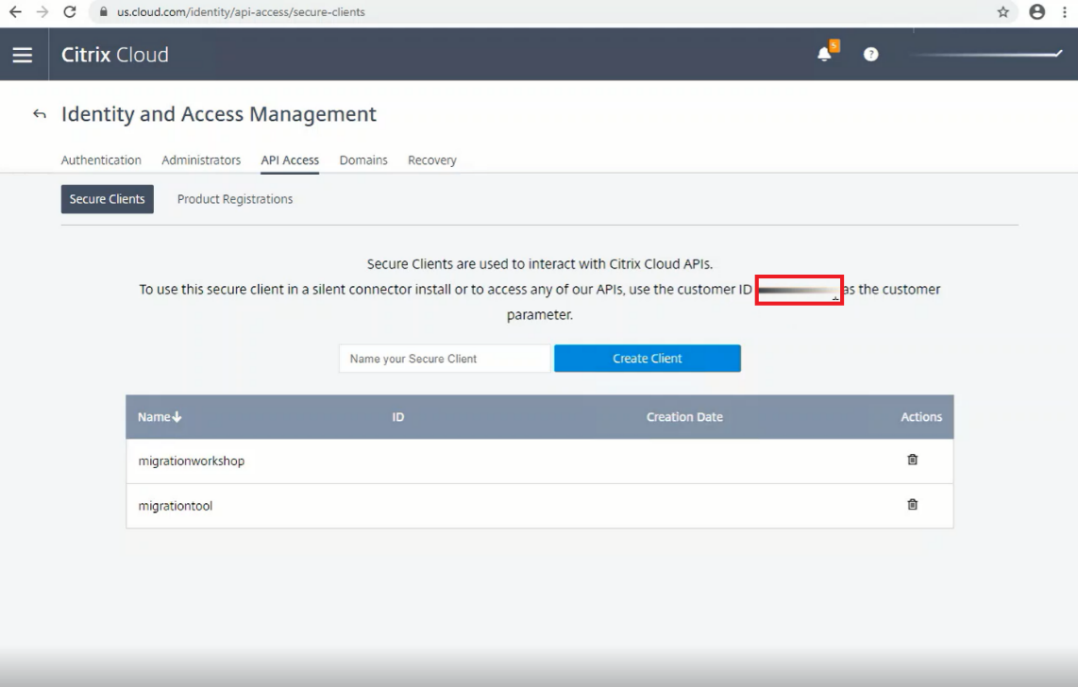
Paste the retrieved valuebetween the quotesthat follow theCustomerId fieldin your
CustomerInfo.ymlfile, between theââ(quotes):
Back on yourCloud portal,去Identity and Access Managementportal andAPI Accesstab. Enter the name you want to identify this API key with on theName your Secure Clientbox. Then click theCreate Clientbutton.Note:This action generates the
Client IDand theSecret Key.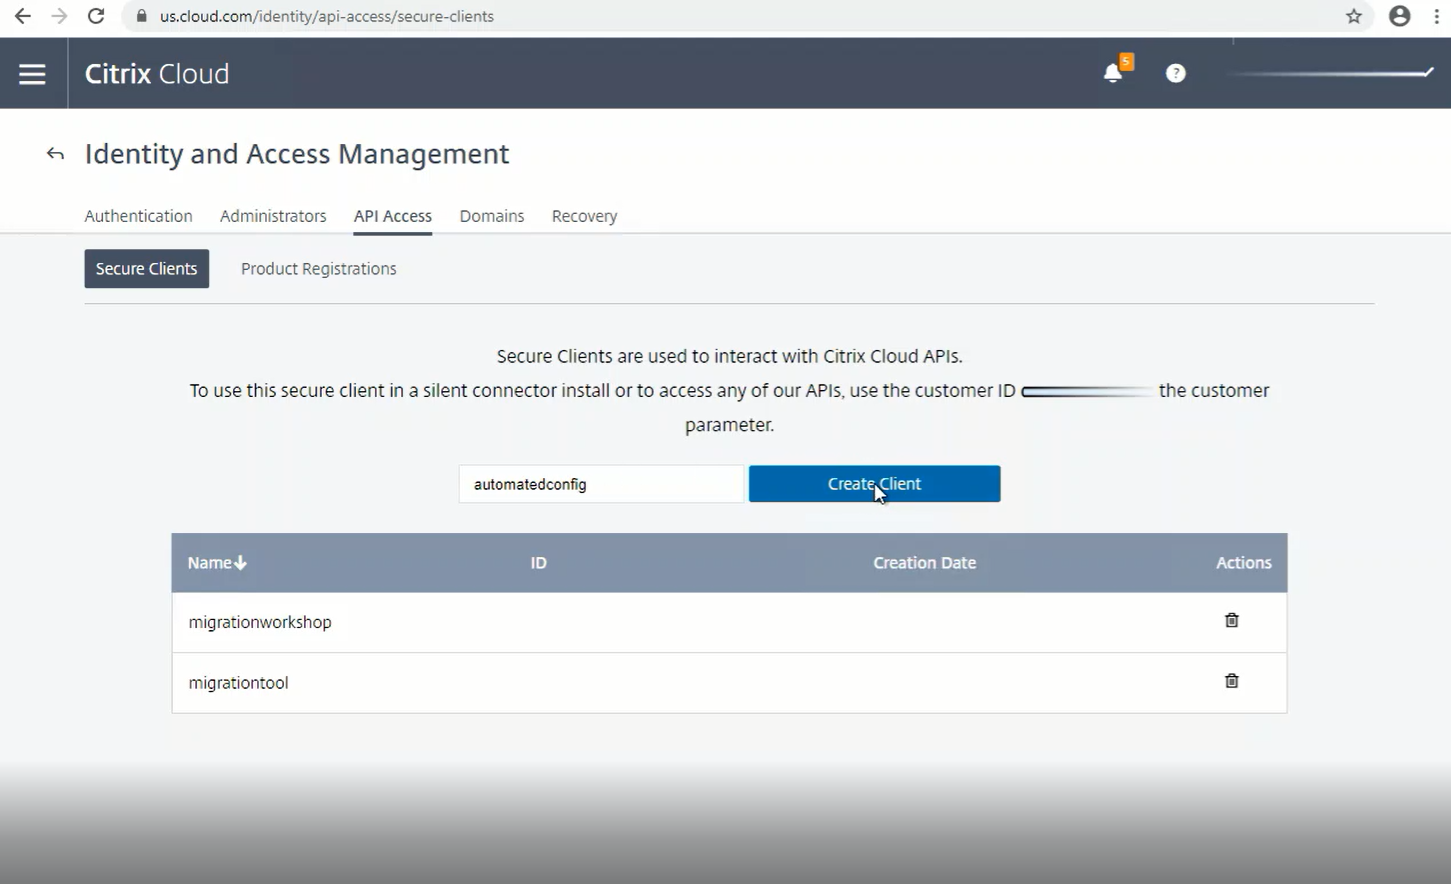
Copy the
IDand theSecretvalues, one by one (paste them on theCustomerInfo.ymlfile as shown in the following step). Then clickDownloadto save the file for later reference.
Paste the
IDandSecretvalues onto the corresponding fields in theCustomerInfo.ymlfile: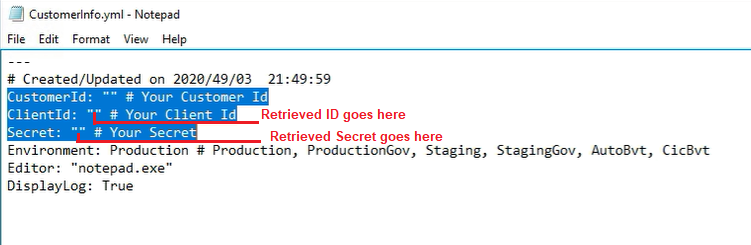


手动update the Zone Mapping file (ZoneMapping.yml)
On-Premises Zonescannot be automatically migrated to acloud Resource Location, so they must be mapped using theZoneMapping.ymlfile.Note:Migration failures occur if the zone is not mapped with a homonymous resource location (a Resource Location with theexact same name).
Back in the same directory where your.ymlfiles reside
(Documents\Citrix\AutoConfig), open up theZoneMapping.ymlusingNotepador your preferred text editor.Note:ThePrimaryvalue must be replaced with the name of your correspondingZoneyou want to migrate objects from (in your On-Premises environment).
You can find this name under yourOn-Premises Citrix Studio console > Configuration > Zones.Note:if your Zone is named
Primaryin your On-Premises environment, this value on theZoneMapping.ymlfile doesn’t need to be changed: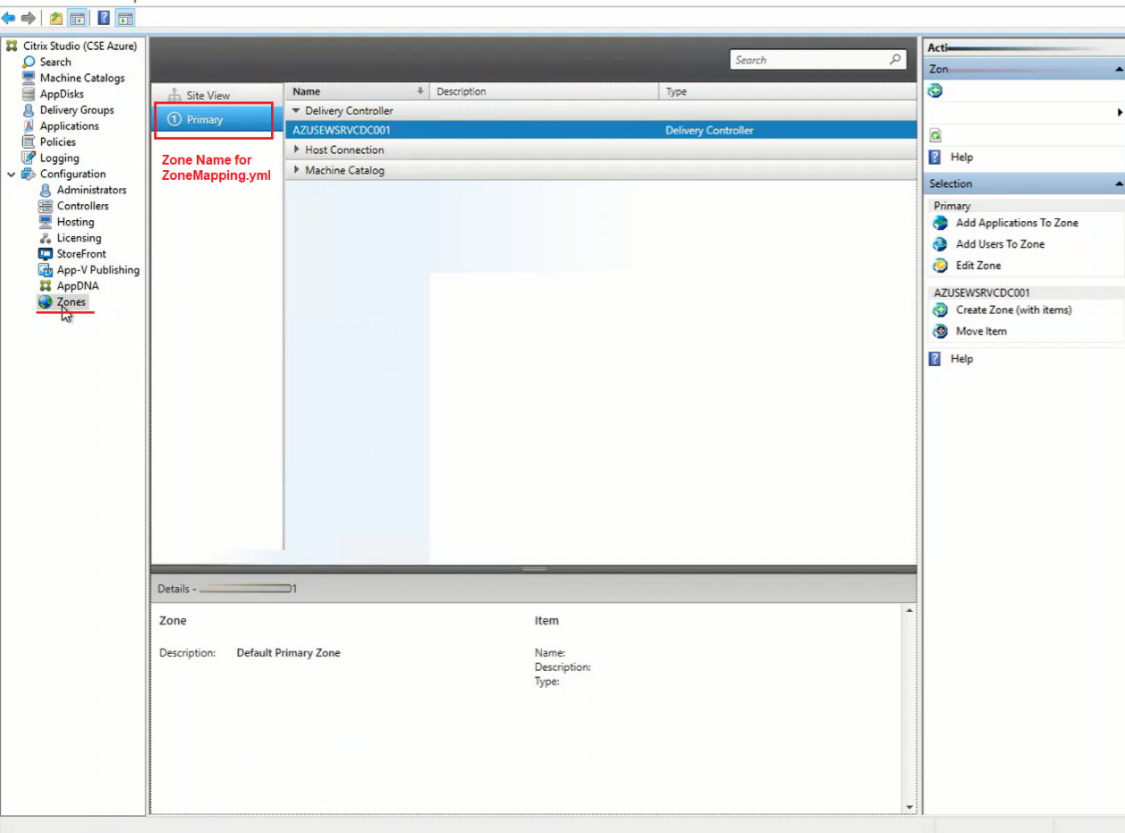
Still on the
ZoneMapping.ymlfile, theName_Of_Your_Resource_Zonevalue must be replaced with yourCloud Resource Location name. This value can be found on yourcloud portalunder the Hamburger menu >Resource Locations: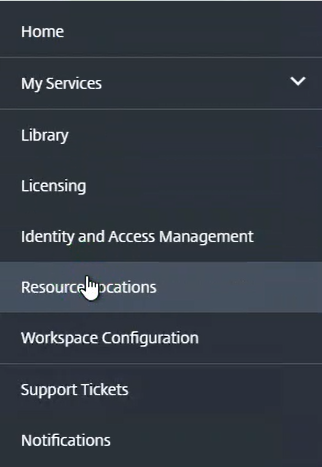
Copy yourResource Location name(Shown as
My Resource Locationon the following screenshot):
Paste this value on the
ZoneMapping.ymlfile instead of theName_Of_Your_Resouce_Zonevalue: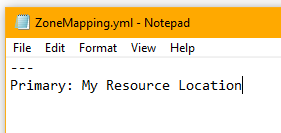


- Note:Multiple Zones in your On-Premises environment can also map toone Resource Locationin the cloud. However there always must be one row in the file foreach zonein theOn-Premises environment. Formultiple zones on-premisesandone Resource Location, the format on this file would look as follows:

When mappingZonesto differentResource locations, the file must look like this instead:

手动update the CvadAcSecurity.yml file
Host Connectionsand their associated hypervisors can be migrated to Citrix DaaS. Adding theHost Connectionsrequires security information for the specific hypervisor. This information needs to manually added into theCvadAcSecurity.ymlfile.NoteFor this example we are using Citrix Hypervisor. For information on the security information required for other hypervisor types, visit theCitrix DaaSproduct documentation site.
Back in the same directory where your.ymlfiles reside
(Documents\Citrix\AutoConfig), open up theCvadAcSecurity.ymlusingNotepador your preferred text editor.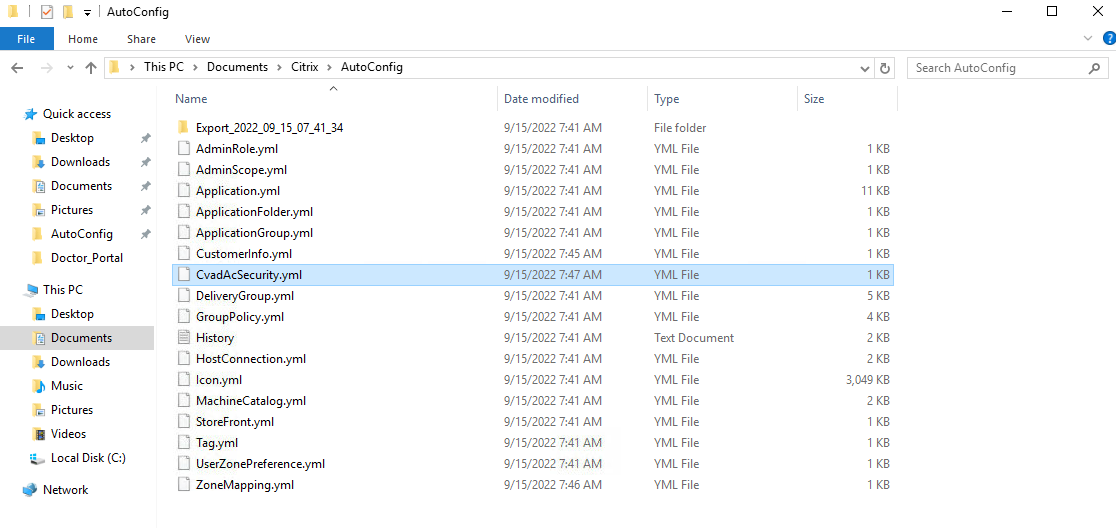
In the
CvadAcSecurity.ymlfile, enter theusernameandpasswordfor your hypervisor connection, thenSavethe file.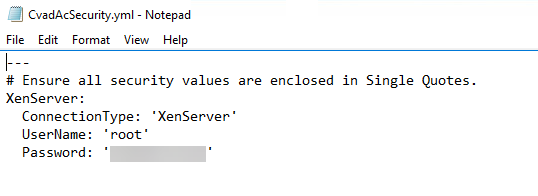


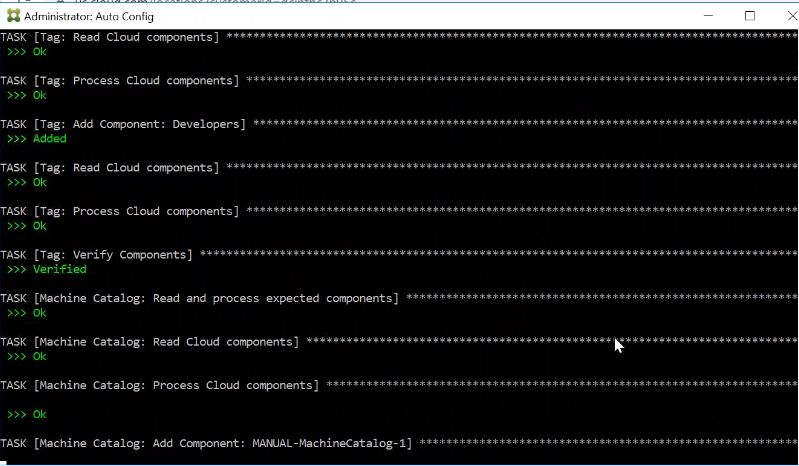
Merging configuration
Back on theMigration tool PowerShell console, run the following command:
Merge-CvadAcToSiteto merge the existing Cloud configuration (if any exists) with the configuration exported from the On-Premises site.
当每个任务成功运行,输出看起来green as.ymlfiles are imported and the corresponding components are added to the cloud site:
The resulting files show in the following directory:
\Documents\Citrix\AutoConfig\Import_ 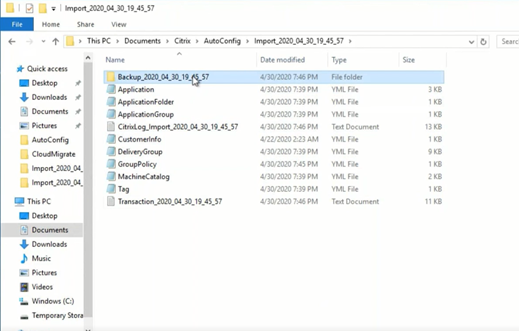
On this same folder, you can find a
Backup_YYYY_MM_DD_HH_mm_ssfolder.Note:Copy this folder somewhere safe as it is a backup of the configuration.The
Backupfolder contains the following files, which are helpful for reverting changes, if needed: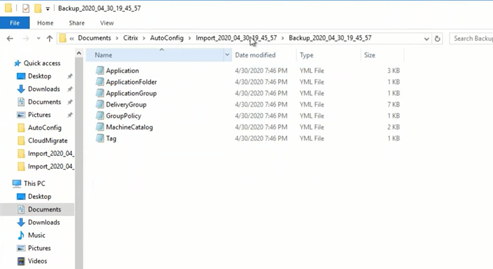


Verify configuration created in Cloud Studio
Access your Citrix DaaSManagetab via theCloud Console>My Services > Citrix DaaS > Manage tab).
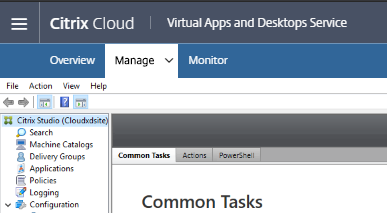
Refresh to make sure theMachine catalogs,Delivery groups,policies,tags,andapplicationsare now showing as expected.Note:根据你进口什么,结果各不相同they are specific to your own unique configuration. Revieweach sectionto make sure the expected items are listed.

- Machine Catalogs list example:

If everything looks as expected, your Citrix DaaS migration is complete.
Migrating Cloud environment across Resource Locations
For guidance on how to migrate across Cloud regions or DaaS environments, refer to the Citrix DaaS Migrating from Cloud to clouddocumentation.
Troubleshooting Tips
General information for troubleshooting:
- Refer to theAutomated Configuration Tool Troubleshooting FAQ article.
- Prior to opening support ticket with Citrix, collect all log and
*.ymlfiles into a single zip by runningNew-CvadAcZipInfoForSupport.No customer security information is included.Forward the zip file at the following location%HOMEPATH%\Documents\Citrix\AutoConfig\CvadAcSupport_yyyy_mm_dd_hh_mm_ss.zipNew-CvadAcZipInfoForSupport. - Running any cmdlet creates alog fileand an entry in themaster history log file. The entries contain the date, operation, result, backup, and log file locations of the execution. This log provides potential solutions and fixes to common errors.
- Themaster history logis located in
%HOMEPATH%\Documents\Citrix\AutoConfig, in the file namedHistory.Log.* All operation log files are placed in abackup folder. - All log file names begin with
CitrixLog, then show theauto-configoperation and thedateandtimestampof the cmdlet execution. - Logsdo notauto-delete.
- Console logging can be suppressed by using the
-quietparameter
For more information:
You can also reach out via theSupport Forum
Download new versions from the directDownloads website link
Refer to the Citrix DaaSMigrate to cloudsection for more information and theOfficial Documentation.
If after consulting the information listed previously you still need assistance, get in touch with your Citrix representatives, Customer Success Manager, or Support.