Configure SAML single sign-on
在达成提供单点登录功能ications that are hosted on the service provider, you can configure SAML single sign-on on the SAML SP.
Configuring SAML single sign-on by using the command line interface
Configure the SAML SSO profile.
Example
In the following command,Exampleis the load balancing virtual server that has a web link from the SharePoint portal. Nssp.example.com is the Traffic Management virtual server that is load balancing the SharePoint server.
add tm samlSSOProfile tm-saml-sso -samlSigningCertName nssp -assertionConsumerServiceURL "https://nssp2.example.com/cgi/samlauth" -relaystateRule "\\"https://nssp2.example.com/samlsso.html\\"" -sendPassword ON -samlIssuerName nssp.example.comAssociate the SAML SSO profile with the traffic action.
Example
The following command enables SSO and binds the SAML SSO profile created above to a traffic action.
add tm trafficAction html_act -SSO ON -samlSSOProfile tm-saml-ssoConfigure the traffic policy that specifies when the action must be executed.
Example
The following command associates the traffic action with a traffic policy.
add tm trafficPolicy html_pol "HTTP.REQ.URL.CONTAINS(\\"abc.html\\")" html_actBind the traffic policy created previously to a traffic management virtual server (load balancing or content switching). Alternatively, the traffic policy can be associated globally.
Note
This traffic management virtual server must be associated with the relevant authentication virtual server that is associated with the SAML action.
bind lb vserver lb1_ssl -policyName html_pol -priority 100 -gotoPriorityExpression END -type REQUEST
Configuring SAML single sign-on by using the GUI
To configure SAML single sign-on you need to define the SAML SSO profile, the traffic profile, and the traffic policy and bind the traffic policy to a traffic management virtual server or globally to the Citrix ADC appliance.
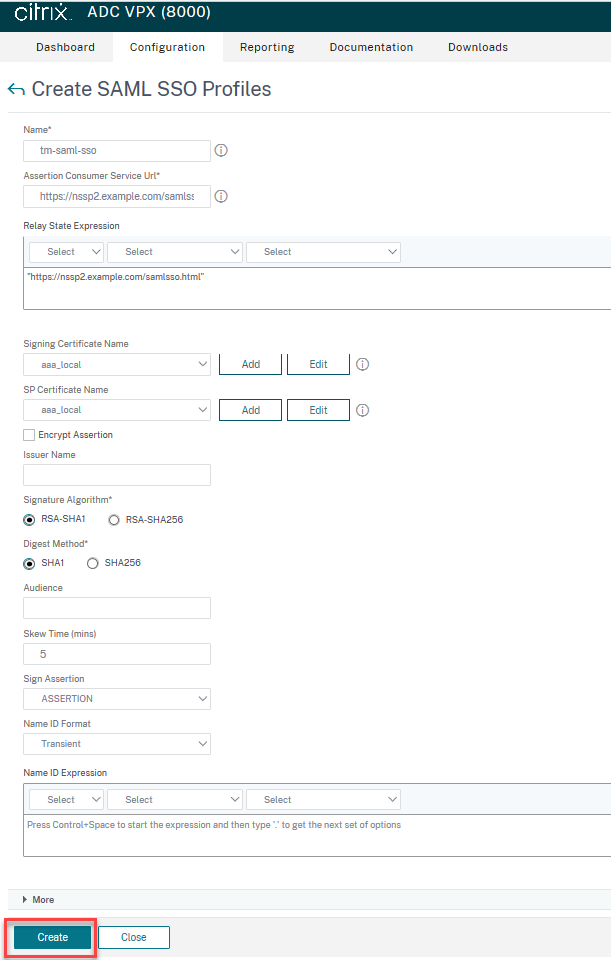
Navigate toSecurity > AAA-Application Traffic > Policies > Traffic > SAML SSO Profilesand clickAdd.
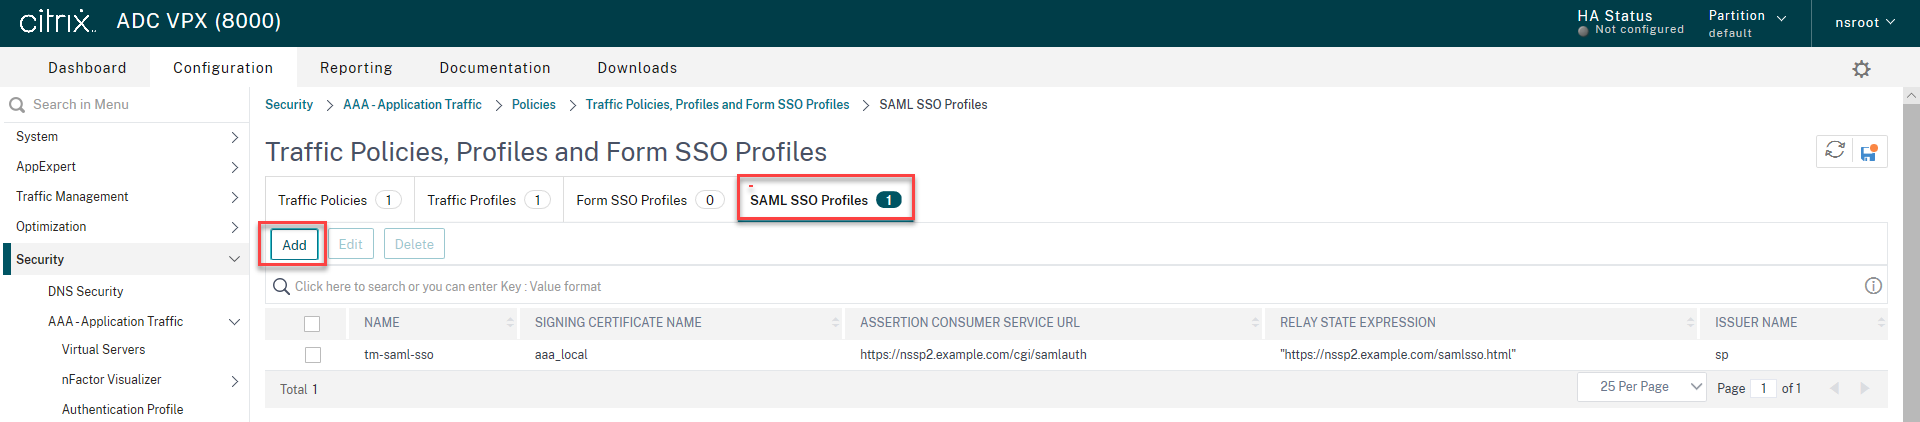
On theCreate SAML SSO Profilespage, enter values for the following fields and clickCreate.
- Name - Name for the SAML SSO Profile
- Assertion Consumer Service Url - URL to which the assertion is to be sent
- Signing Certificate Name - Name of the SSL certificate that is used to Sign Assertion
- SP Certificate Name - Name of the SSL certificate of a peer/receiving party using which Assertion is encrypted
- Issuer Name - The name to be used in requests sent from Citrix ADC to IdP to uniquely identify Citrix ADC
- Signature Algorithm - Algorithm to be used to sign/verify SAML transactions
- Digest Method - Algorithm to be used to compute/verify digest for SAML transactions
- Audience - Audience for which an assertion sent by IdP is applicable. This is typically an entity name or url that represents a ServiceProvider
- Skew Time (mins) - The number of minutes on either side of current time that the assertion would be valid
- Sign Assertion - Option to sign portions of assertion when Citrix ADC IDP sends one. Based on the user selection, either Assertion or Response or Both or none can be signed.
- Name ID Format - Format of Name Identifier sent in Assertion
- Name ID Expression - Expression that will be evaluated to obtain NameIdentifier to be sent in assertion
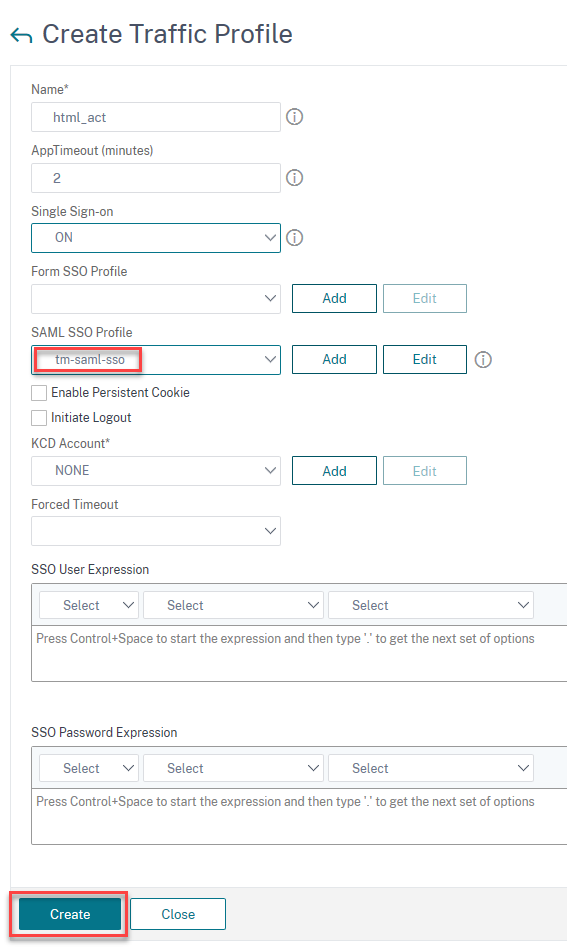
Navigate toSecurity > AAA-Application Traffic > Policies>Traffic > Traffic Profilesand clickAdd.
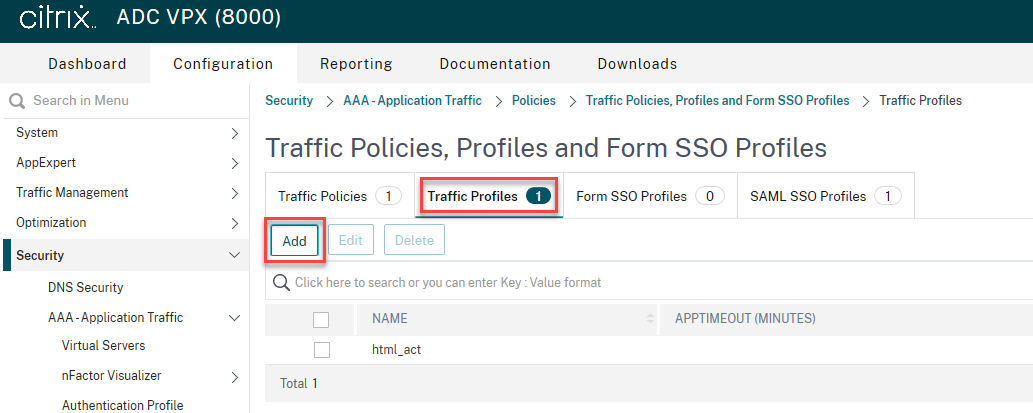
On theCreate Traffic Profilepage, enter values for the following fields, and clickCreate.
- Name - Name for the traffic action.
- AppTimeout (minutes) - Time interval, in minutes, of user inactivity after which the connection is closed.
- Single Sign-on - Select ON
- SAML SSO Profile - Select the created SAML SSSO Profile
- KCD Account - Kerberos constrained delegation account name
- SSO User Expression - Expression that will be evaluated to obtain user name for SingleSignOn
- SSO Password Expression - Expression that will be evaluated to obtain password for SingleSignOn
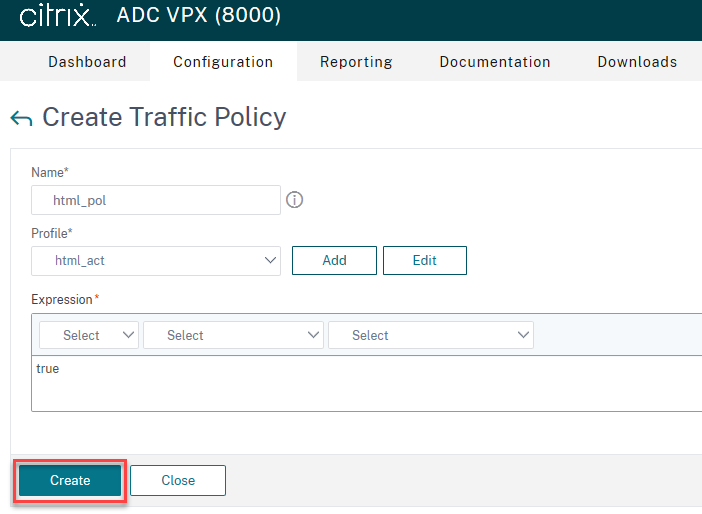
Navigate toSecurity > AAA-Application Traffic > Policies > Traffic > Traffic Policiesand clickAdd.
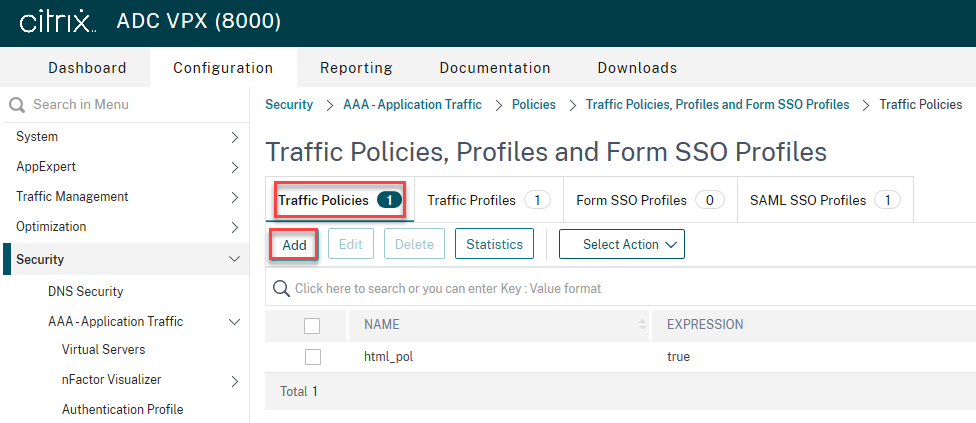
On theCreate Traffic policypage, enter values for the following, and clickCreate.
- Name – Name of the traffic policy to be created
- Profile – Select the created Traffic profile
- Expression – Default syntax expression that the policy uses to respond to specific request. For example, true.
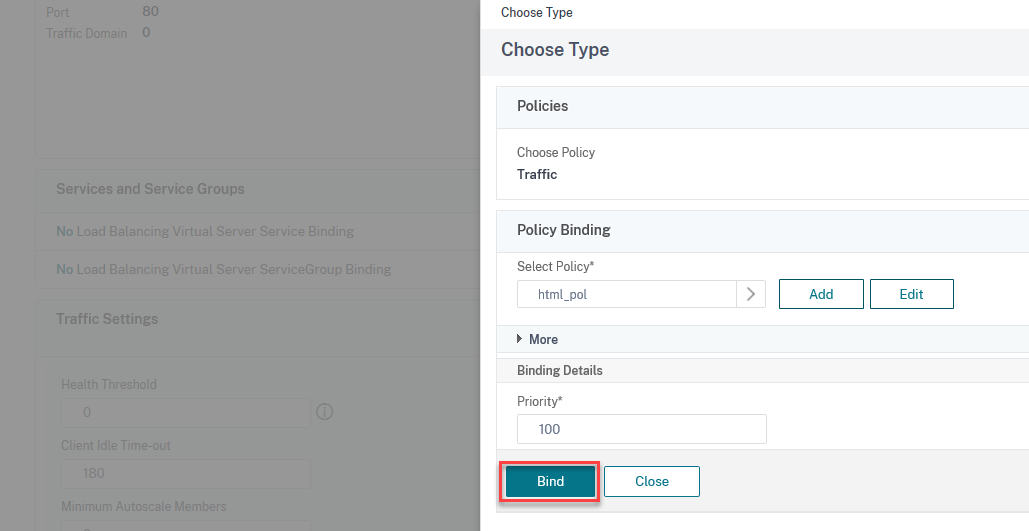
To bind the traffic policy to a traffic management virtual server, select a virtual server.
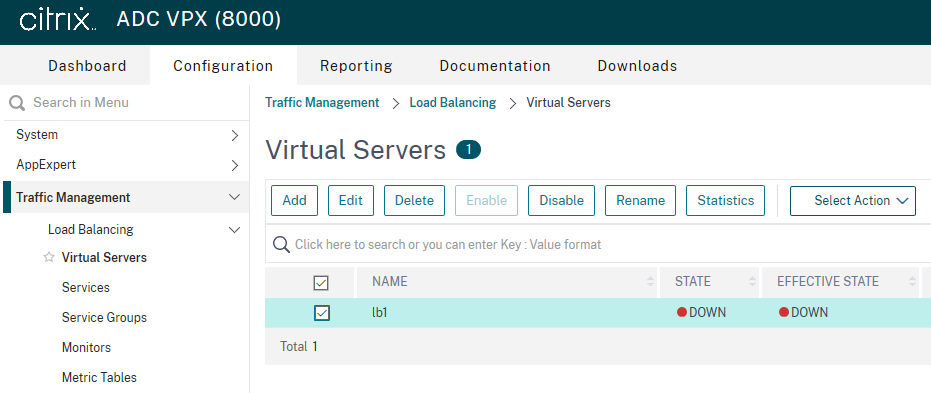
ClickPolicies.
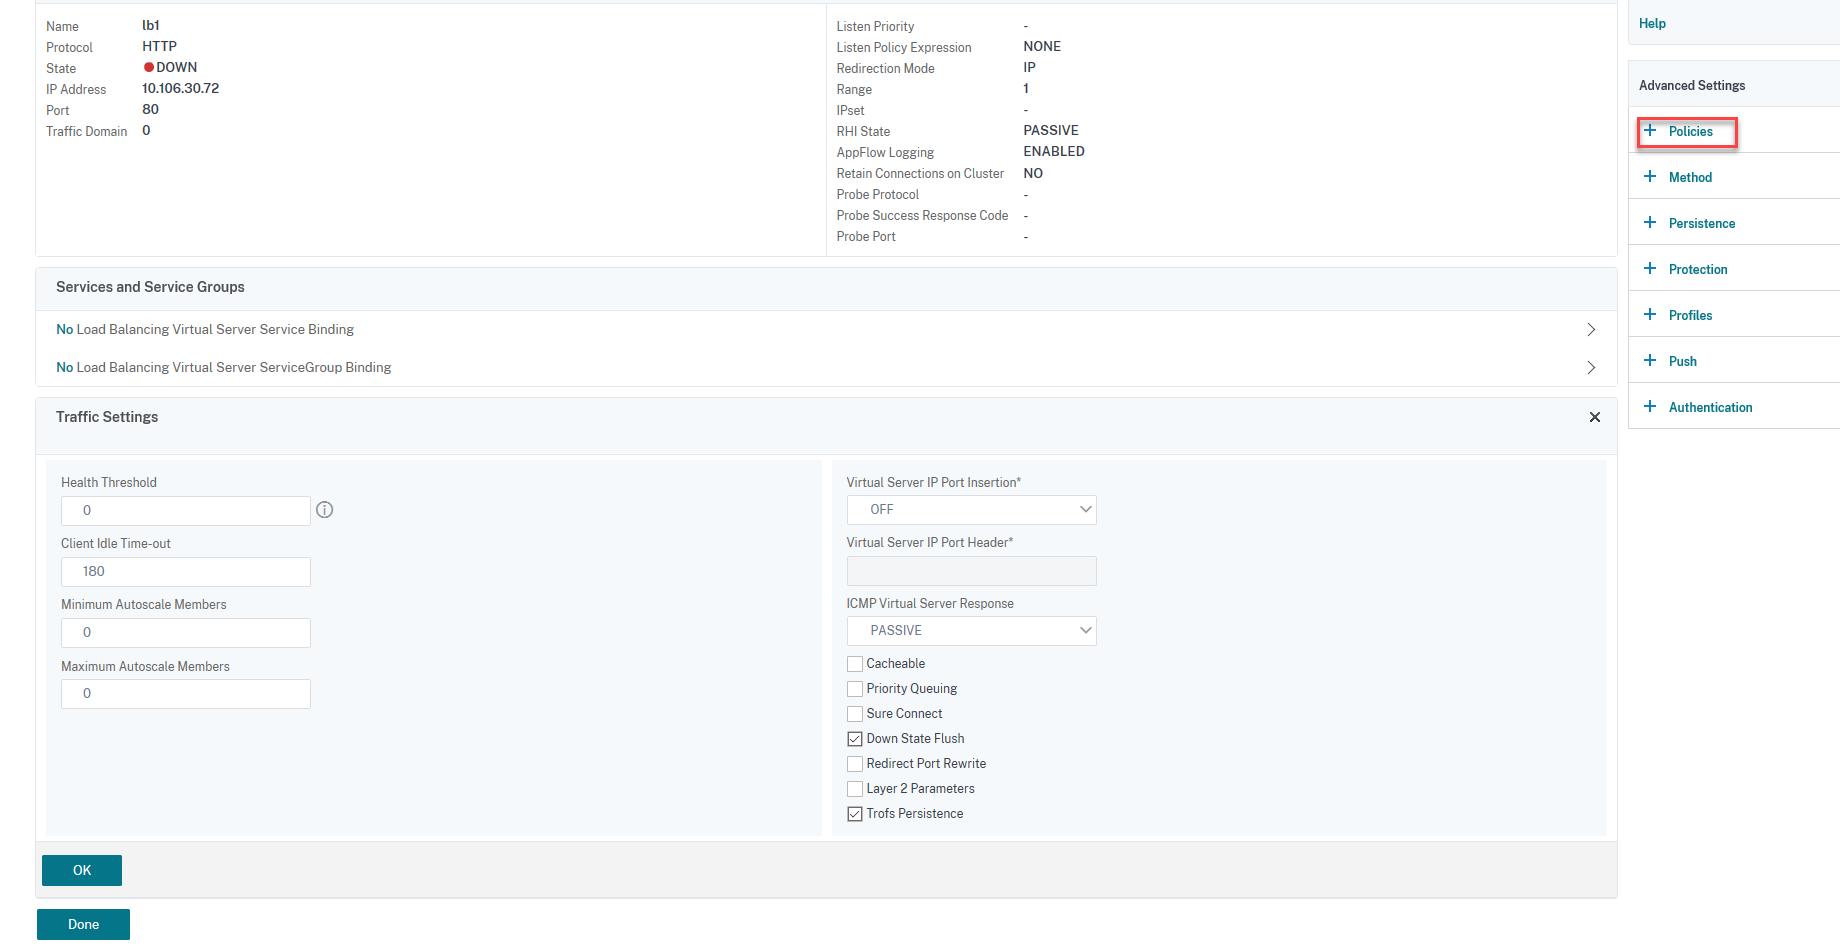
SelectTrafficin theChoose Policyfield and selectRequestin theChoose Typefield, and clickContinue.
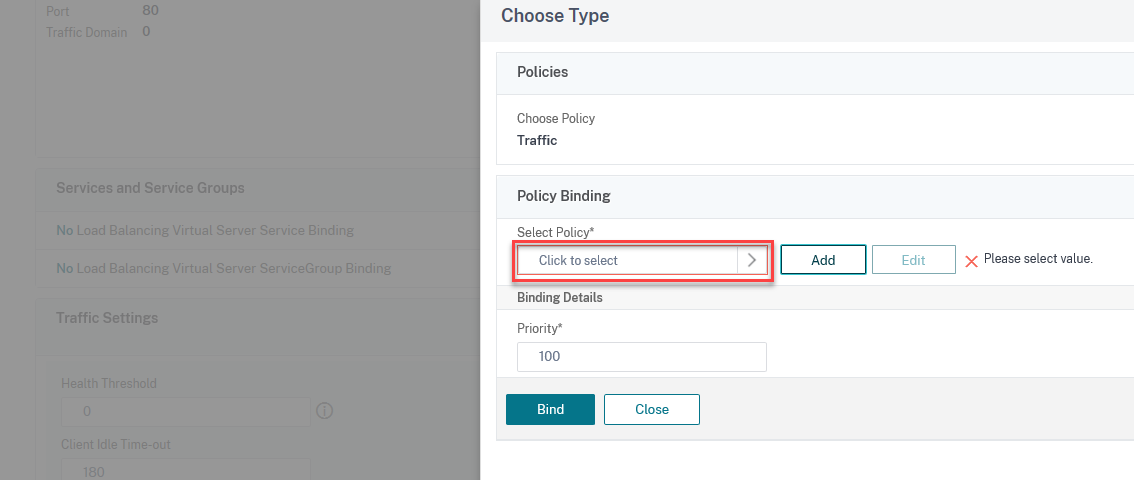
ClickSelect.
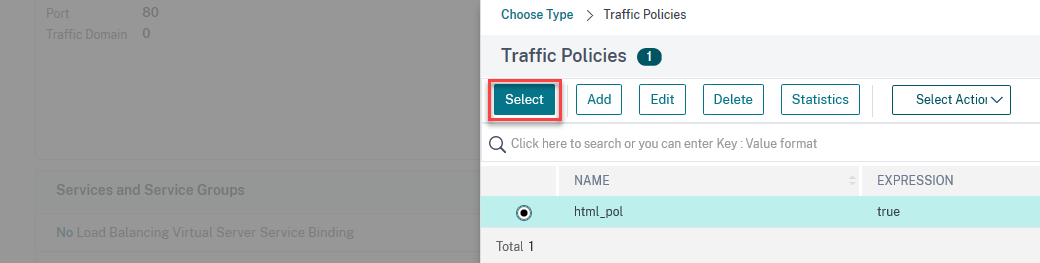
ClickBindto bind the traffic policy to the virtual server.