
Configuring nFactor authentication
You can configure multiple authentication factors using the nFactor configuration. The nFactor configuration is supported only in Citrix ADC Advanced and Premium editions.
方法配置nFactor
You can configure nFactor authentication by one of the following methods:
nFactor Visualizer:nFactor visualizer enables you to easily link factors or policy labels together in a single pane and also change the linking of the factors in the same pane. You can create an nFactor flow using the visualizer and bind that flow to an authentication, authorization, and auditing virtual server. For details about nFactor Visualizer and an example nFactor configuration using the visualizer, seenFactor Visualizer for simplified configuration.
Citrix ADC GUI:For details, see sectionConfiguration elements involved in nFactor configuration.
Citrix ADC CLI:For a sample snippet on nFactor configuration using the Citrix ADC CLI, seeSample snippet on nFactor configuration by using the Citrix ADC CLI.
Important:This topic contains details about configuring nFactor by using the Citrix ADC GUI.
Configuration elements involved in nFactor configuration
The following elements are involved in configuring nFactor. For detailed steps, refer to the appropriate sections in this topic.
| Configuration element | Tasks to be performed |
|---|---|
| AAA virtual server | Create a AAA virtual server |
| Bind portal theme to AAA virtual server | |
| Enable client certificate authentication | |
| 登录schema | Configure a login schema profile |
| Create and bind a login schema policy | |
| Advanced authentication policies | Create advanced authentication policies |
| Bind first factor advanced authentication policy to Citrix ADC AAA virtual server | |
| 使用提取的LDAP组选择下一个authentication Factor | |
| Authentication policy label | Create authentication policy label |
| Bind authentication policy label | |
| nFactor for Citrix Gateway | Create authentication profile to link a Citrix ADC AAA virtual server with Citrix Gateway virtual server |
| Configure SSL parameters and CA certificate for Citrix Gateway | |
| Configure Citrix Gateway traffic policy for nFactor single sign-on to StoreFront |
nFactor如何工作s
When a user connects to the authentication, authorization, and auditing or Citrix Gateway virtual server, the sequence of events that occur are as follows:
If forms-based authentication is used, the login schema bound to the authentication, authorization, and auditing virtual server is displayed.
- Advanced authentication policies bound to the authentication, authorization, and auditing virtual server are evaluated.
- If the advanced authentication policy succeeds, and if the next factor (authentication policy label) is configured, the next factor is evaluated. If Next Factor is not configured, then authentication is complete and successful.
- If the advanced authentication policy fails, and if Goto Expression is set to Next, then the next bound advanced authentication policy is evaluated. If none of the advanced authentication policies succeed, then authentication fails.
- If the next factor authentication policy label has a Login Schema bound to it, it is displayed to the user.
- The advanced authentication policies bound to the next factor authentication policy label are evaluated.
- If the Advanced authentication policy succeeds, and if the next factor (authentication policy label) is configured, the next factor is evaluated.
- If Next Factor is not configured, then authentication is complete and successful.
If the Advanced authentication policy fails, and if Goto Expression is Next, then the next bound advanced authentication policy is evaluated.
- If the policies succeed, then authentication fails.
Authentication, authorization, and auditing virtual server
To use nFactor with Citrix Gateway, you first configure it on an authentication, authorization, and auditing virtual server. Then you later link the authentication, authorization, and auditing virtual server to the Citrix Gateway virtual server.
Create authentication, authorization, and auditing Virtual Server
If the Authentication, authorization, and auditing feature is not already enabled, navigate to,Security > AAA – Application Traffic, and right-click to enable the feature.

Navigate toConfiguration > Security > AAA - Application Traffic > Virtual Servers.

ClickAddto create an authentication virtual server.

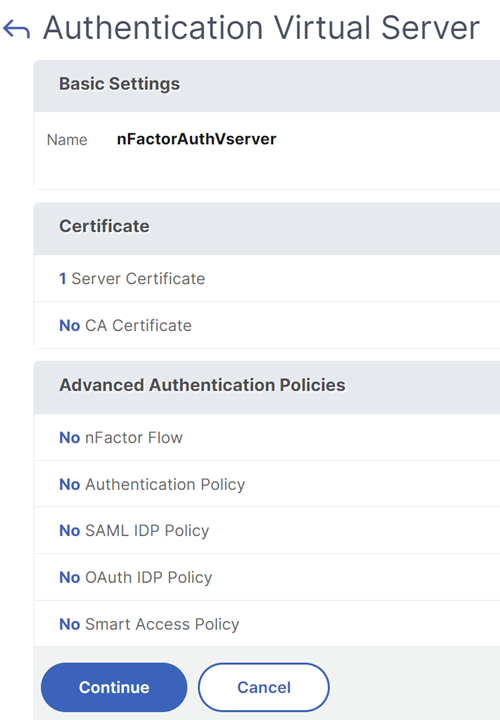
Enter the following information and clickOK.
Parameter name Parameter Description Name Name for the authentication, authorization, and auditing virtual server. IP address Type Change the IP address Type toNon Addressableif this virtual server is used only for Citrix Gateway. 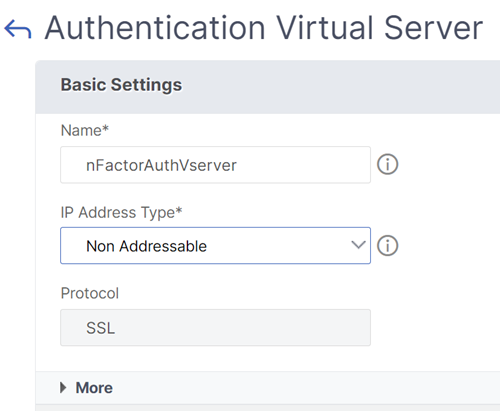
Under Certificate, selectNo Server Certificate.
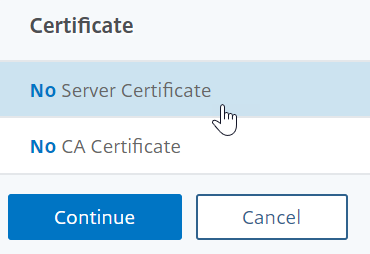
Click the text,Click to selectto select the server certificate.

Click the radio button next to a certificate for the authentication, authorization, and auditing Virtual Server, and clickSelect. The chosen certificate doesn’t matter because this server is not directly accessible.
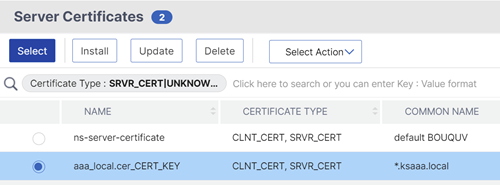
ClickBind.

ClickContinueto close theCertificatesection.
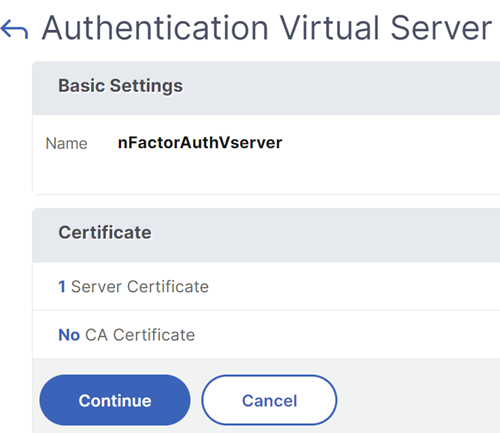
ClickContinue.
Bind the portal theme to the authentication, authorization, and auditing virtual server
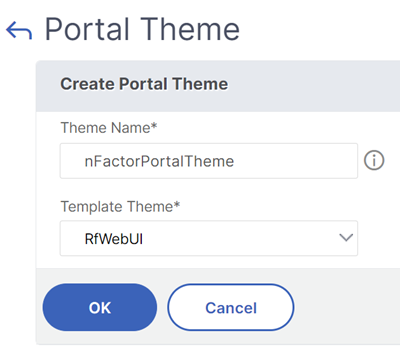
Navigate toCitrix Gateway > Portal Themes, and add a theme. You create the theme under Citrix Gateway, and then later bind it to the authentication, authorization, and auditing virtual server.

Create a theme based on the RfWebUI template theme.
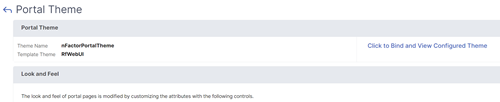
After adjusting the theme as desired, at the top of the portal theme editing page, clickClick to Bind and View Configured Theme.
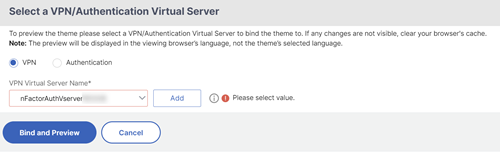
Change the selection to Authentication. From theAuthentication Virtual Server Namedrop-down menu, select the authentication, authorization, and auditing virtual server, and clickBind and Previewand close the preview window.
Enable the client certificate authentication
If one of your authentication factors is the client certificate, then you must perform some SSL configuration on the authentication, authorization, and auditing virtual server:
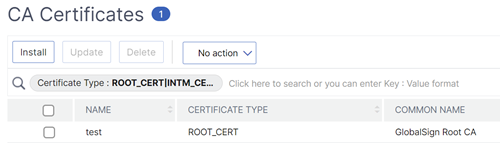
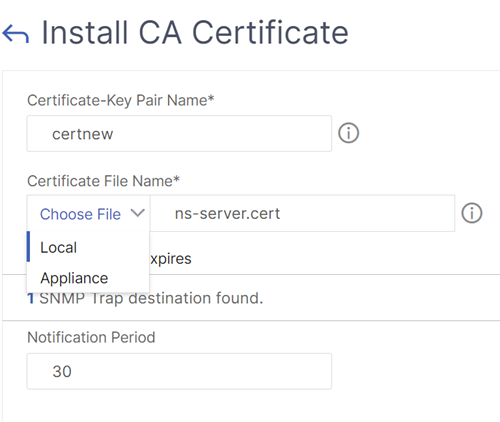
Navigate toTraffic Management > SSL > Certificates > CA Certificates, and install the root certificate for the issuer of the client certificates. Root certificates do not have a key file.
Navigate toTraffic Management > SSL > Change advanced SSL settings.

- Scroll down to check whetherDefault ProfileisENABLED. If yes, then you must use an SSL Profile to enable Client Certificate Authentication. Otherwise, you can enable Client Certificate Authentication directly on the authentication, authorization, and auditing virtual server in the SSL Parameters section.
If default SSL Profiles are not enabled:
- Navigate toSecurity > AAA - Application > Virtual Servers, and edit an existing authentication, authorization, and auditing virtual server.

- On the left, in theSSL Parameterssection, click the pencil icon.

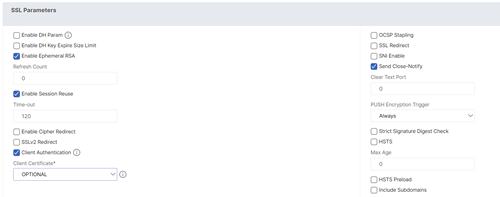
Check the box next toClient Authentication.
Make sureOptionalis selected in theClient Certificatedrop-down menu, and clickOK.
If Default SSL Profiles are enabled, then create an SSL Profile with Client Authentication enabled:
On the left menu, expand System, and click Profiles.
On the top right, switch to the SSL Profile tab.
Right-click the ns_default_ssl_profile_frontend profile, and click Add. This copies settings from the default profile.
Give the Profile a name. The purpose of this profile is to enable Client Certificates.
Scroll down and find the Client Authentication check box. Check the box.
Change the Client Certificate drop-down menu to OPTIONAL.
Copying the default SSL Profile does not copy the SSL Ciphers. You must redo them.
Click Done when done creating the SSL Profile.
Navigate toSecurity > AAA – Application Traffic > Virtual Servers, and edit an authentication, authorization, and auditing virtual server.
Scroll down to the SSL Profile section and click the pencil.
Change the SSL Profile drop-down menu to the profile that has Client Certificates enabled. Click OK.
Scroll down this article until you reach the instructions to bind the CA certificate.
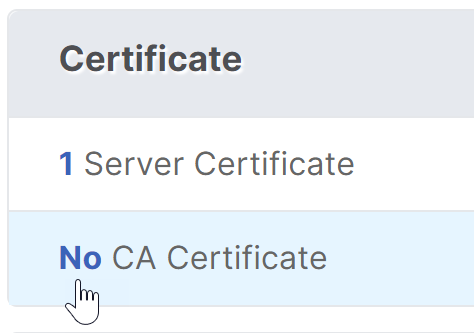
On the left, in theCertificatessection, click where it saysNo CA Certificate.
Click the text,Click to select.
Click the radio button next to the root certificate for the issuer of the client certificates, and clickSelect.
ClickBind.
登录schema XML file
登录Schema is an XML file providing the structure of forms-based authentication logon pages.
nFactor implies multiple authentication factors that are chained together. Each Factor can have different Login Schema pages/files. In some authentication scenarios, users can be presented with multiple logon screens.
Configure a login schema profile
To configure a Login Schema Profile:
- Create or Edit a Login Schema .XML file based on your nFactor design.
Navigate toSecurity > AAA - Application Traffic > Login Schema.

On the right, switch to theProfilestab, and clickAdd.

In theAuthentication Schemafield, click the pencil icon.
Click the LoginSchema folder to see the files in it.

Select one of the files. You can see a preview on the right. The labels can be changed by clicking theEditbutton on the top right.
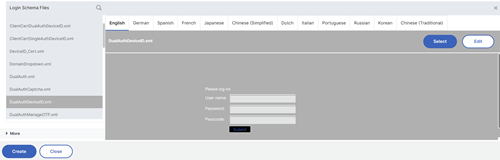
When you Save the changes, a new file is created under /nsconfig/LoginSchema.

On the top right, clickSelect.

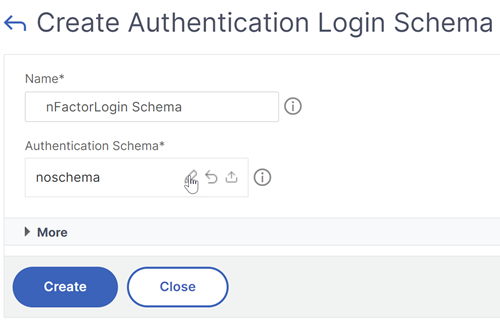
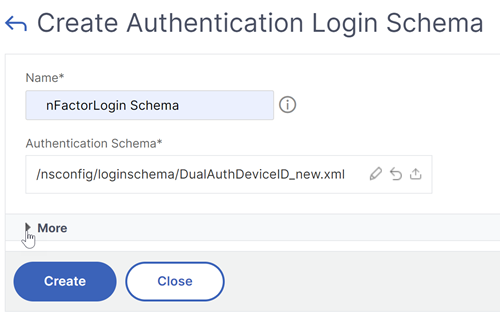
Give the Login Schema a name, and clickMore.
使用用户名和密码进入login schema for single sign-on (SSO) to a back-end service, for example StoreFront.
您可以使用在登录输入的凭证chema as your Single Sign-On credentials by using any of the following methods.
ClickMoreat the bottom of theCreate Authentication Login Schemapage and selectEnable Single Sign On Credentials.
ClickMoreat the bottom of theCreate Authentication Login Schemapage and enter unique values for the user credential index and password credential index. These values can be between 1 and 16. Later you reference these index values in a traffic policy/profile by using the expression AAA.USER.ATTRIBUTE(#).
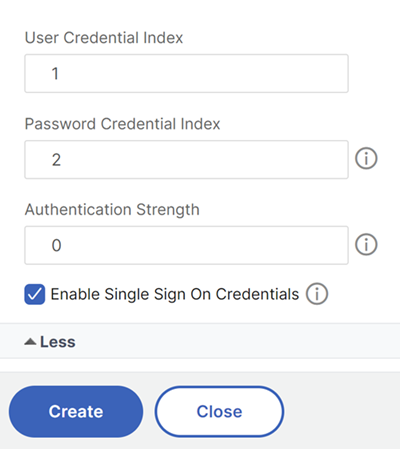
ClickOKto create the login schema profile.
Note:If you edit the login schema file (.xml) later, for changes to be reflected you must edit the login schema profile and select the login schema (.xml) file again.
Create and bind a login schema policy
To bind a login schema profile to an authentication, authorization, and auditing virtual server, you must first create a login schema policy. Login schema policies are not required when binding the login schema profile to an authentication policy label, as detailed later.
To create and bind a login schema policy:
Navigate toSecurity > AAA - Application Traffic > Login Schema.
On thePoliciestab, clickAdd.

Use theProfile下拉菜单选择登录模式Profile you already created.
Enter an advanced policy expression in the规则box, and clickCreate.

On the left, navigate toSecurity > AAA - Application Traffic > Virtual Servers, and edit an existing authentication, authorization, and auditing virtual server.

In the Advanced Settings column, click登录Schemas.

In the Login Schemas section, click the textNo Login Schema.

Click the text,Click to select.
Click the radio button next to the login schema policy, and clickSelect. Only login schema policies appear in this list. Login schema profiles (without a policy) do not appear.
ClickBind.
Advanced authentication policies
Authentication policies are a combination of policy expression, and policy action. If the expression is true, then evaluate the authentication action.
Create advanced authentication policies
Authentication policies are a combination of policy expression and policy action. If the expression is true, then evaluate the authentication action.
You need authentication actions/servers (for example LDAP, RADIUS, CERT, SAML, and so forth) When creating an advanced authentication policy, there’s a plus (Add) icon that lets you create authentication actions/servers.
Or you can create authentication actions (servers) before creating the advanced authentication policy. The authentication servers are located underAuthentication > Dashboard. On the right, click Add and select a Server Type. The instructions for creating these Authentication Servers are not detailed here. See the Authentication – NetScaler 12 / Citrix ADC 12.1 procedures.
To create an Advanced Authentication Policy:
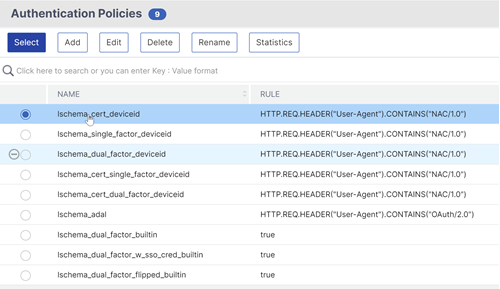
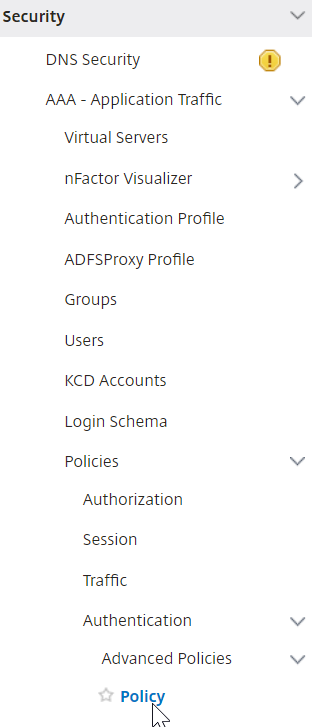
Navigate toSecurity > AAA - Application Traffic > Policies > Authentication > Advanced Policies > Policy
- In the details pane do one of the following:
- To create a policy, clickAdd.
- To modify an existing policy, select the policy, and then clickEdit.
In theCreate Authentication PolicyorConfigure Authentication Policydialog box, type or select values for the parameters.
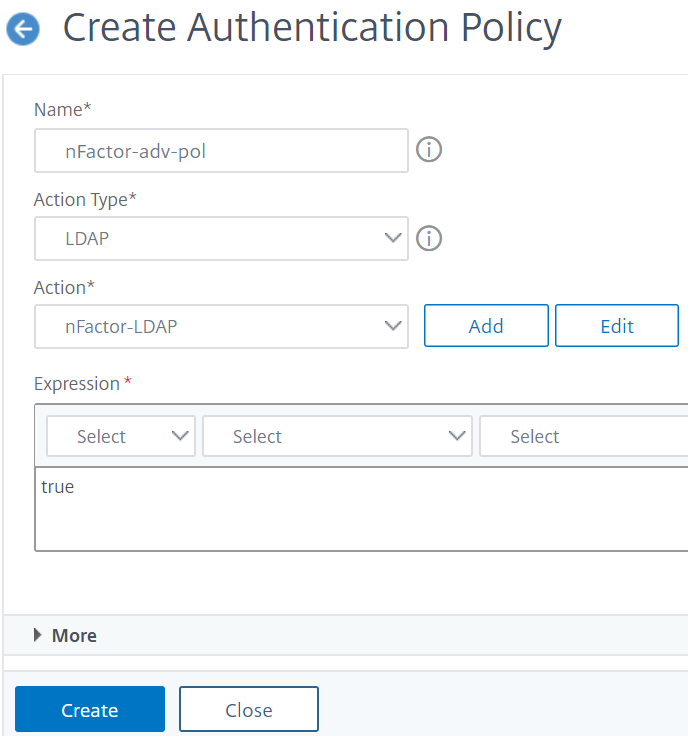
- Name- The policy name. Cannot be changed for a previously configured policy.
- Action Type- The policy type: Cert, Negotiate, LDAP, RADIUS, SAML, SAMLIDP, TACACS, or WEBAUTH.
- Action- The authentication action (profile) to associate with the policy. You can choose an existing authentication action, or click the plus and create an action of the proper type.
- Log Action- The audit action to associate with the policy. You can choose an existing audit action, or click the plus and create an action. You don’t have any Actions configured, or to create an action, clickAddand complete the steps.
- Expression——选择连接的规则你want to apply the action that you specified. The rule can be simple (“true” selects all traffic) or complex. You enter expressions by first choosing the type of expression in the leftmost drop-down list beneath the Expression window, and then by typing your expression directly into the expression text area, or by clicking Add to open Add Expression dialog box and using the drop-down lists in it to construct your expression.)
- Comment- You can type a comment that describes the type of traffic that this authentication policy applies to. Optional.
- ClickCreateand then clickClose. If you created a policy, that policy appears in the Authentication Policies and Servers page.
Create additional advanced authentication policies as required based on your nFactor design.
Bind first factor advanced authentication policy to authentication, authorization, and auditing
You can directly bind advanced authentication policies for the first Factor the authentication, authorization, and auditing virtual server. For the next factors, you must bind the advanced authentication policies to the authentication policy labels.
- Navigate toSecurity > AAA - Application Traffic > Virtual Servers. Edit an existing virtual server.
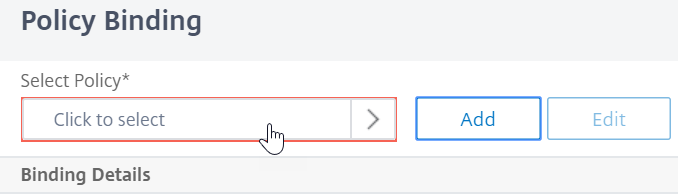
On the left, in the Advanced Authentication Policies section, clickNo Authentication Policy.
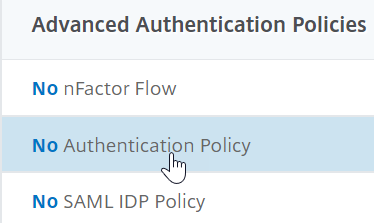
InSelect Policy, click the text,Click to select.
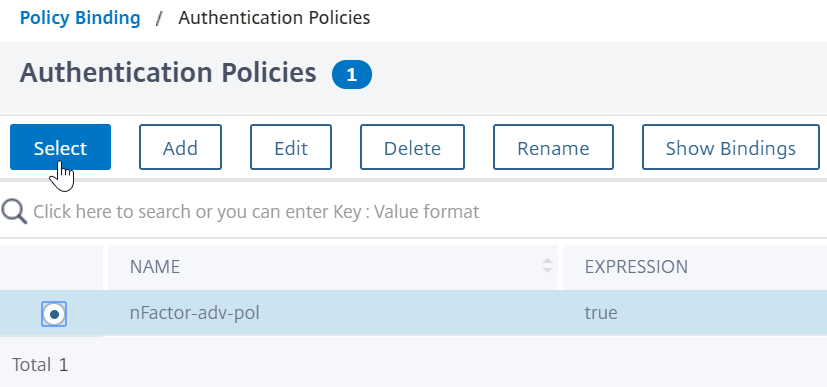
Click the radio button next to theAdvanced Authentication Policy, and clickSelect.
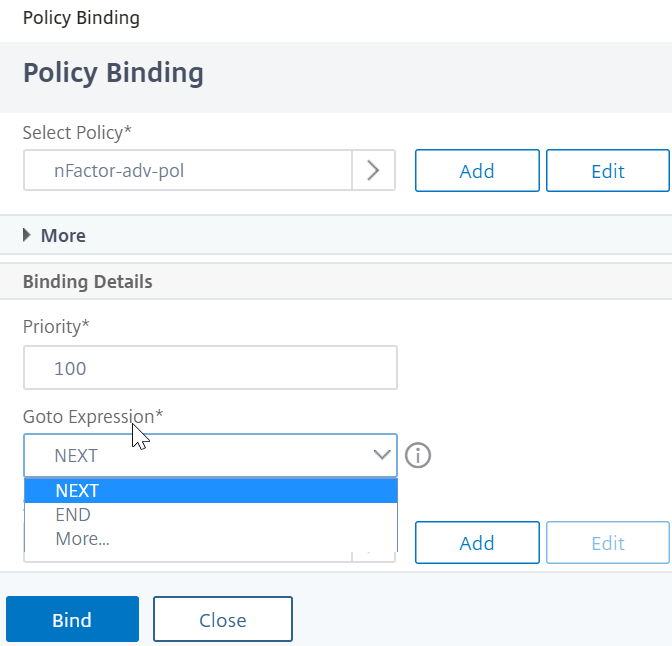
- In the Binding Details section, theGoto Expressiondetermines what happens next if this advanced authentication policy fails.
- IfGoto Expressionis set toNEXT, then the next advanced authentication policy bound to this authentication, authorization, and auditing Virtual Server is evaluated.
- IfGoto Expressionis set toEND, or if there are no more advanced authentication policies bound to this authentication, authorization, and auditing virtual server, then authentication is completed and marked as failed.
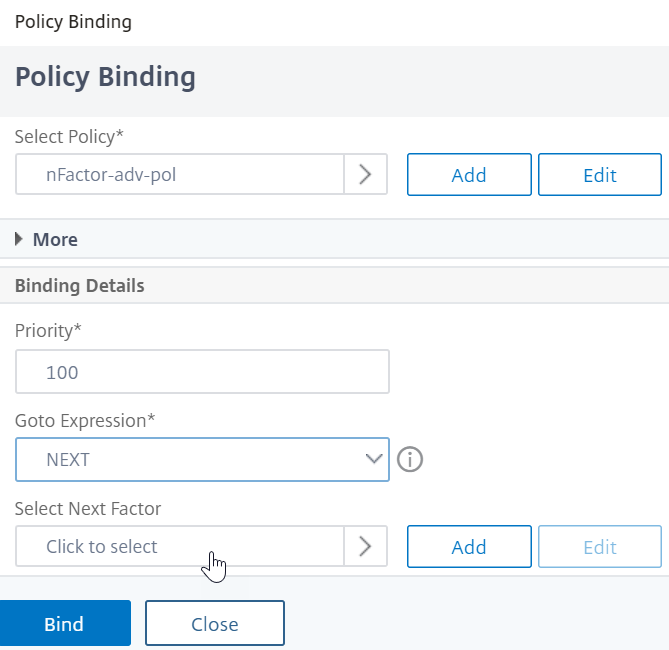
InSelect Next Factor, you can select can point to an authentication policy label. The next factor is evaluated only if the advanced authentication policy succeeds. Finally, clickBind.
使用提取的LDAP组选择下一个authentication Factor
You can use extracted LDAP groups to select the next authentication factor without actually authentication with LDAP.
- When creating or editing an LDAP server or LDAP action, clear theAuthenticationcheck box.
- InOther Settings, select appropriate values inGroup AttributeandSub Attribute Name.
Authenticate the policy label
When you bind an advanced authentication policy to the authentication, authorization, and auditing virtual server and have selected a next factor, the next factor is evaluated only if the advanced authentication policy succeeds. The next factor that is evaluated is an authentication policy label.
标签指定了collec认证政策tion of authentication policies for a particular factor. Each policy label corresponds to a single factor. It also specifies the login form that must be presented to the user. The authentication policy label must be bound as the next factor of an authentication policy or of another authentication policy label.
Note不需要登录模式:每一个因素。登录schema profile is required only if you are binding a login schema to an Authentication Policy Label.
Create an authentication policy label
A policy label specifies the authentication policies for a particular factor. Each policy label corresponds to a single factor. The policy label specifies the login form that must be presented to the user. The policy label must be bound as the next factor of an authentication policy or of another authentication policy label. Typically, a policy label includes authentication policies for a specific authentication mechanism. However, you can also have a policy label that has authentication policies for different authentication mechanisms.
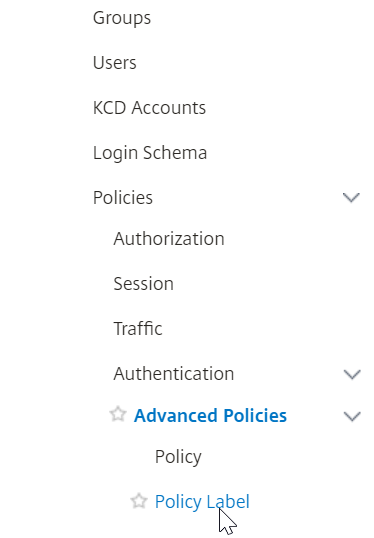
Navigate toSecurity > AAA – Application Traffic > Policies > Authentication > Advanced Policies > Policy Label.
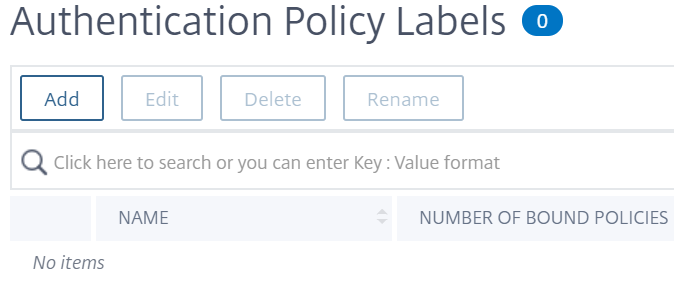
Click theAddbutton.
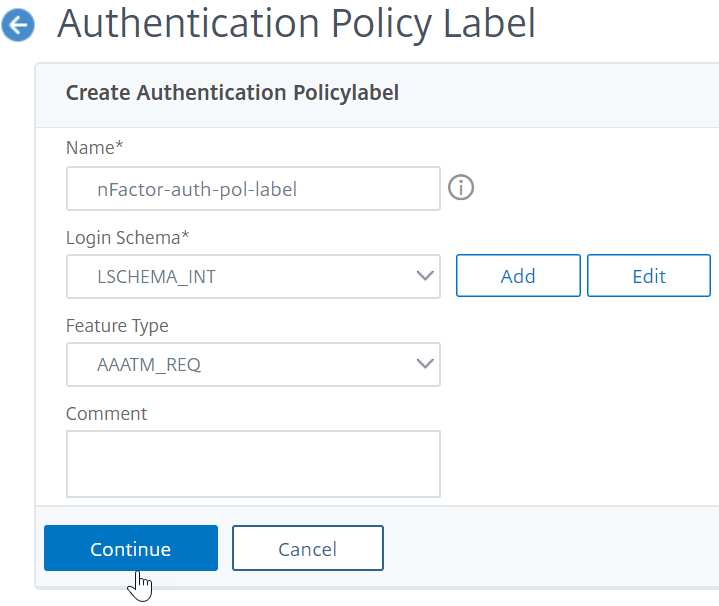
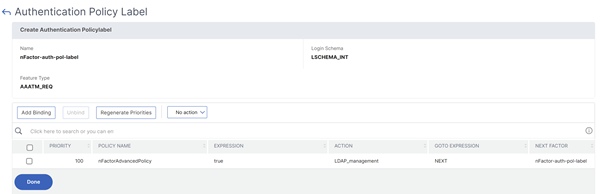
Complete the following fields to create an authentication policy label:
a) Enter theNamefor the new authentication policy label.
b) Select the登录Schemaassociated with authentication policy label. IF you do not want to display anything to the user, you can select a login schema profile that is set to no schema (LSCHEMA_INT).
c) ClickContinue.
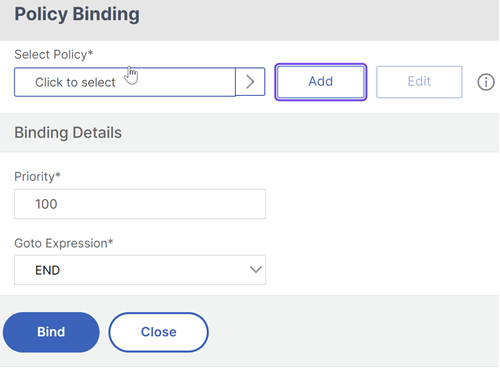
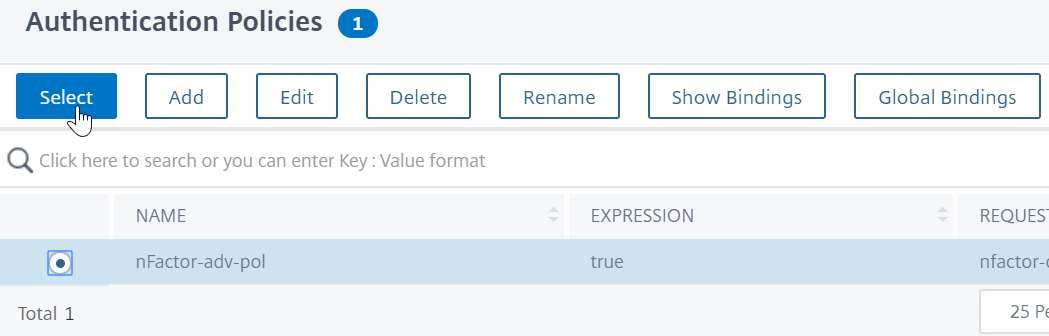
In thePolicy Bindingsection, click where it saysClick to select.
Select the authentication policy that evaluates this factor.
Complete the following fields:
a) Enter thePriorityof the policy binding.
b) InGoto ExpressionselectNEXTif you want to bind more advanced authentication policies to this factor or selectEND.
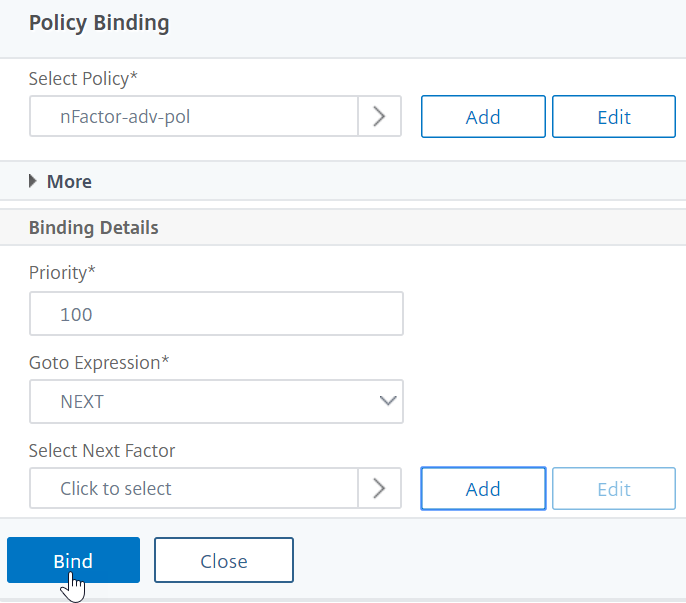
- InSelect Next Factor, if you want to add another factor, click to select and bind the next authentication policy label (next factor). If you do not select the next factor, and if this advanced authentication policy succeeds, then authentication is successful and complete.
ClickBind.
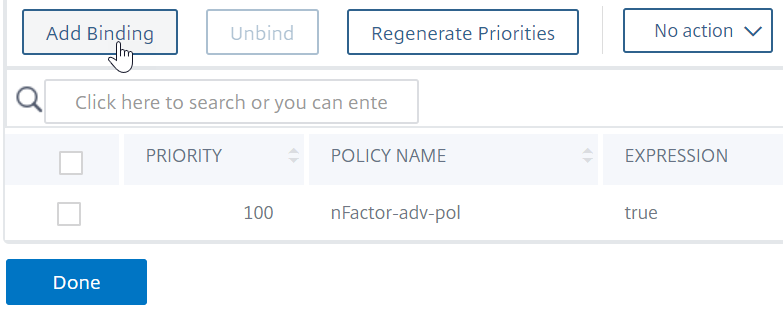
You can clickAdd Bindingto add more advanced authentication policies to this policy label (factor). ClickDoneupon completion.
Bind authentication policy label
After you create the policy label, you bind it to an existing advanced authentication policy binding to chain the factors together.
You can select the next factor when editing an existing authentication, authorization, and auditing virtual server that has an advanced authentication policy bound or when editing a different policy label to include the next factor.
To edit an existing authentication, authorization, and auditing virtual server that has an advanced authentication policy already bound to it
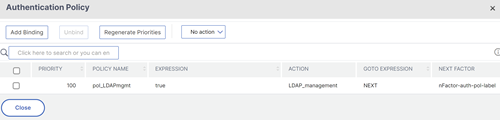
Navigate toSecurity > AAA – Application Traffic > Virtual Servers.Select the virtual server and clickEdit.

On the left, in theAdvanced Authentication Policiessection, click an existing authentication policy binding.

InSelect Action, clickEdit Binding.
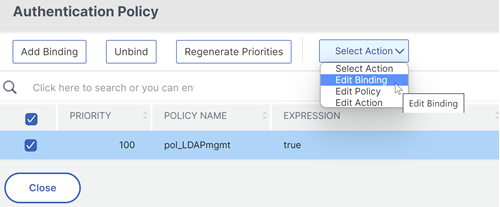
InSelect Next Factor, click, and select an existing authentication policy label (next factor).
ClickBind. You can see the next factor on the extreme right.
To add a policy label next factor to a different policy label
Navigate toSecurity > AAA – Application Traffic > Policies > Authentication > Advanced Policies > PolicyLabel. Select a different policy label and clickEdit.

InSelect Action, clickEdit Binding.
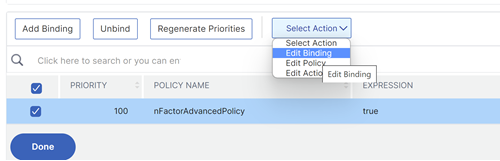
- InBinding Details > Select Next Factor, click to select the next factor.
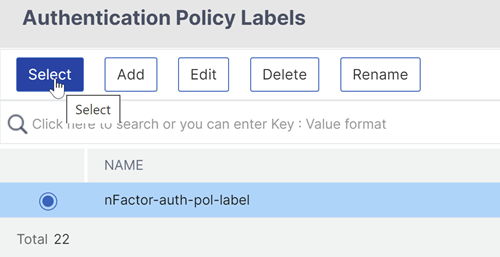
Choose the policy label for the next factor and click theSelectbutton.

ClickBind.You can see the next factor on the right.
nFactor for Citrix Gateway
To enable nFactor on the Citrix Gateway, an authentication profile must be linked to an authentication, authorization, and auditing virtual server.
Create authentication profile to link an authentication, authorization, and auditing virtual server with Citrix Gateway virtual server
Navigate toCitrix Gateway > Virtual Serversand select and existing gateway virtual server to edit.

InAdvanced Settings, clickAuthentication Profile.
ClickAddunderAuthentication Profile
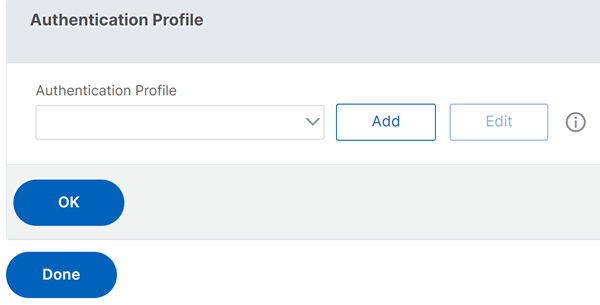
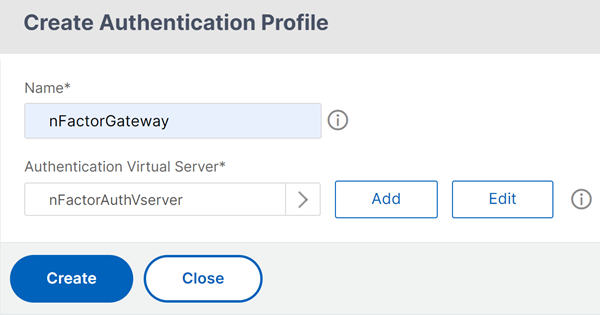
Enter the name for the authentication profile and click where it saysClick to select.
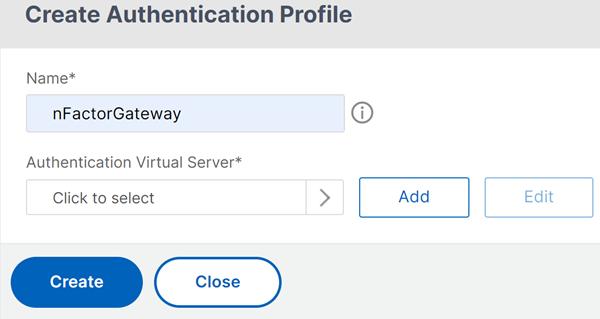
InAuthentication Virtual Server, select an existing server that has login schema, advanced authentication policy, and authentication policy labels configured. You can also create an authentication virtual server. The authentication, authorization, and auditing virtual server does not need an IP address. ClickSelect.

ClickCreate.
ClickOKto close the Authentication Profile section.
Note:If you have configured one of the factors as client certificates, then must configure the SSL parameters and CA certificate.
After you have completed linking the authentication profile to an authentication, authorization, and auditing virtual server, and when you browse to your Citrix Gateway, you can view the nFactor authentication screens.
Configure SSL parameters and CA certificate
If one of the authentication factors is a certificate, then you must perform some SSL configuration on the Citrix Gateway virtual server.
Navigate toTraffic Management > SSL > Certificates > CA Certificates, and install the root certificate for the issuer of the client certificates. Certificate Authority certificates do not need key files.
If default SSL Profiles are enabled, then you have already created an SSL Profile that has Client Authentication enabled.
Navigate toCitrix Gateway > Virtual Servers, and edit an existing Citrix Gateway virtual server that is enabled for nFactor.
- If default SSL Profiles are enabled, click the edit icon.
In the SSL Profile list, select the SSL Profile that has Client Authentication enabled and set to OPTIONAL.
- If default SSL Profiles are not enabled, click the edit icon.
- Check the Client Authentication check box.
- Ensure that Client Certificate is set to Optional
Click OK.
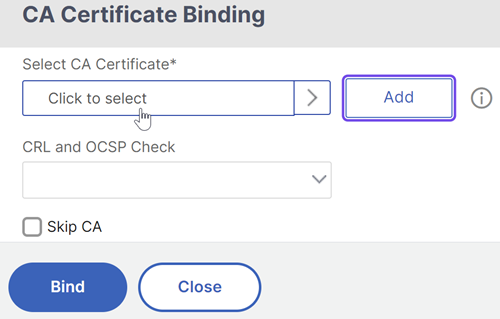
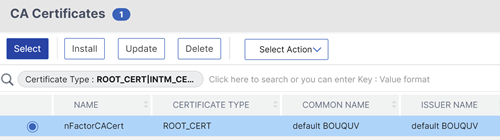
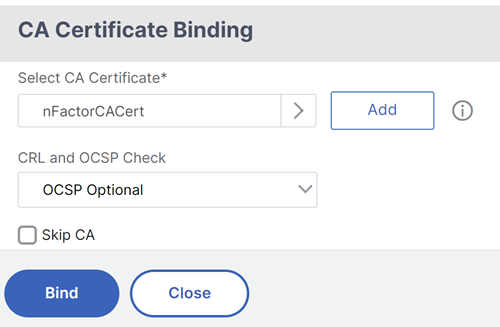
In Certificates section, clickNo CA Certificate.
In Select CA Certificate, click to select and select the root certificate for the issuer of the client certificates.
Click Bind.
Note: You might have to also bind any Intermediate CA Certificates that issued the client certificates.
Configure Citrix Gateway traffic policy for nFactor single sign-on to StoreFront
For single sign-on to StoreFront, nFactor defaults to using the last entered password. If LDAP is not the last entered password, then you must create a traffic policy/profile to override the default nFactor behavior.
Navigate toCitrix Gateway > Policies > Traffic.

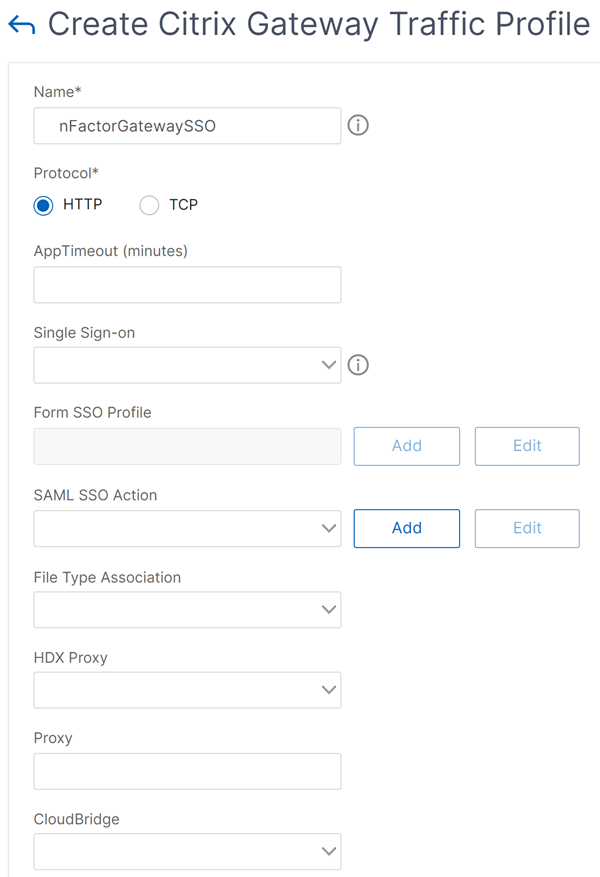
In theTraffic Profilestab, clickAdd.

Enter a name for the traffic profile. Select theHTTPprotocol. InSingle Sign-on, selectON.
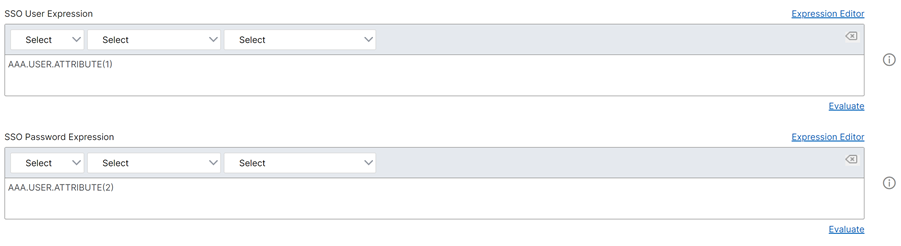
In theSSO Expression, enter a AAA.USER.ATTRIBUTE(#) expression that matches the indexes specified in the login schema and clickCreate.
NoteAAA.USER expression is now implemented to replace the deprecated HTTP.REQ.USER expressions.
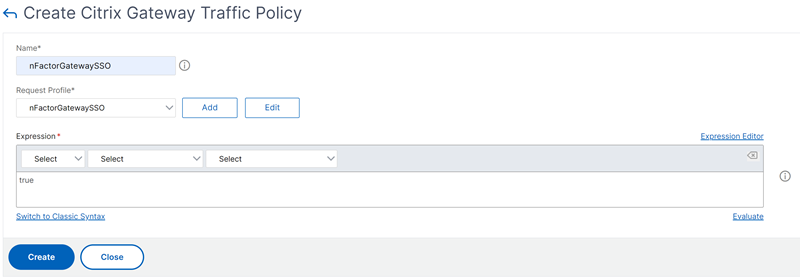
ClickTraffic Policiestab, and clickAdd.

Enter a name for the policy. Select the traffic profile created in the previous step. InExpression, enter an advanced expression, and clickCreate.
Navigate toCitrix Gateway > Citrix Gateway Virtual Server.
- Select and existing virtual server and clickEdit.
- In thePoliciessection, click the+sign.
- InChoose Policy, selectTraffic.
- InChoose Type, selectRequest.
- Select the traffic policy that you have created and then clickBind.
Sample snippet on nFactor configuration by using the CLI
To understand the step-wise configurations for nFactor authentication, let us consider a two-factor authentication deployment where the first factor is LDAP authentication and the second factor is RADIUS authentication.
This sample deployment requires the user to log in to both factors using a single login form. Therefore, we define a single login form that accepts two passwords. The first password is used for LDAP authentication and the other for RADIUS authentication. Here are the configurations that are performed:
Configure the load balancing virtual server for authentication
add lb vserverlbvs89 HTTP 1.136.19.55 80 -AuthenticationHost auth56.aaatm.com -Authentication ON
Configure the authentication virtual server.
add authentication vserverauth56 SSL 10.106.30.223 443 -AuthenticationDomain aaatm.com
Configure the login schema for the login form and bind it to a login schema policy.
add authentication loginSchemalogin1 -authenticationSchema login-2passwd.xml -userCredentialIndex 1 -passwordCredentialIndex 2
Note:
Use the user name and one of the passwords entered in the login schema for single sign-on (SSO) to a back-end service, for example StoreFront. You can reference these index values in the traffic action by using the expression AAA.USER.ATTRIBUTE(#). The values can be between 1 and 16.
Alternatively, you can use the credentials entered in the login schema as your Single Sign-On credentials by using the following command.
add authentication loginSchema login1 -authenticationSchema login-2passwd.xml -SSOCredentials YES add authentication loginSchemaPolicy login1 -rule true -action login1Configure a login schema for the pass-through and bind it to a policy label
add authentication loginSchema login2 -authenticationSchema noschema add authentication policylabel label1 -loginSchema login2Configure the LDAP and RADIUS policies.
add authentication ldapAction ldapAct1 -serverIP 10.17.103.28 -ldapBase "dc=aaatm, dc=com" -ldapBindDn administrator@aaatm.com -ldapBindDnPassword 81qw1b99ui971mn1289op1abc12542389b1f6c111n0d98e1d78ae90c8545901 -encrypted -encryptmethod ENCMTHD\_3 -ldapLoginName samAccountName -groupAttrName memberOf -subAttributeName CN add authentication Policy ldap -rule true -action ldapAct1 add authentication radiusAction radius -serverIP 10.101.14.3 -radKey n231d9a8cao8671or4a9ace940d8623babca0f092gfv4n5598ngc40b18876hj32 -encrypted -encryptmethod ENCMTHD\_3 -radNASip ENABLED -radNASid NS28.50 -radAttributeType 11 -ipAttributeType 8 add authentication Policy radius -rule true -action radiusBind the login schema policy to the authentication virtual server
bind authentication vserver auth56 -policy login1 -priority 1 -gotoPriorityExpression ENDBind the LDAP policy (first factor) to the authentication virtual server.
bind authentication vserver auth56 -policy ldap -priority 1 -nextFactor label1 -gotoPriorityExpression nextBind the RADIUS policy (second factor) to the authentication policy label.
bind authentication policylabel label1 -policyName radius -priority 2 -gotoPriorityExpression end
In this article
- 方法配置nFactor
- Configuration elements involved in nFactor configuration
- nFactor如何工作s
- Authentication, authorization, and auditing virtual server
- 登录schema XML file
- Advanced authentication policies
- Authenticate the policy label
- nFactor for Citrix Gateway
- Sample snippet on nFactor configuration by using the CLI