
PoC Guide: nFactor for Citrix Gateway Authentication with Native OTP
Introduction
Implementing multifactor authentication is one of the best ways to verify identity, and improve security posture. Native (time-based) One Time Password (OTP) is a convenient way to implement another factor using readily available authenticator applications. It allows users to enter validation codes from their authenticator application, into a gateway form, to authenticate.
Citrix Gateway supports Native OTP, and can provide authentication for various services including web services, VPN, and Citrix Virtual Apps and Desktops. In this POC Guide we demonstrate using it for authentication in a Citrix Virtual Apps and Desktops environment.
Conceptual Architecture


Overview
This guide demonstrates how to implement a Proof of Concept environment using two factor authentication with Citrix Gateway. It uses LDAP to validate Active Directory credentials as the first factor, and Native OTP as the second factor.
It makes assumptions about the completed installation, and configuration of the following components:
- Citrix Gateway installed, licensed, and configured with an externally reachable virtual server bound to a wildcard certificate
- Citrix Gateway integrated with a Citrix Virtual Apps and Desktops environment which uses LDAP for authentication
- Endpoint with Citrix Workspace app installed
- A supported Authenticator app, that supports Time Based OTP, installed (including Microsoft Authenticator, Google Authenticator, or Citrix SSO)
- Active Directory (AD) is available in the environment
Refer to Citrix Documentation for the latest product version, and license requirements:Native OTP Authentication
nFactor
LDAP Policies
First we create two LDAP policies which we reference later when we are building our nFactor flow.
Native OTP Registration
This LDAP registration policy is used to exchange, and store the key used to generate the time based OTP code.
- Log in to the Citrix ADC UI
- Navigate toSecurity > AAA-Application Traffic > Policies > Authentication > Advanced Policies > Policy
- Click
Add - Enter
polldap_notpmanagefor the policy name, and change the Action Type toLDAP. - Click
Addunder Action - Populate the following fields:
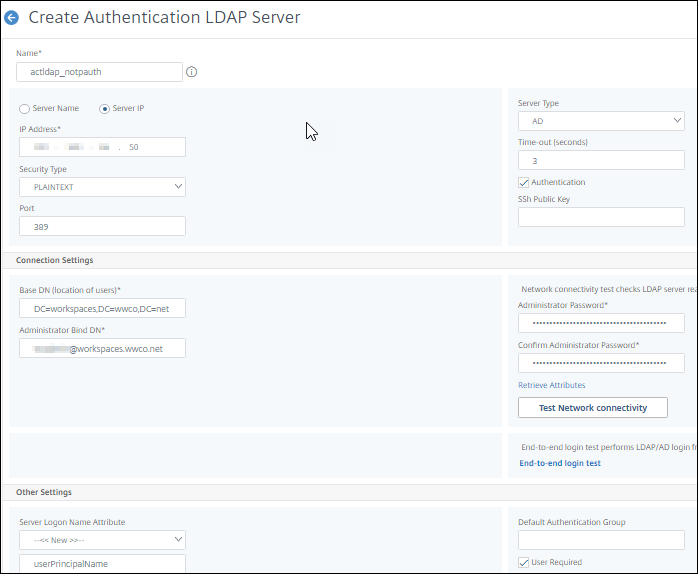
- Name - enter
actldap_notpmanage - Server Name / IP address - select an FQDN or IP address for AD server/(s). We enter
192.0.2.50 - Clear
AuthenticationThis setting along with the OTP Secret below indicate the policy will set, rather than get, object attributes - Base DN - enter the path to the AD user container. We enter
DC=workspaces, DC=wwco, DC=net - Administrator Bind DN - enter the admin/service account to query AD to authenticate users. We enter
workspacessrv@workspaces.wwco.net - 确认/管理员密码——输入/确认the admin / service account password
- Click Test Network Connectivity to ensure connection
- Server Logon Name Attribute - in the second field below this field enter
userPrincipalName - OTP Secret - Enter
userParametersThis is the User’s LDAP object that will get updated with the key that`s used with hash to generate the time based OTP code
- Name - enter
- Select Create

- Enter the expression
true, and clickOK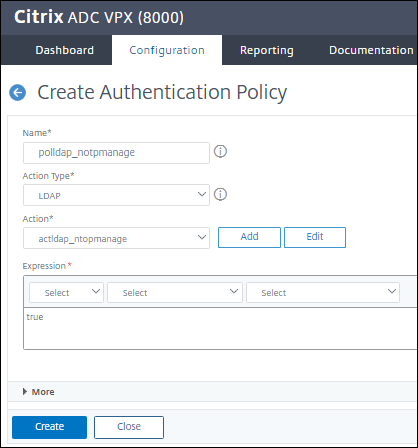


Native OTP Authentication
This LDAP authentication policy is used to do the first factor authentication.
- Navigate to
Security > AAA-Application Traffic > Policies > Authentication > Advanced Policies > Policy - Click
Add - Enter
polldap_notpauthfor the policy name, and change the Action Type toLDAP. - Click
Addunder Action - Populate the following fields:
- Name - enter
actldap_notpauth - Server Name / IP address - select an FQDN or IP address for AD server/(s). We enter
192.0.2.50 - Base DN - enter the path to the AD user container. We enter
DC=workspaces, DC=wwco, DC=net - Administrator Bind DN - enter the admin/service account to query AD to authenticate users. We enter
workspacessrv@workspaces.wwco.net - 确认/管理员密码——输入/确认the admin / service account password
- Click Test Network Connectivity to ensure connection
- Server Logon Name Attribute - in the second field below this field enter
userPrincipalName
- Name - enter
- Select Create
- Enter the expression
true, and clickOK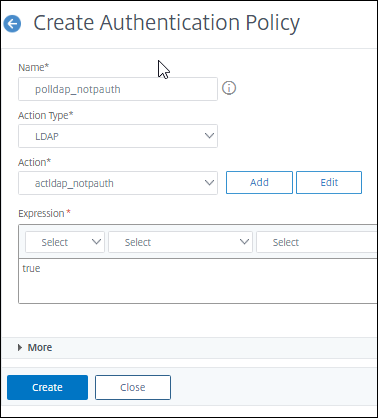


For more information seeLDAP authentication policies
Login Schemas
Login Schemas are used when data needs to be gathered on behalf of a policy.
Native OTP lSchema - Single Authentication
This registration login schema corresponds to the LDAP registration policy.
- Navigate to
Security > AAA-Application Traffic > Login Schema - Select the
Profiletab - Click
Addunder Profile, and name itprolschema_notpsingle - Click the pencil icon next to
noschema - Click
Login Schema, and scroll down to selectSingleAuthManageOTP.xml, and select the blueSelectin the right corner. - Click
Create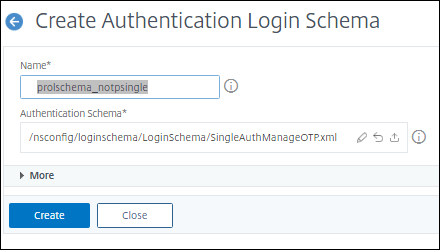

Native OTP lSchema - Dual Authentication
This registration login schema corresponds to the dual factor authentication where the user enters both their password, and the OTP passcode.
- Under the
Profiletab clickAddagain - Enter the name
pollschema_notpdual - Click
Addunder Profile, and also name itprolschema_notpdual - Click the pencil icon next to
noschema - Click
Login Schema, and scroll down to selectDualAuth.xml, and select the blueSelectin the right corner. - Click
More - In the field
Password Credential Indexenter1 - Click
Create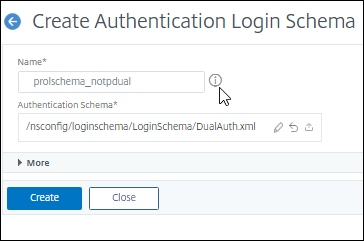

Native OTPAAAVirtual Server - Visualizer Flow
- Next navigate to
Security > AAA - Application Traffic > nFactor Visualizer > nFactor Flows - Click
Add - Click the
+sign to create the initial factor.This factor will not take action, rather handle directing incoming traffic to registration or authentication factor flows. - Enter
factor0-notp, and clickCreate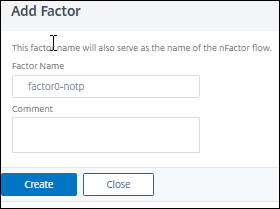

Registration Flow
- Select
Add Policy - Select
Addnext toSelect Policy - Enter name
polfactor0-notpmanage - Set the
Action TypetoNO_AUTHN - Paste in
HTTP.REQ.COOKIE.VALUE(“NSC_TASS”).EQ(“manageotp”)for the expression OR build it with Expression builder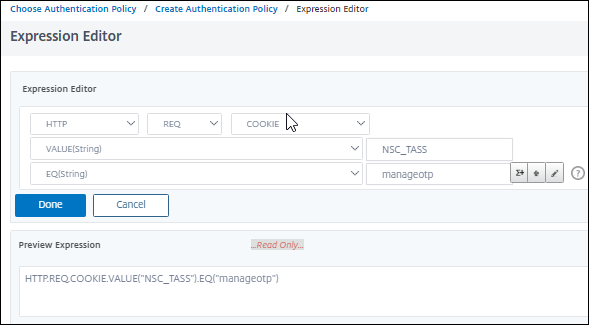 You can optionally limit registration to endpoints on the internal network by adding a source IP address criteria such as
http.req.cookie.value("NSC_TASS").eq("manageotp") && client.IP.SRC.IN_SUBNET(10.0.0.0/8) - Click
Create, followed byAdd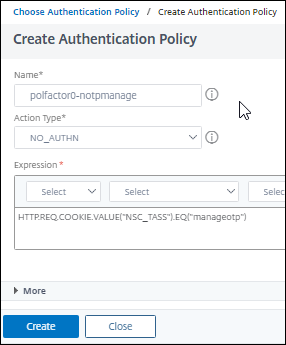
- Select the green
+to the right of thepolfactor0-notpmanagepolicy you just created - Enter
factor1-notpmanage, and clickCreate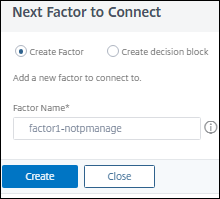
- In the new factor box, select
Add Schema - Select
prolschema_notpsingle, and clickOk - Select
Add Policy - From the drop-down list under
Select Policyselectpolldap_notpauth, and clickAdd - Select the green
+to the right of thepolldap_notpauthpolicy - Enter
factor2-notpmanage, and clickCreate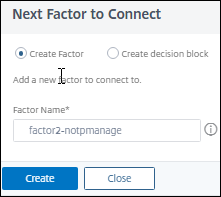
- In the new factor box, select
Add Policy - From the drop-down list under
Select Policyselectpolldap_notpmanage, and clickAdd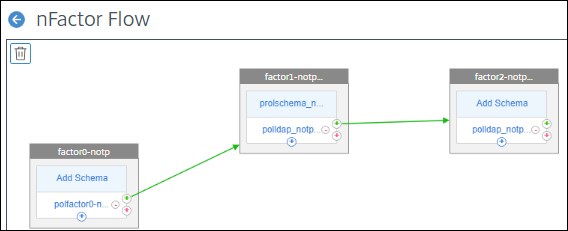
 You can optionally limit registration to endpoints on the internal network by adding a source IP address criteria such as


Authentication Flow
- Now in the initial factor box we created
factor0-notp, select the blue+ - Select
Addnext toSelect Policy - Enter name
polfactor0-notpauth - Set the
Action Typeto NO_AUTHN - Enter
truefor the expression - Click
Create, followed byAddNotice that the policy priority has increased to 110 meaning it will be executed only if the above policypolfactor0-notpmanageat 100 is not a match.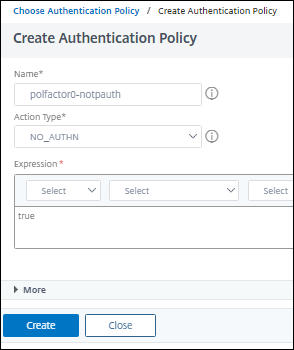
- Select the green
+to the right of thepolfactor0-notpauthpolicy you just created - Enter
factor1-notpauth, and clickCreate - In the new factor box, select
Add Schema - Select
prolschema_notpdual, and clickOk - Select
Add Policy - From the drop-down list under
Select Policyselectpolldap_notpauth, and clickAdd - Select the green
+to the right of thepolldap_notpauthpolicy you just created - Enter
OTPCheck, and clickCreate - Select
Add Policy - From the drop-down list under
Select Policyselectpolldap_notpmanage, and clickAdd - Select
Done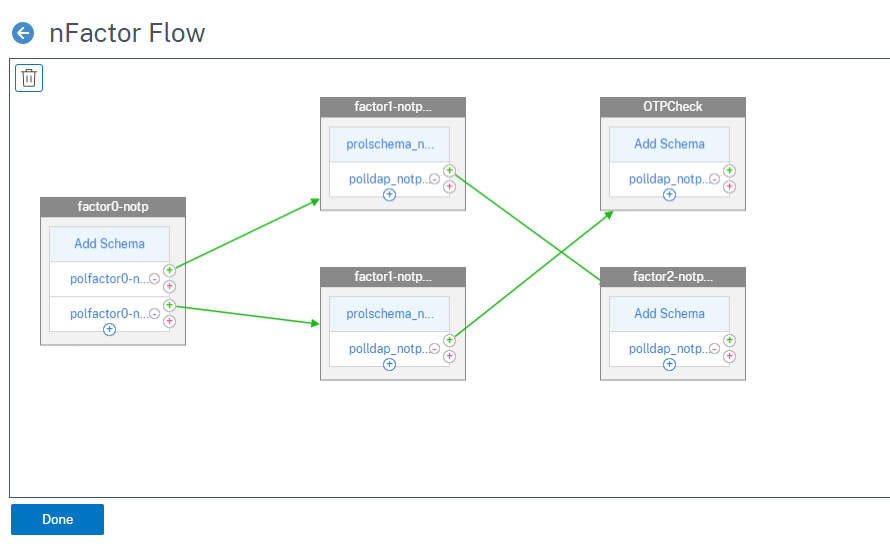


Native OTPAAAVirtual Server
ThisAAAVirtual Server is where the policies and schema are bound with the appropriate priority.
- Navigate toTraffic Management > SSL> Certificates > All Certificatesto verify you have your domain certificate installed. In this POC example we used a wildcard certificate corresponding to our Active Directory domain. SeeCitrix ADC SSL certificatesfor more information.
- Next navigate to
Security > AAA - Application Traffic > Virtual Servers, and select Add - Enter the following fields:
- Name - a unique value. We enter
nativeotp_authvserver - IP Address Type -
Non Addressable
- Name - a unique value. We enter
- Click
Ok - Select No Server Certificate, select the arrow under
Select Server Certificate, select the domain certificate, click Select, Bind, and Continue - Under
Advanced Authentication Policies, selectNo Nfactor Flow - Select the right arrow under
Select nFactor Flow, selectfactor0_notp, clickSelect, clickBind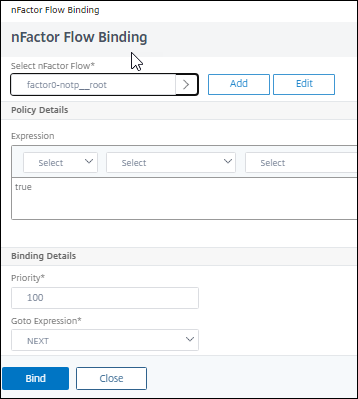
- Click
Continue, followed byDone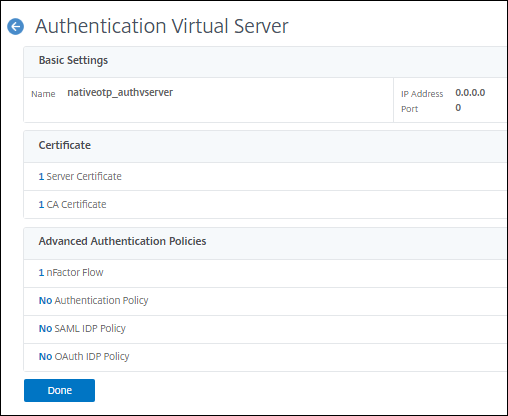


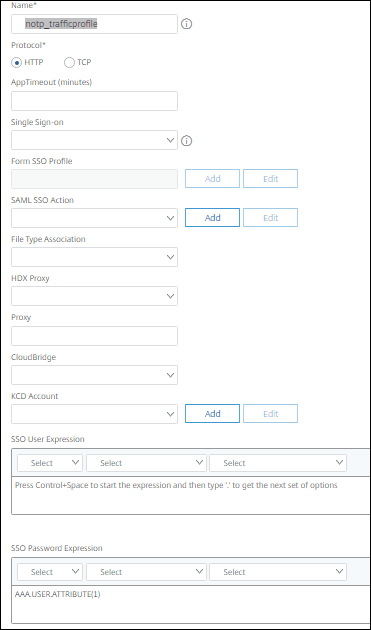
Traffic Policy
Now we create a traffic policy to relay the LDAP password to StoreFront, instead of the OTP passcode.
- Navigate toCitrix Gateway > Virtual Servers > Policies > Traffic
- Select the
Traffic ProfilesTab, and click Add - Enter the name
notp_trafficprofile - Select
HTTP - In the SSO Password Expression enter
http.REQ.USER.ATTRIBUTE(1) - Click Create
- Now click the Traffic Policies Tab
- In the Request Profile field, select the
notp_trafficprofileTraffic Profile you just created. - Enter the name
nOTP_TrafficPolicy - In the Express box enter
true - Click
Create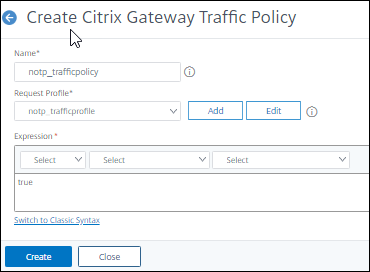


Gateway Virtual Server
The Gateway Virtual Server is bound to the Native OTPAAAVirtual Server to provide authentication for Citrix Virtual Apps and Desktops.
- Navigate to
Citrix Gateway > Virtual Servers - Select your current Gateway, and click
Edit - Select Authentication Profile from the Advanced Settings panel on the right hand side
- Select
Add - Enter a profile name. We enter
nativeotp_authprofile - Under Policy select the arrow, and select the Native OTP
AAAVirtual Servernativeotp_authvserver - Click
Create - Select Policies from the Advanced Settings panel on the right hand side
- Select the
+sign to Add - Under
选择政策selectTraffic,在Choose TypeselectRequest. The selectContinue - Click the right arrow, select
notp_trafficpolicy, and selectOK - Click
Done, and save the running configuration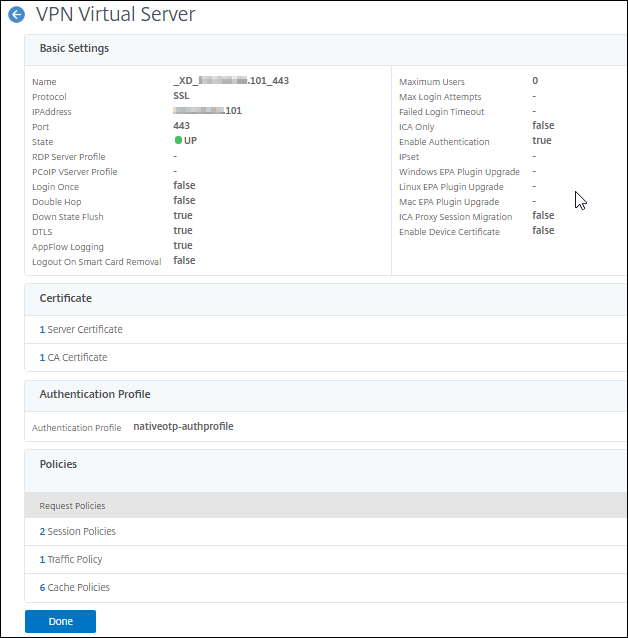

User Endpoint
Now we test Native OTP by authenticating into our Citrix Virtual Apps and Desktops environment.
Registration with Citrix SSO app
First the user registers their device for Native OTP using the Citrix SSO app.
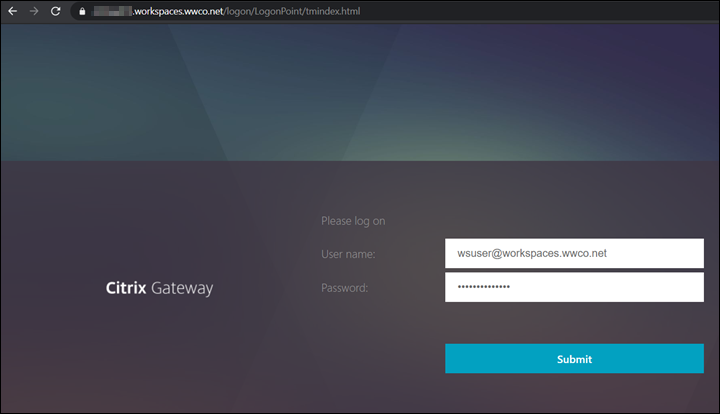
- Open a browser, and navigate to the domain FQDN managed by the Citrix Gateway with
/manageotpappended to the end of the FQDN. We usehttps://gateway.workspaces.wwco.net/manageotp - After your browser is redirected to a login screen enter user UPN, and password
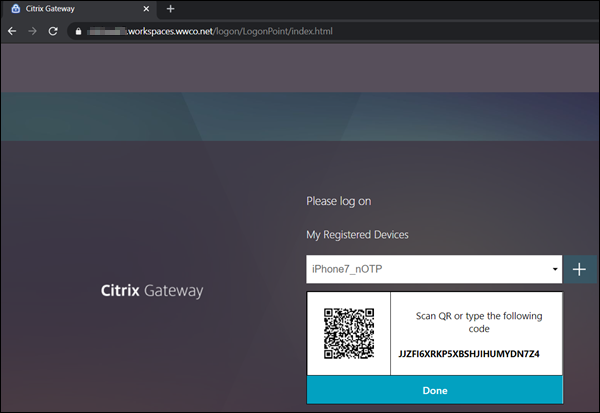
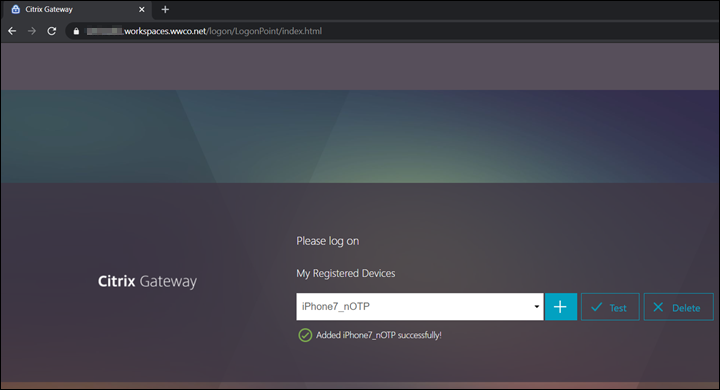
- On the next screen select Add Device, enter a name. We use
iPhone7_nOTP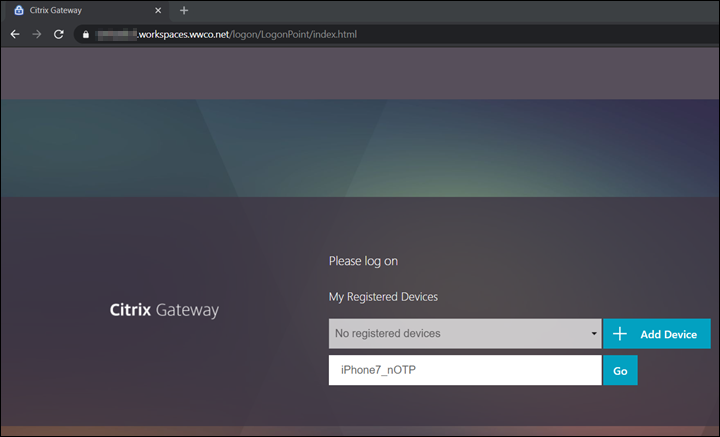
- Select Go, and a QR code appears
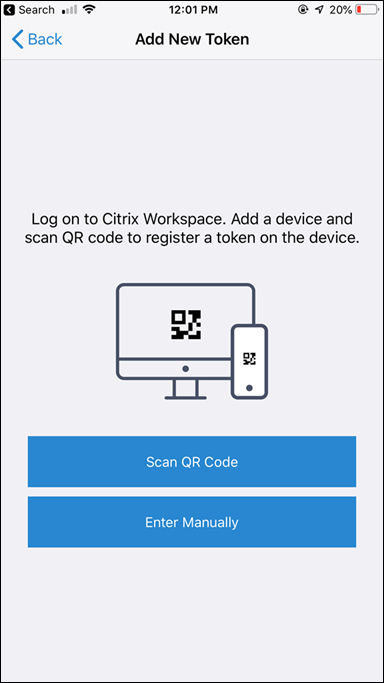
- On your mobile device open your Citrix SSO app or other authenticator app such as Microsoft or Google’s (available for download from app stores)
- Select Add New Token
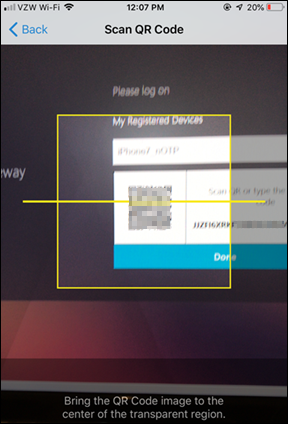
- Select Scan QR Code
- Select Aim your camera at the QR Code, and once it`s captured select Add
- Select Save to store the token
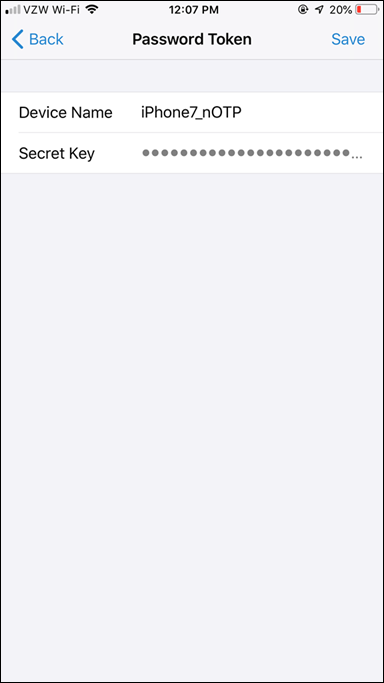
- The Token is now active, and begins displaying OTP codes at 30 second intervals
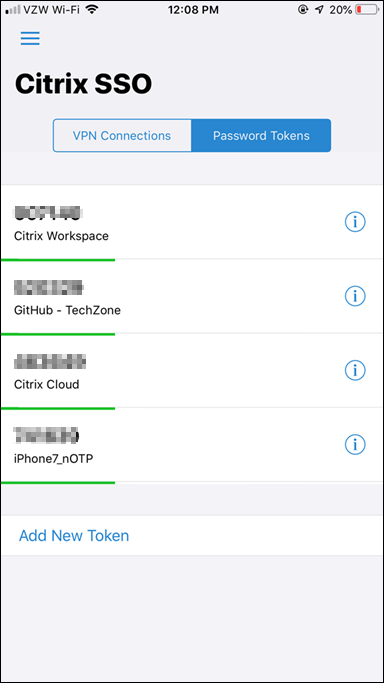
- Select Done and you see confirmation that the device was added successfully


Citrix Virtual Apps and Desktops Authentication, Publication, and Launch
Then the user enters their UserPrincipalName, Password, and the OTP Passcode from the Citrix SSO app to access their virtual apps, and desktops.
- Open a browser, and navigate to the domain FQDN managed by the Citrix Gateway. We use
https://gateway.workspaces.wwco.net - After your browser is redirected to a login screen enter user UserPrincipalName, and password
- Open the Citrix SSO app enter the OTP code in the passcode field for the
iPhone7_nOTPdevice entry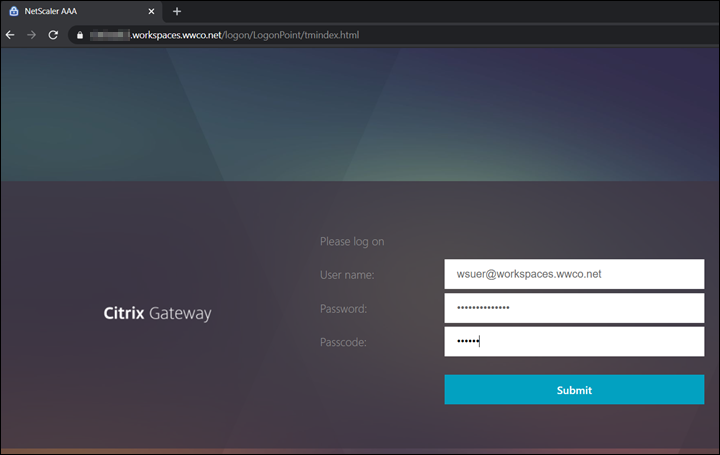
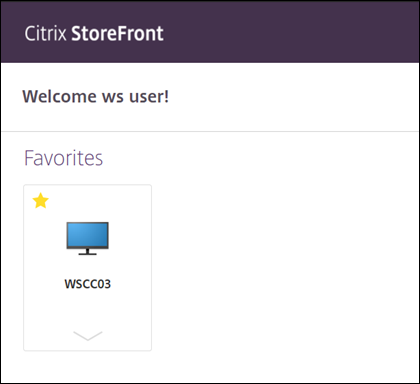
- Verify the users virtual apps, and desktops are enumerated, and launch once logged in


Troubleshooting
Here we look at a couple common troubleshooting areas for Native OTP.
NTP Errors
Upon login with your OTP code the page may post a message advising you to verify NTP synchronization. The Citrix ADC’s time must be sync in order to generate the correct time based OTP. If you have not implemented NTP follow these steps:
- Set the time manually on your Citrix ADCto the current time.This will speed up the synchronization that would otherwise take a longer period time
- Add NTP Server/s
- If you still get an NTP error upon submitting the OTP code seeTime Display on NetScaler Does Not Sync Using NTP
Authentication Errors
Cannot complete your request.- if this error message occurs after successful authentication it likely indicates an error passing user credentials to StoreFront. Verify the Dual Authentication schema and Traffic Policy settings.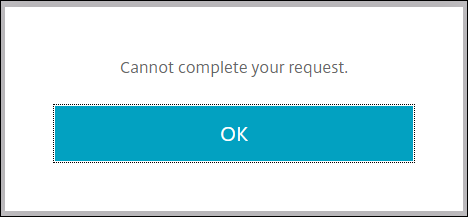
Try again or contact your help desk- this error message often indicates a LDAP login failure.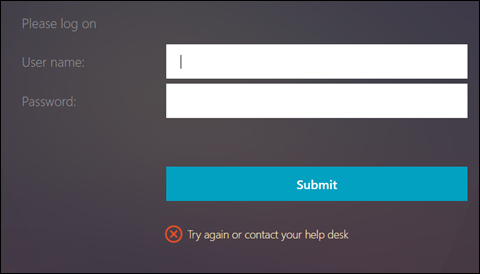 If you have verified the password is correct verify the Administrator bind password has been set. You may have had an existing LDAP authentication policy, and created the manage policy by selecting it, followed by selecting add. This step saves time by populating existing settings like the
Base DN, and you may see the Administrator password field appears to be populated, but you MUST reenter the password.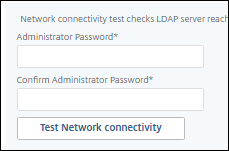

 If you have verified the password is correct verify the Administrator bind password has been set. You may have had an existing LDAP authentication policy, and created the manage policy by selecting it, followed by selecting add. This step saves time by populating existing settings like the
Summary
With Citrix Workspace, and Citrix Gateway, Enterprises can improve their security posture by implementing multifactor authentication without making the user experience complex. Users can gain access to their Citrix Virtual Apps and Desktops, by entering their domain user name, and password, and then simply confirming their identity by entering a One Time Password from their registered authenticator app.
References
For more information refer to:
Native OTP Authentication– find more details regarding Native OTP implementation, and use cases.