
PoC Guide: nFactor for Citrix Gateway Authentication with Group Extraction
Introduction
Large Enterprise environments require flexible authentication options to meet the needs of a variety of user personas. With Group Extraction user AD group membership determines the number, and type of nFactor authentication methods users are required to complete to verify their identity and access their applications and data.
Examples of user groups include:
- normal-security-group for individuals that may have lower security requirements by the nature of their job or limited data access and are located within the bounds of the corporate security perimeter. This group may only require 1 factor.
- elevated-security-group for third party workers or contractors who may not have had background checks done and have higher security requirements. This group may require 2 or more factors.
- high-security-group for employees that perform critical jobs, and require special government clearance, or industry approval. This group may require 2 or more factors and contextual verifications such as source IP address.

Overview
This guide demonstrates how to implement a Proof of Concept environment using two factor authentication with Citrix Gateway. It uses LDAP only to validate Active Directory credentials if the user’s endpoint is on a private subnet, indicating they are on the corporate intranet, or if they are a member of a “VIP” AD group such as a CXO. Otherwise, it is assumed they are located external to the perimeter of the Enterprise network and not a member of a group with lower security requirements, and are required to complete a second factor in the form of entering an email One Time Password (OTP). It uses a Citrix Virtual Apps and Desktops published virtual desktop to validate connectivity.
It makes assumptions about the completed installation and configuration of the following components:
- Citrix ADC installed, and licensed
- Citrix Gateway configured with an externally reachable virtual server bound to a wildcard certificate
- Citrix Gateway integrated with a Citrix Virtual Apps and Desktops environment which uses LDAP for authentication
- Endpoint with Citrix Workspace app installed
- Active Directory (AD) is available in the environment
- Access to an SMTP server to originate email
Refer to Citrix Documentation for the latest product version, and license requirements:nFactor Group Extraction
nFactor
First, we log in to the CLI on our Citrix ADC and enter the authentication actions and associated policies for LDAP and Email respectively. Then we log in to our GUI to build our nFactor flow in the visualizer tool and complete the multifactor authentication configuration.
LDAP Authentication policies
We create the LDAP actions, and the policies that reference them. We also create the Email action, and the policy that references it, which is the multifactor authentication method for users that are not members of the VIP group or on a local subnet.
For LDAP Actions populate the required fields to create the LDAP action in a string and paste it into the CLI:
ldapAction——输入the action name.serverIP——输入the domain server/s FQDN or IP address.serverPort——输入the LDAP port.ldapBase——输入the string of domain objects and containers where pertinent users are stored in your directory.ldapBindDn——输入the service account used to query domain users.ldapBindDnPassword——输入your service account password.ldapLoginName——输入the user object type.groupAttrName——输入the group attribute name.subAttributeName——输入the sub attribute name.secType——输入the security type.ssoNameAttribute——输入the single sign-on name attribute.defaultAuthenticationGroup——输入the default authentication group.alternateEmailAttr——输入the user domain object attribute where their email address can be retrieved.
For LDAP Policies populate the required fields to reference the LDAP Action in a string and paste it into the CLI:
Policy——输入the policy name.action——输入the name of the Email action we created above.
For more information seeLDAP authentication policies
- First connect to the CLI by opening an SSH session to the NSIP address of the Citrix ADC and log in as the
nsrootadministrator or equivalent admin user.
LDAP action 1 - authAct_GroupExtract_genf
Update the following fields for your environment and copy and paste the string into the CLI:add authentication ldapAction authAct_GroupExtract_genf -serverIP 192.0.2.50 -ldapBase "OU=Team M,OU=Team Accounts,OU=Demo Accounts,OU=Workspaces Users,DC=workspaces,DC=wwco,DC=net" -ldapBindDn workspacessrv@workspaces.wwco.net -ldapBindDnPassword 123xyz -encrypted -encryptmethod ENCMTHD_3 -ldapLoginName userPrincipalName -groupAttrName memberOf -subAttributeName cn -secType SSL -authentication DISABLED
LDAP policy 1 - authPol_GroupExtract_genf
Update the following fields for your environment and copy and paste the string into the CLI:add authentication Policy authPol_GroupExtract_genf -rule true -action authAct_GroupExtract_genf

LDAP policy 2A - authPol_LdapOnly_genf
Update the following fields for your environment and copy and paste the string into the CLI:add authentication Policy authPol_LdapOnly_genf -rule "AAA.USER.IS_MEMBER_OF(\"VIP\") || client.IP.SRC.IN_SUBNET(10.0.0.0/8)" -action NO_AUTHN
LDAP policy 2B - authPol_TwoFactor_genf
Update the following fields for your environment and copy and paste the string into the CLI:add authentication Policy authPol_TwoFactor_genf -rule "client.IP.SRC.IN_SUBNET(10.0.0.0/8).NOT" -action NO_AUTHN
LDAP action 3A - authAct_Ldap_genf
Update the following fields for your environment and copy and paste the string into the CLI:add authentication ldapAction authAct_Ldap_genf -serverIP 192.0.2.50 -ldapBase "OU=Team M,OU=Team Accounts,OU=Demo Accounts,OU=Workspaces Users,DC=workspaces,DC=wwco,DC=net" -ldapBindDn workspacessrv@workspaces.wwco.net -ldapBindDnPassword 123xyz -encrypted -encryptmethod ENCMTHD_3 -ldapLoginName userPrincipalName -groupAttrName memberOf -subAttributeName cn -secType SSL -passwdChange ENABLED
LDAP policy 3A - authPol_Ldap_genf
Update the following fields for your environment and copy and paste the string into the CLI:add authentication Policy authPol_Ldap_genf -rule true -action authAct_Ldap_genf
LDAP action 3B - authAct_LDAP_eotp_genf
Update the following fields for your environment and copy and paste the string into the CLI:add authentication ldapAction authAct_LDAP_eotp_genf -serverIP 192.0.2.50 -serverPort 636 -ldapBase "DC=workspaces,DC=wwco,DC=net" -ldapBindDn workspacessrv@workspaces.wwco.net -ldapBindDnPassword 123xyz -encrypted -encryptmethod ENCMTHD_3 -ldapLoginName userPrincipalName -groupAttrName memberOf -subAttributeName cn -secType SSL -ssoNameAttribute userPrincipalName -defaultAuthenticationGroup Email-OTP -alternateEmailAttr otherMailbox
LDAP policy 3B - authPol_LDAP_eotp_genf
Update the following fields for your environment and copy and paste the string into the CLI:add authentication Policy authPol_LdapEtop_genf -rule true -action authAct_LDAP_eotp_genf
Email Authentication policy
Populate the following fields to create the Email action and paste the completed string into the CLI:
emailAction——输入the action name.userName——输入the user, or service account, that log in to the mail server.password——输入your service account password to log in to the mail server. (The password is encrypted by the Citrix ADC by default)serverURL——输入the FQDN or IP address of the mail server.content——输入the user message next to the field to enter the email code.time out——输入the number of seconds the email code is valid.emailAddress——输入the LDAP object to query for the user email address.
For the Email policy populate the required fields to reference the Email Action in a string and paste it into the CLI:
Policy——输入the policy name.action——输入the name of the Email action
For more information seeEmail OTP authentication policy
Email action 4B - authAct_Email_eotp_genf
Update the following fields for your environment and copy and paste the string into the CLI:
add authentication emailAction authAct_Email_eotp_genf -userName workspacessrv@workspaces.wwco.net -password 123xyz -encrypted -encryptmethod ENCMTHD_3 -serverURL "smtps://192.0.2.40:587" -content "Your OTP is $code" -timeout 60 -emailAddress "aaa.user.attribute(\"alternate_mail\")"
Email policy 4B - authPol_Email_eotp_genf
Update the following fields for your environment and copy and paste the string into the CLI:
add authentication Policy authPol_Email_eotp_genf -rule true -action authAct_Email_eotp
Login Schema
lSchema 1 - lSchema_GroupExtract_genf
Update the following fields for your environment and copy and paste the string into the CLI:add authentication loginSchema lSchema_GroupExtract_genf -authenticationSchema "/nsconfig/loginschema/LoginSchema/OnlyUsername.xml"
lSchema 2 - CheckAuthType_genf
The second factor does not require a Login Schema. It just has policies with expressions to check which factor to do next.
lSchema 3A - lSchema_LDAPPasswordOnly_genf
Update the following fields for your environment and copy and paste the string into the CLI:add authentication loginSchema lSchema_LDAPPasswordOnly_genf -authenticationSchema "/nsconfig/loginschema/LoginSchema/PrefilUserFromExpr.xml"
Here you may receive a warning that http.req.user has been replaced with aaa.user. You must edit the xml file from the cli.

To edit the xml file from CLI, do the following:
- Log in to the Citrix ADC CLI
- Enter
shell
Now you have two options:
Automated:
- Enter
sed -i '' 's/http.req/aaa/' /nsconfig/loginschema/LoginSchema/PrefilUserFromExpr.xml - Enter
cat /nsconfig/loginschema/LoginSchema/PrefilUserFromExpr.xmlto review the change
Manual:
- Enter
cd /nsconfig/loginschema/LoginSchema - Enter
vi PrefilUserFromExpr.xml - Enter
/http.req - Press x 8 times to delete the
http.reqstring - Press the escape key
- Press i and enter
aaa, press the escape key again - Press the colon key ‘:’, enter
wqand press enter. - NOTE that you can use this method to modify other aspects of the login schema such as the field prompts
lSchema 3 b - lSchema_EOTPPasswordOnly_genf
Update the following fields for your environment and copy and paste the string into the CLI:add authentication loginSchema lSchema_EOTPPasswordOnly_genf -authenticationSchema "/nsconfig/loginschema/LoginSchema/PrefilUserFromExpr.xml"
NOTE: The 3B factor also uses the PrefilUserFromExpr.xml schema, but we label the policy differently for the EOTP path.
lSchema 4B - EOTP_genf
The fourth factor does not require a Login Schema. It generates the email with the One Time Passcode.
nFactor
- Log in to the Citrix ADC GUI
- Navigate toTraffic Management > SSL> Certificates > All Certificatesto verify you have your domain certificate installed. In this POC example we used a wildcard certificate corresponding to our Active Directory domain. SeeCitrix ADC SSL certificatesfor more information.
- Next navigate to
Security > AAA - Application Traffic > nFactor Visualizer > nFactor Flows - Select Add and select the plus sign in the Factor box
Visualizer
Factor1_GroupExtract_genf
- Enter
Factor1_GroupExtract_genfand select create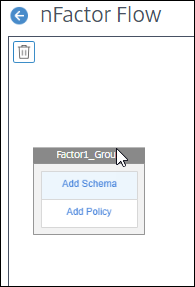
- Select Add Schema
- Select the Login Schema lSchema_GroupExtract_genf
- Select OK
- In the same box select Add Policy
- Select the LDAP policy
authPol_GroupExtract_genf - Select Add
- Select the green plus sign next to the
authPol_GroupExtract_genfpolicy to create another factor

Factor2_CheckAuthType_genf
- Enter
Factor2_CheckAuthType_genfThis Factor is used to verify the authentication requirements - Select Create
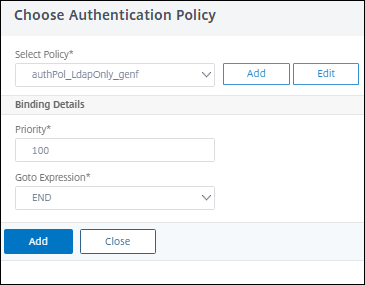
- In the same box select Add Policy
- Select
authPol_LdapOnly_genf - 在转到下Expression select
END - Select Add
- Select the blue plus sign under the
authPol_LdapOnly_genfpolicy to add a second policy - Select the policy
authPol_TwoFactor_genf - Enter
90for the PriorityHere we make the Two Factor policy occur prior to the LDAP only policy by lowering the priority to 90 which is less than the default of 100. This ensures that remote users in the VIP group are identified for LDAP only authentication. - Select Add

Factor3A_LDAPPasswordAuth_genf
- Back next to the
authPol_GroupExtract_genfpolicy select the green plus sign to create another factor - Enter
Factor3A_LDAPPasswordAuth_genf - Select Create
- In the same box select Add Policy
- Select
authPol_Ldap_genf - 在转到下Expression select
END - Select Add
- Select Add Schema
- Select the Login Schema
lSchema_LDAPPasswordOnly_genf - Select OK
Factor3B_EOTPPasswordAuth_genf
- Back next to the
authPol_TwoFactor_genfpolicy select the green plus sign to create another factor - Enter
Factor3B_EOTPPasswordAuth_genf - Select Create
- In the same box select Add Policy
- Select
authPol_LdapEtop_genf - Select Add
- Select Add Schema
- Select the Login Schema
lSchema_EOTPPasswordOnly_genf - Select OK
Factor4B_EOTP_genf
- Next to the
authPol_LdapEtop_genfpolicy select the green plus sign to create another factor - Enter
Factor4B_EOTP_genf - Select Create
- In the same box select Add Policy
- Select
authPol_Email_eotp_genf - Select Add
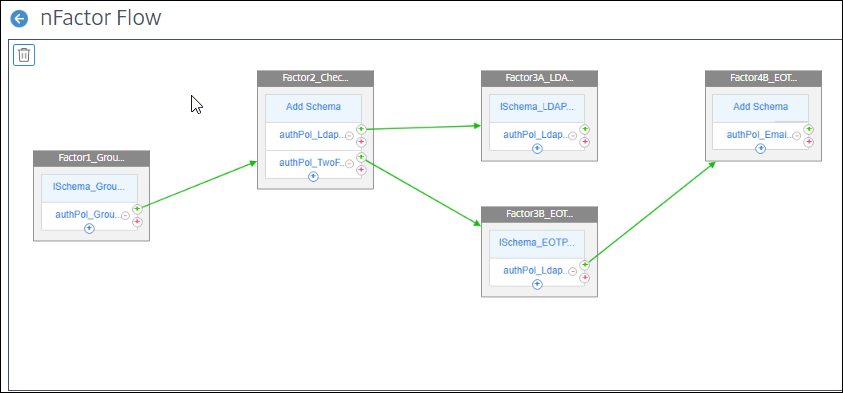
- Select Done and the nFactor flow is complete

Citrix ADC authentication, authorization, and auditing (Citrix ADC AAA) virtual server
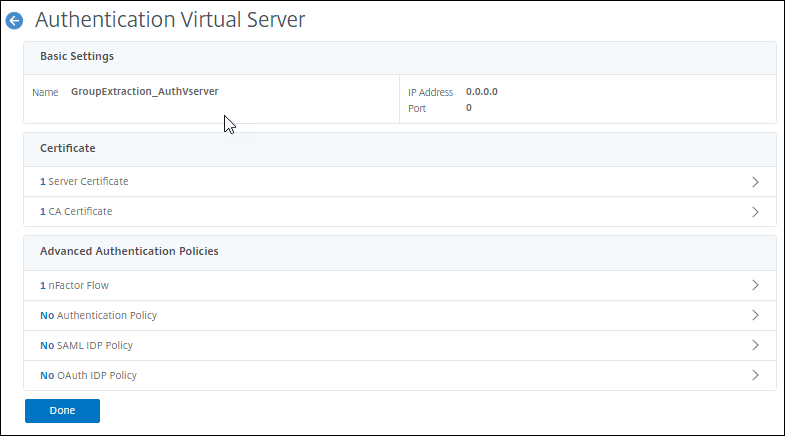
- Next navigate toSecurity > AAA - Application Traffic > Virtual Serversand select Add
- Enter the following fields and click OK:
- Name - a unique value. We enter
GroupExtraction_AuthVserver - IP Address Type -
Non Addressable
- Name - a unique value. We enter
- Select No Server Certificate, select the domain certificate, click Select, Bind, and Continue
- Select No nFactor Flow
- Under Select nFactor Flow click the right arrow, select the
Factor1_GroupExtract_genfflow created earlier - Click Select, followed by Bind, followed by Continue

Citrix Gateway - virtual server
- Next navigate toCitrix Gateway > Virtual Servers
- Select your existing virtual server that provides proxy access to your Citrix Virtual Apps and Desktops environment
- Select Edit
- If you currently have an LDAP policy bound navigate under Basic Authentication - Primary Authentication select LDAP Policy. Then check the policy, select Unbind, select Yes to confirm, and select Close
- Under the Advanced Settings menu on the right select Authentication Profile
- Select Add
- Enter a name. We enter
GroupExtract_AuthProfile - Under Authentication virtual server click the right arrow, and select the Citrix ADC AAA virtual server we created
GroupExtraction_AuthVserver - Click Select, and Create
- Click OK and verify the virtual server now has an authentication profile selected while the basic authentication policy has been removed
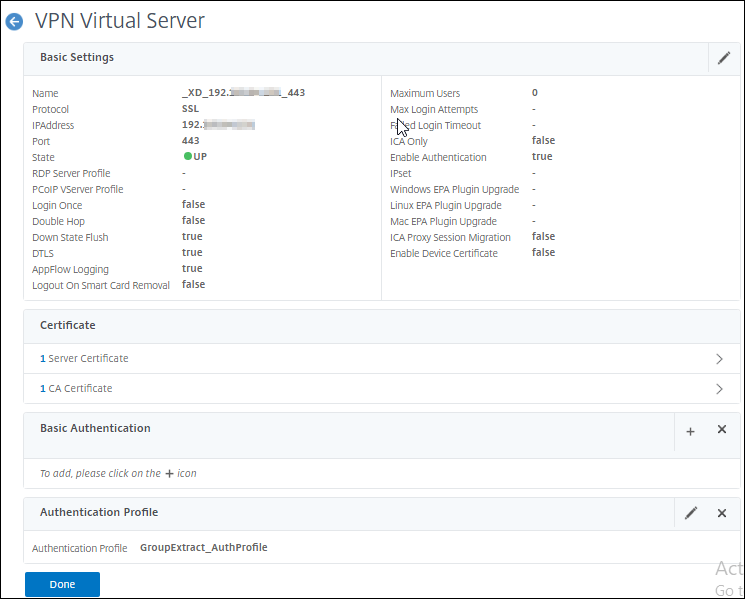
- Click Done

User Endpoint
First we test whether One Factor authentication is applied to VIP users by authenticating into our Citrix Virtual Apps and Desktops environment.
- Open a browser, and navigate to the domain FQDN managed by the Citrix Gateway. We use
https://gateway.workspaces.wwco.net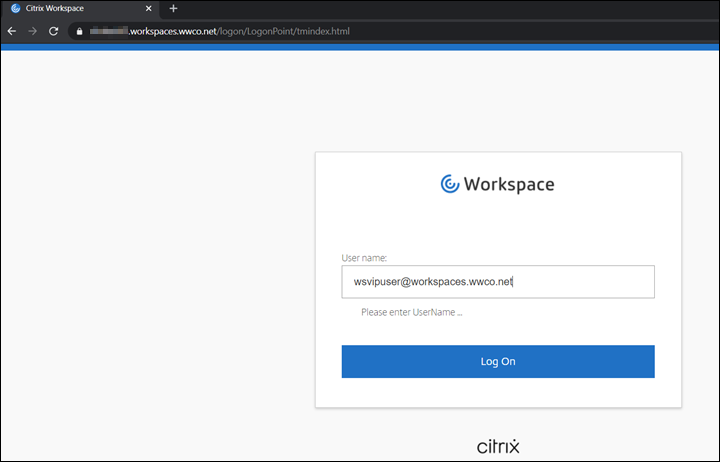
- After your browser is redirected to a login screen. First enter a user name. We use
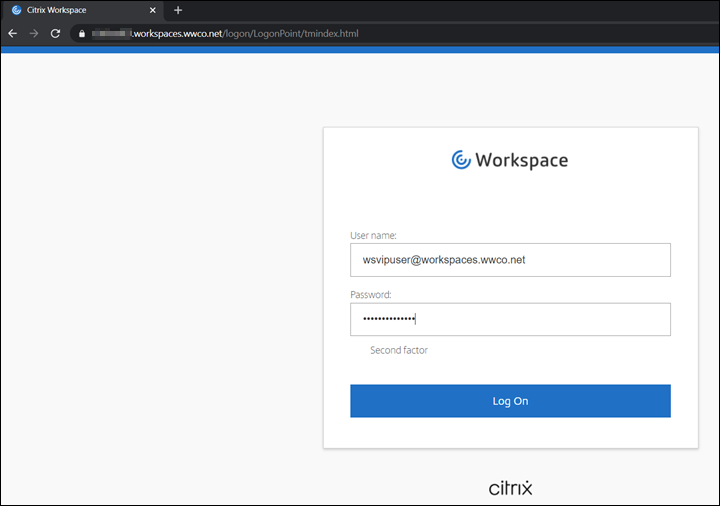
wsvipuser@workspaces.wwco.netThis user must be a member of the AD groupVIP - nFactor determines that the user is a member of the VIP group and you are prompted to submit the user password.
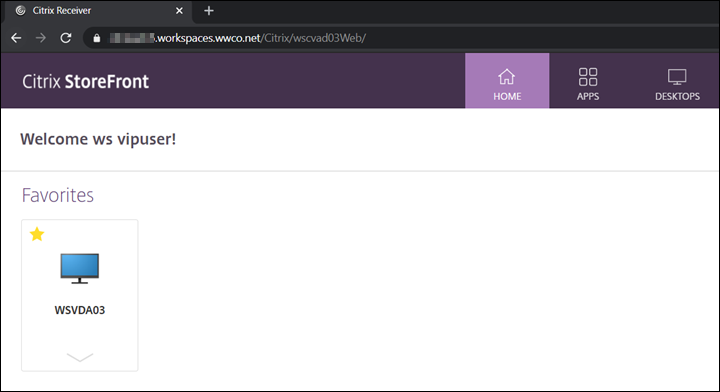
- Now the user is logged into their Workspace page.
- Select a virtual desktop and verify launch.


Now we test Two Factor authentication with Email OTP by authenticating into our Citrix Virtual Apps and Desktops environment again.
- Open a browser, and navigate to the domain FQDN managed by the Citrix Gateway. We use
https://gateway.workspaces.wwco.net - After your browser is redirected to a login screen. First enter a user name. We use
wsuser@workspaces.wwco.net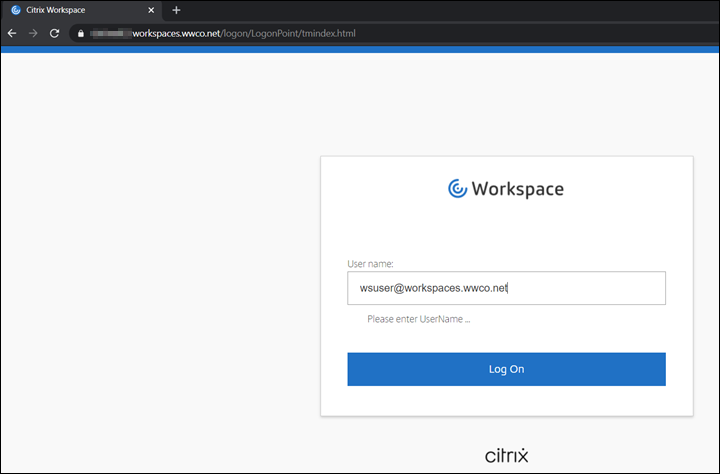
- nFactor determines that the user is not local, nor a member of the VIP group, you are be prompted to submit the user password.

- The nFactor then presents a form requesting the OTP passcode. We copy and paste the passcode from the
wsuseremail account.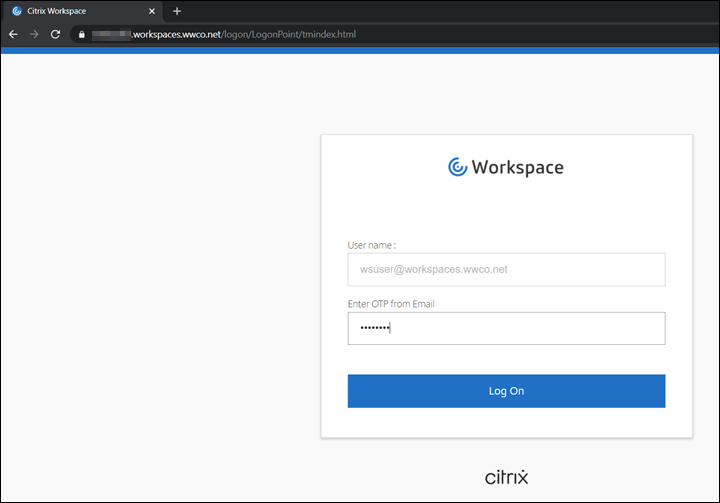
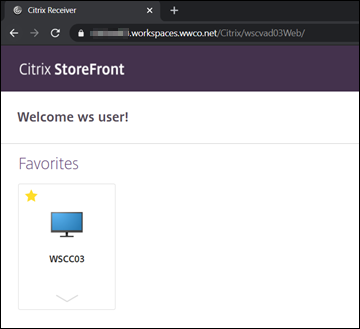
- Now the user is logged into their Workspace page.
- Select a virtual desktop and verify launch.


Summary
With Citrix Workspace and Citrix Gateway Enterprises can improve their security posture by implementing multifactor authentication without making the user experience complex. Group Extraction allows Enterprises to customize the depth of their multifactor use, along with contextual authentication, according to user group persona requirements.
References
For more information refer to:
Citrix ADC Commands to Find the PolicyHitsfor Citrix Gateway Session Policies- learn more about CLI commands likensconmsg -d current -g _hitsto track policyhitsto help troubleshoot.
nFactor for Citrix Gateway Authentication with Email OTP- learn how to implement an extensible and flexible approach to configuring multifactor authentication with nFactor for Citrix Gateway authentication with email one-time password.